

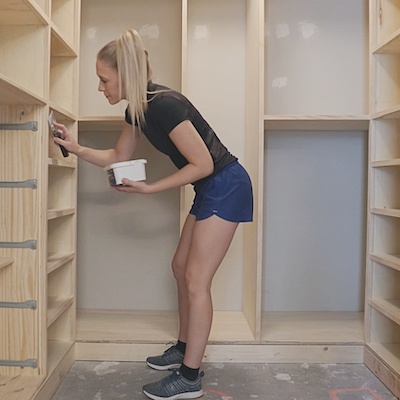
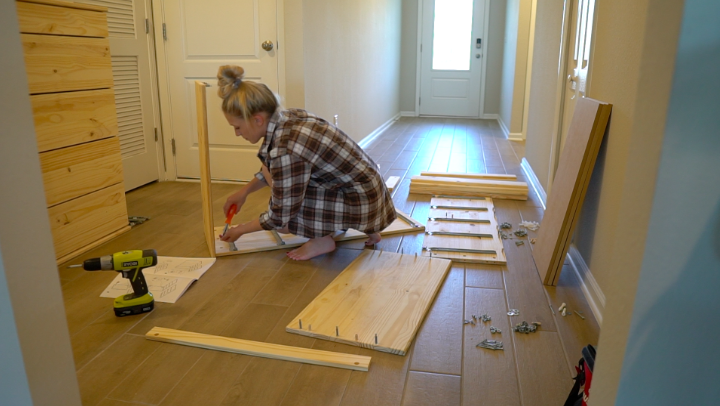
The day has finally come to start taking control of the fiasco in our master closet. I have researched so many different closet organization systems and they are all SO expensive. How is it that a few shelves, drawers and closet rods magically cost over $2,000?! Well, I’m over those overpriced systems… I’m going to DIY my dream master closet on a budget (with the help of 1 Ikea hack)!!! I bought two Tarva (5 drawer) dressers from Ikea and basically designed my whole closet around these dressers. This closet makeover is quite the undertaking so I’m going to break this project down into 2 parts.. I hope you can stay with me.
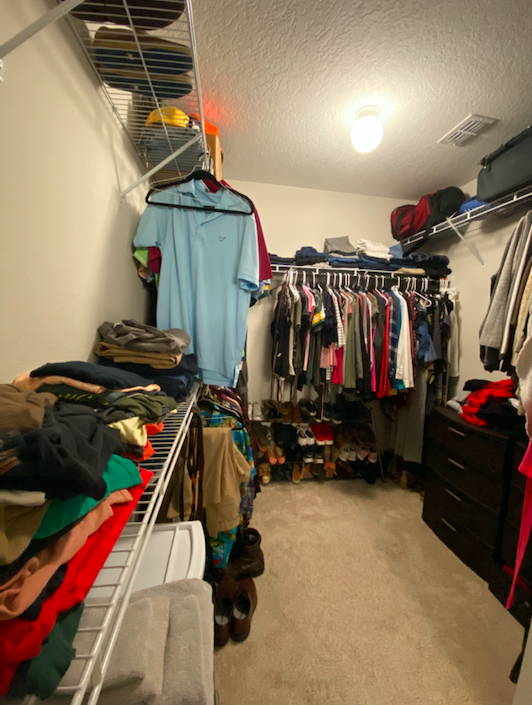
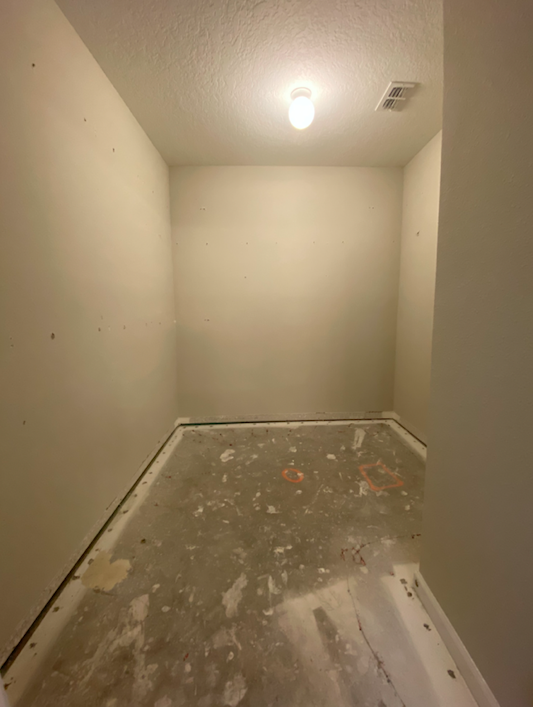
Here’s what we are currently working with.. We have a lot of space to work with but we just need to figure out a way to maximize the entire space and make it more efficient.
Download the printable PDF plans below!

To help visualize the new closet, I designed everything in Sketchup. I used the exact dimensions of our closet and started messing with different layouts that would fit our exact needs. I’m also pretty OCD so I wanted everything to be symmetrical. After adjusting the layout 10+ times, here’s what I came up with!

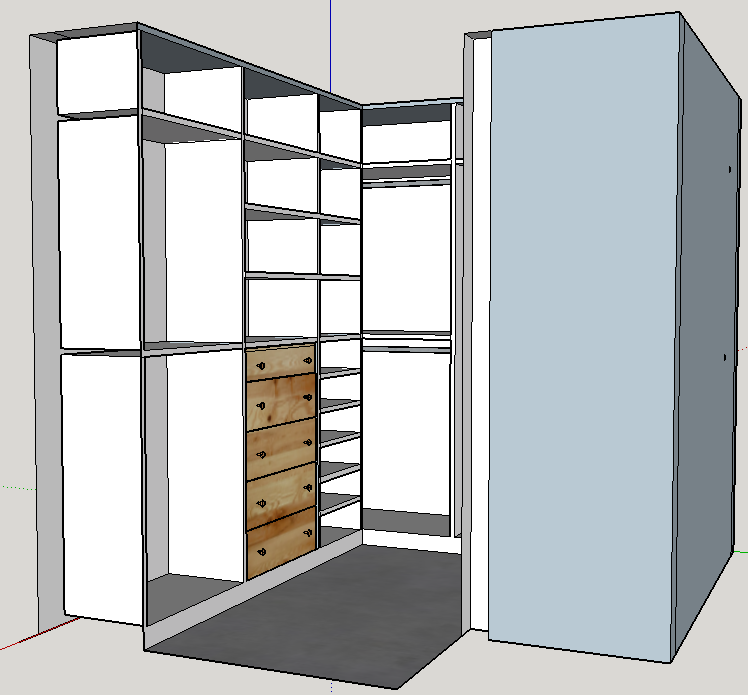
I will have the left side. The cubby to the left of the Tarva dresser will be for our clothes hamper, all of the upper shelves will be for folding jeans, shorts, sweaters/sweatshirts, etc. I will put all of my socks/undies/swim suites/athletic wear in the Tarva dresser. Then to the right of the dresser I will put my shoes.


The back wall is going to be all hanging space. I’ll hang my stuff on the left side, Devin will hang his on the right side and we’ll share the middle for hanging long stuff.


Devin gets the right side and it is laid out exactly like my side minus one section where I will have the clothes hamper. You think I can get somewhat close to the design??? Wish me luck!!

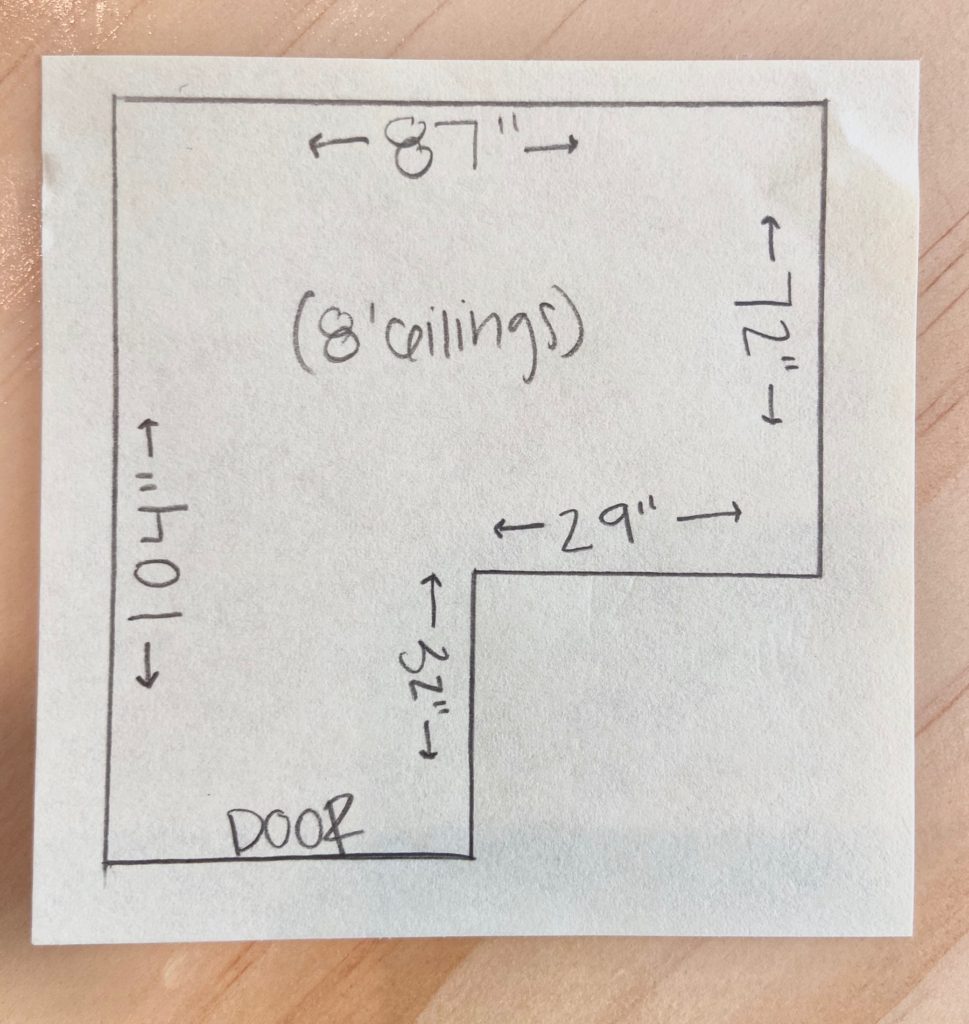
Closet dimensions ^^
Lumber
| 2 Tarva dressers |
| 3/4″ Sande plywood (for base & side supports) |
| 2″ x 4″s (for base) |
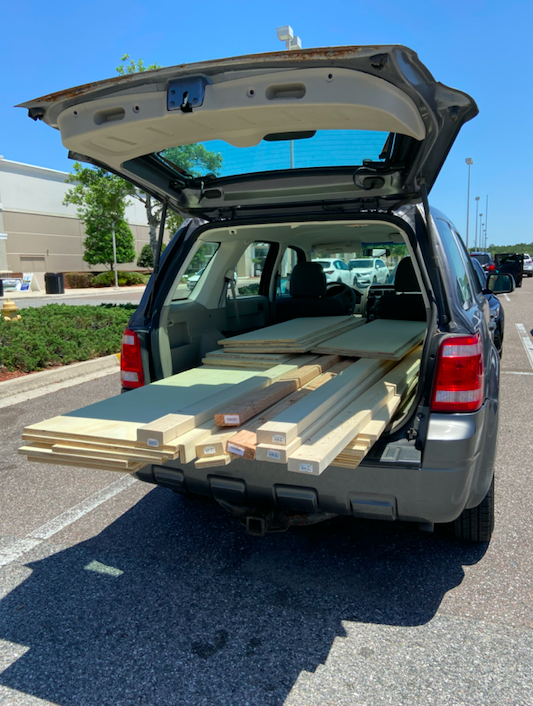
I got all of my lumber at Home Depot and I had them cut all of the long stuff for me so I could fit it into my SUV. Can you believe all of this lumber fit?! Good thing we only live a mile away from Home Depot… Now I know your closet won’t be the same dimensions as mine so I won’t go into detail on my lumber dimensions. But you can customize this project to fit any space!


TOOLS / SUPPLIES
| Miter saw / circle saw |
| Brad nailer W/ brad nails |
| Cordless Drill |
| Hammer |
| Speed square |
| Level |
| Kreg Jig |
| Tape measure |
| Liquid nails |
| Pocket-hole screws |
| Wood screws |
| Stud finder |
| Utility knife |
This post contains affiliate links. If you decide to purchase from one of the links, I will receive a small commission at no additional cost to you. Thank you for your support!
![DIY Dream Closet Makeover on a Budget!!! [Part 1] | Home With Stefani](https://i.ytimg.com/vi/--L2xAIV0Kg/hqdefault.jpg)
STEP 1: What’s Your Vision??
If you’re going to do a custom closet like this it’s so important to have a design in mind. I was so excited to get started on this project but I spent ample time beforehand making sure that we had the design exactly how we wanted it. Consider using a program like Sketchup if you know how to use it, otherwise a pencil and paper work just fine!
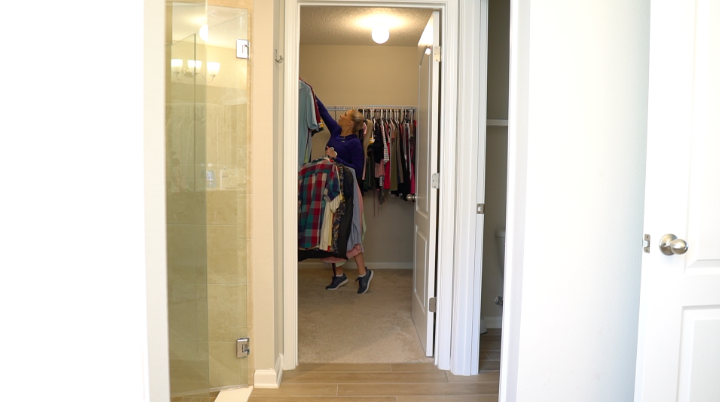
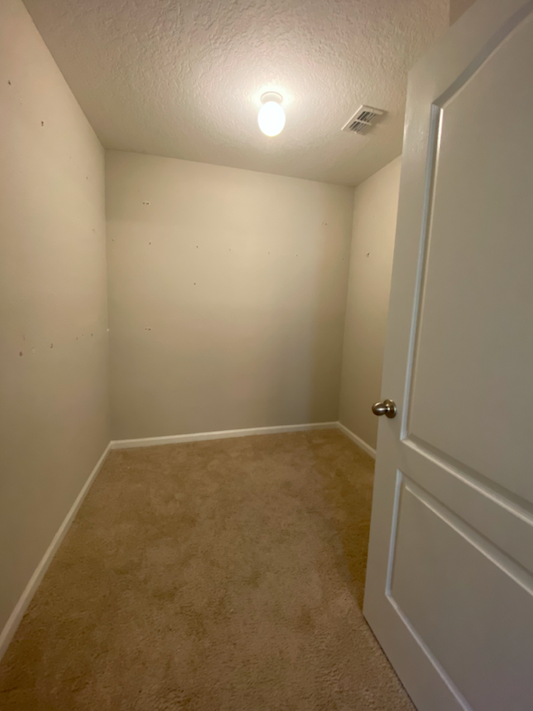
STEP 2: Take everything out
Take everything out of the closet and move your clothes, shoes, etc to a new temporary home. I didn’t do a very great job right off the bat and threw everything on the floor of my master bedroom. But it’s only temporary right?!

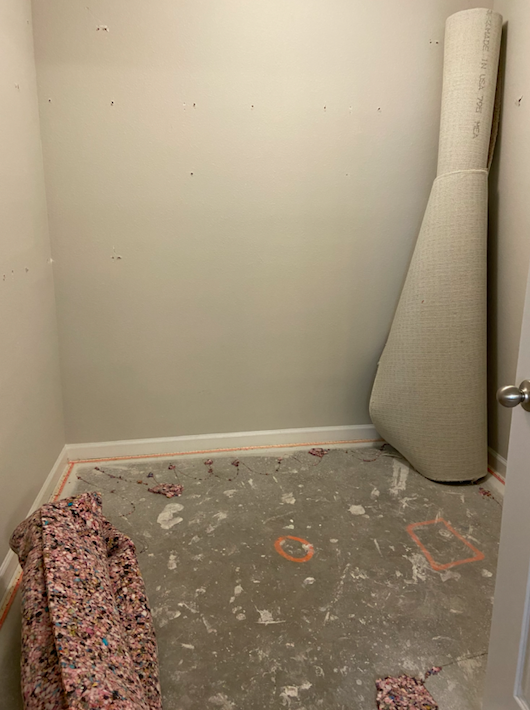
STEP 3: Remove existing closet racks
These white wire closet racks were installed when we moved in and I was so excited to get these things out of here! I had to use a hammer and drill because there were nails and screws holding these racks up. They left some pretty big holes in the drywall but I am going to fill in these holes in a later step.

STEP 4: Take up all carpeting, padding and tack strips
I didn’t want to install my closet system on our ugly carpeting. We are going to replace the carpeting throughout our house eventually with a nice wood floor… but for now, I am going to take up the carpeting and paint the concrete floors. This is a great alternative if you’re looking to save some $$ and still want a nice clean look! Check out my tutorial on How to Paint Concrete Floors. I go into more depth on that tutorial on how to take up the carpeting and how to get rid of the annoying tack strips, check it out!


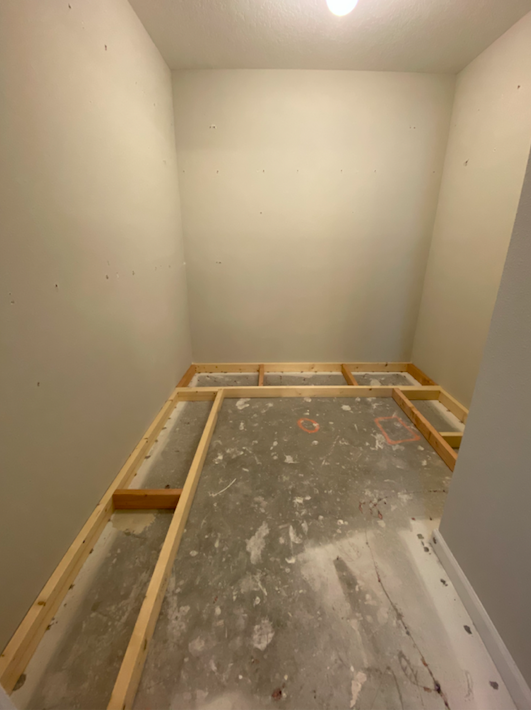
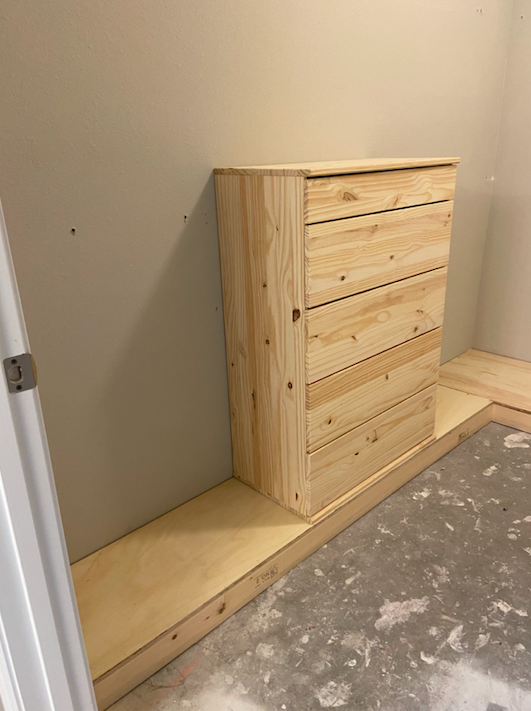
STEP 5: Build base out of 2 x 4’s
I wanted my closet system to sit up on a platform. I think this gives it a nicer, high end look and this way I’m not bending to put things all the way to the floor.
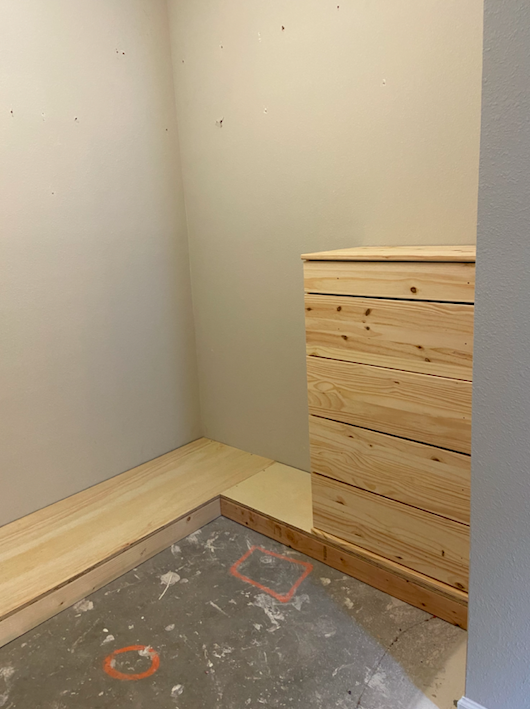
Like I mentioned earlier, I designed my entire closet around the Tarva dressers. The dressers were 15 3/4″ deep so I made the platform on the left and right side 15 3/4″ deep. Then on the back wall I made the platform 22″ deep. It’s important to note that we chose to only do our hanging space on the 22″ deep wall so that our clothes had enough depth to hang and they weren’t sticking out past the plywood support walls. If we were to hang stuff on the 15 3/4″ deep walls, our hangers would stick out passed the supports. Not the end of the world, but it’s the little things that you need to plan ahead for!
I nailed some scrap 2×4’s together and then screwed the bases into the studs in the wall so that they are secure.
Make sure that your base is level. Shim it up in areas if necessary to make it level. This will save you time and energy later on when installing the plywood supports!

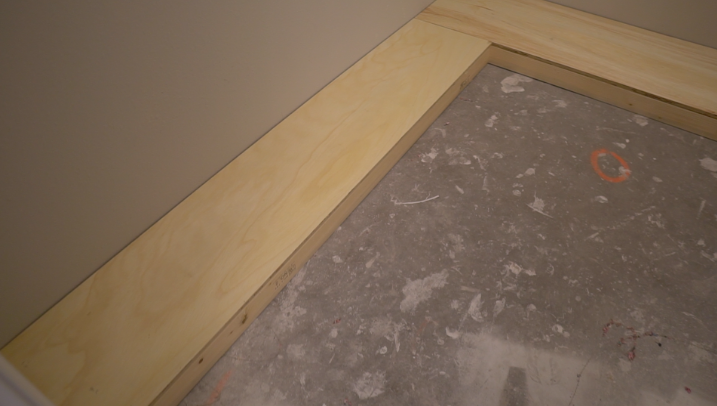
STEP 6: Add 3/4″ plywood to base
After the 2×4’s were installed, I cut 3/4″ plywood to match the dimension of the base. I used 1 1/4″ screws to screw the plywood to the base.


STEP 7: Install Ikea Dressers
My Tarva dressers are directly across from each other (told you I’m OCD). The dressers came with some wall anchors, so I screwed the anchors into the dresser and into the drywall. I also took all of the drawers out and screwed the dresser down into the base as well. My dressers sit flush with my 15 3/4″ base.
The Tarva dresser came with a legs and a base frame but I didn’t use any of that!


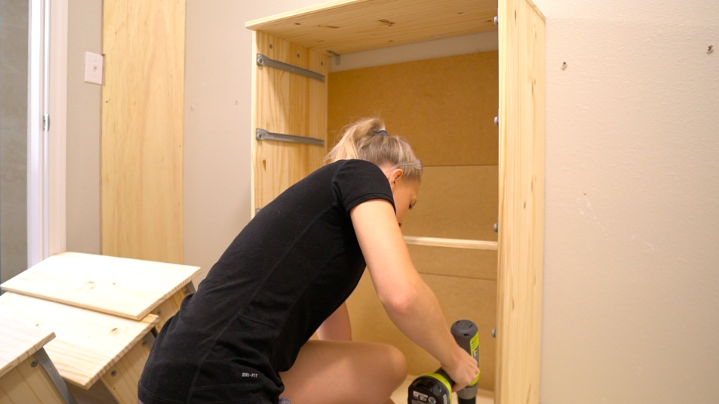
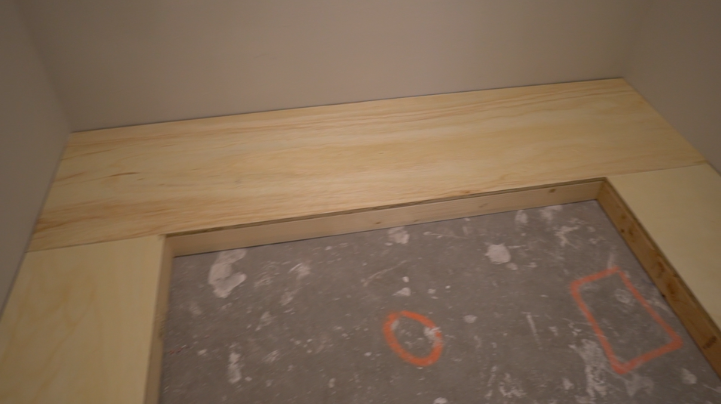
STEP 8: Install all vertical supports
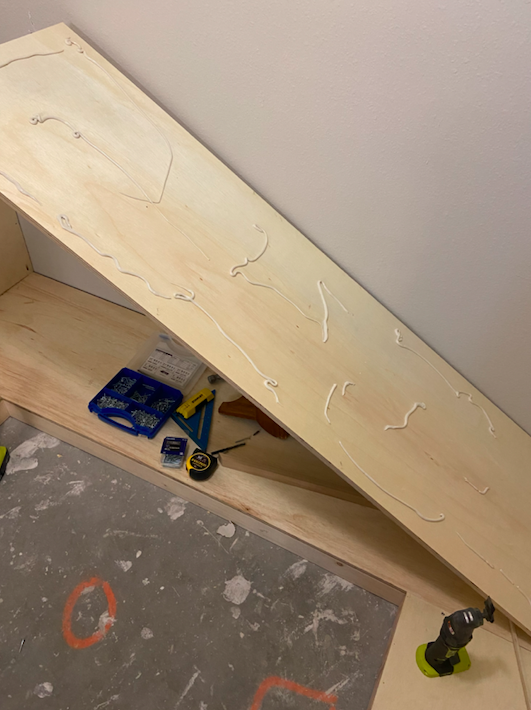
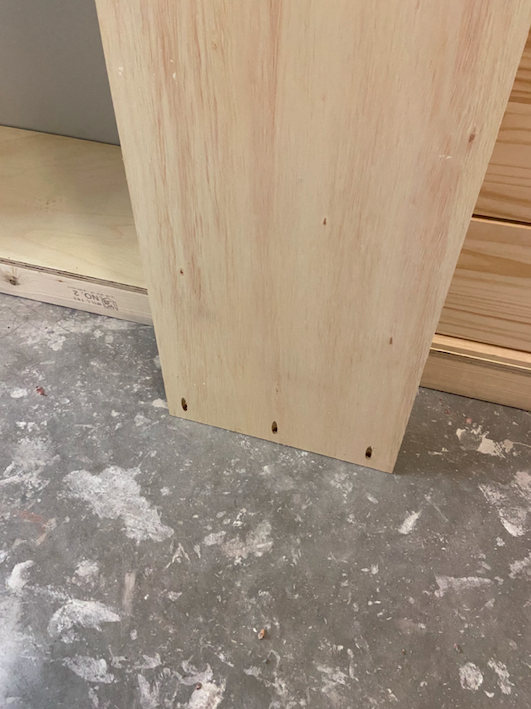
To make this project a bit more manageable I started with all of the vertical plywood supports. For the supports that go against the wall, I used liquid nails on the back of the plywood. I screwed the plywood into studs in the wall. I also drilled pocket holes in the bottom and the top of the support so that I could screw the support down into the base and up into the top shelf.
For the vertical supports that were against the Tarva dresser I (again) used liquid nails for the part that would be against the dresser and then I screwed the plywood down into the base with the pocket holes and I screwed the plywood directly into my Tarva dresser. If we get strong hurricane winds and my house blows over, I think my closet will still be standing..
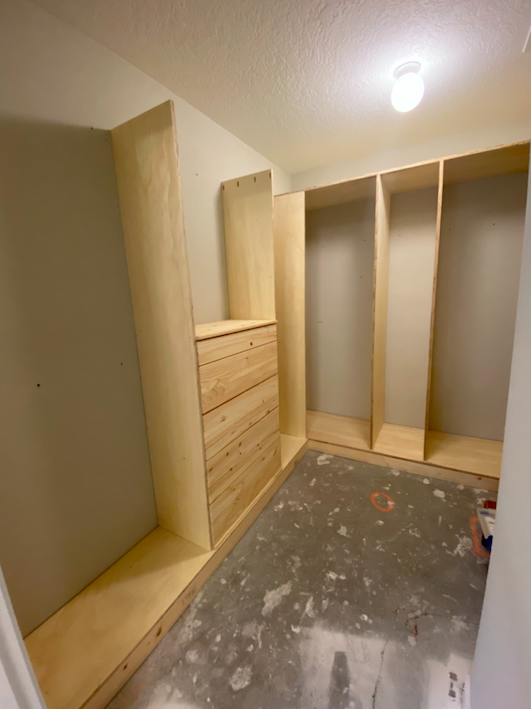

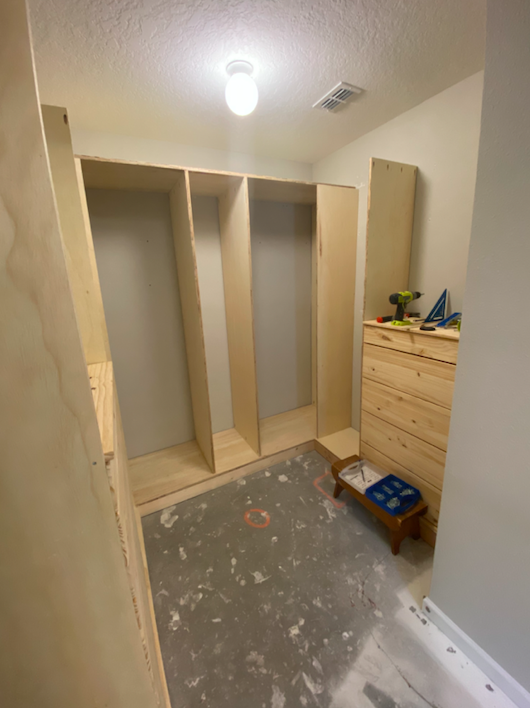
The closet is starting to take shape!! If you have any questions about building your own dream closet please reach out or comment on this post!