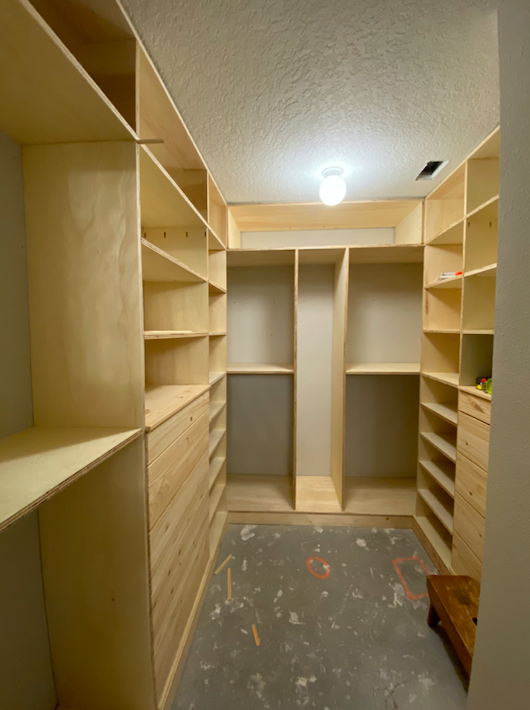
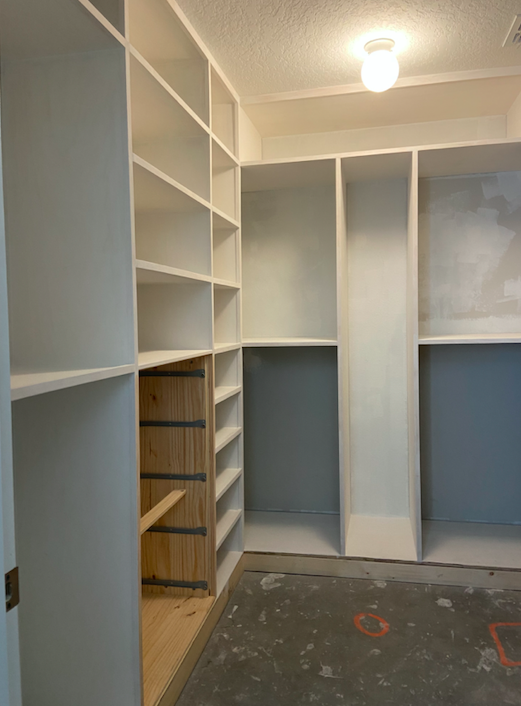
I’m so glad you made it back for part two of my dream closet makeover!! I’ve been working on this project on and off for about three weeks and it’s finally finished!! (Except for a few final details). In part two I finished installing all of the plywood supports, I made some cubbies to go around the entire top of the closet, I added some nice trim to the face of all the plywood and then I painted all of the built ins PLUS I even painted my concrete floors. If you missed part 1, check that out HERE!


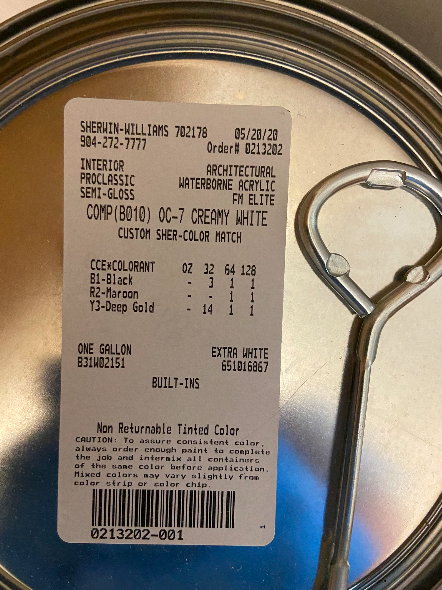
I had a tough time trying to decide what paint color to go with in this space. I thought about doing all white, but then I thought that might just be too much white and I really wanted the closet to look custom. I came across this picture from Studio McGee’s kitchen (I’m obsessed with their style). They went with this putty white color (Creamy White by Benjamin Moore) on their kitchen cabinets with gold knobs and I used that as inspiration for this space. I was able to go to Sherwin Williams and color match the exact color that they used in their kitchen and I’m so happy with how it turned out!!


Like I mentioned earlier, I’m not 100% finished with the space, I have to add the closet rods, the gold drawer knobs plus a few other final touches. So in my next post I will reveal the closet with all of the final touches!! I’m also going to go over a breakdown of the cost and compare it to what it would have cost to do this closet in the Ikea pax system. I already picked out a cute mirror, rug, some different organizers so the final reveal will be coming soon. Keep scrolling for a YouTube video of Part 2 and to see everything that I did to get the closet to this point!


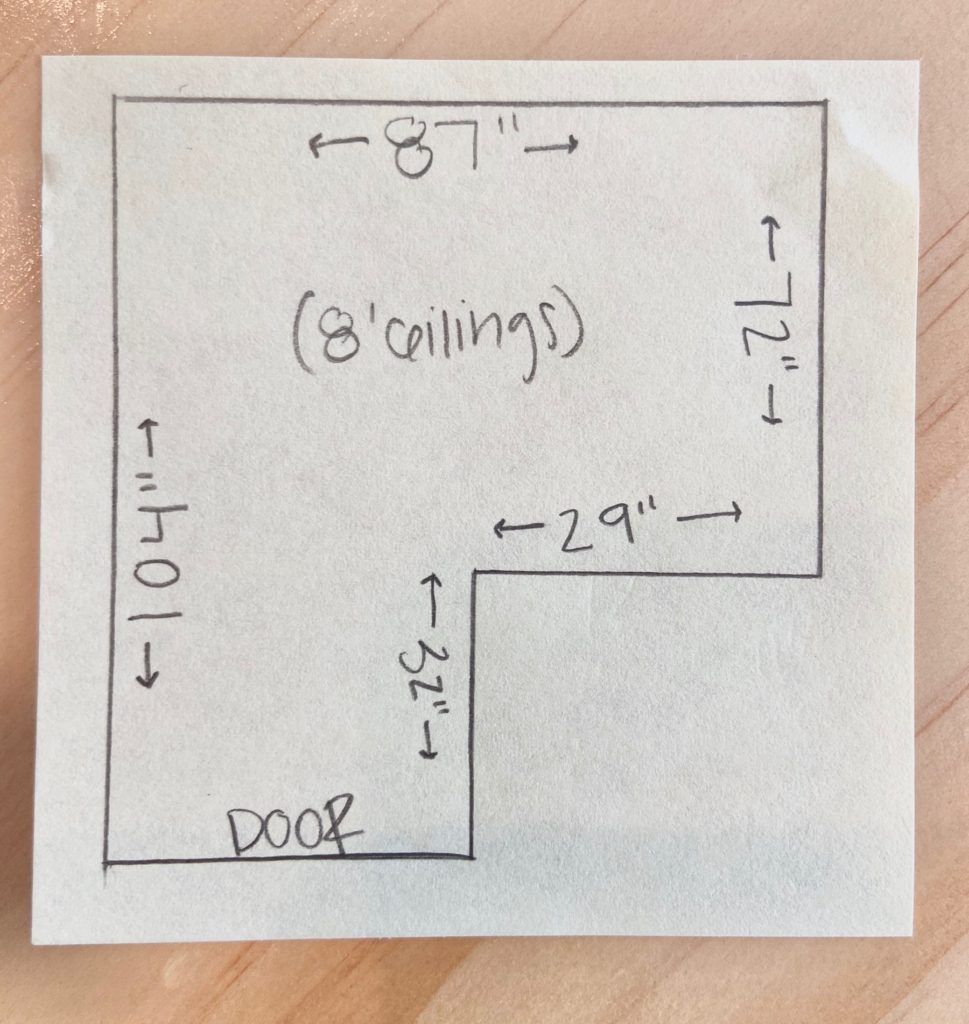
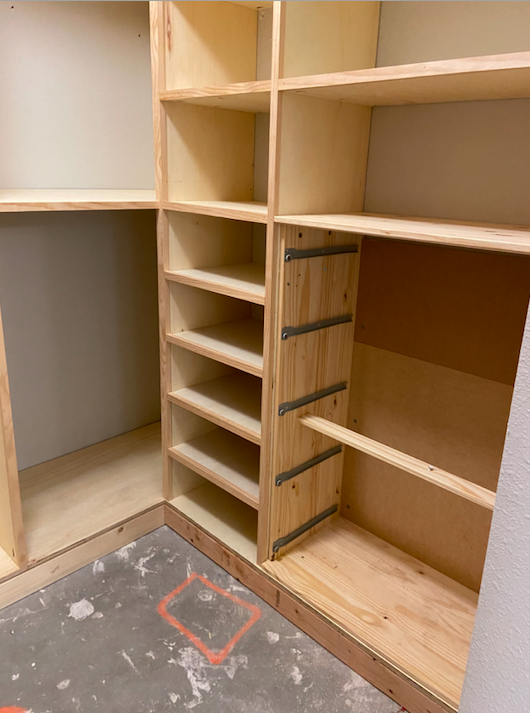
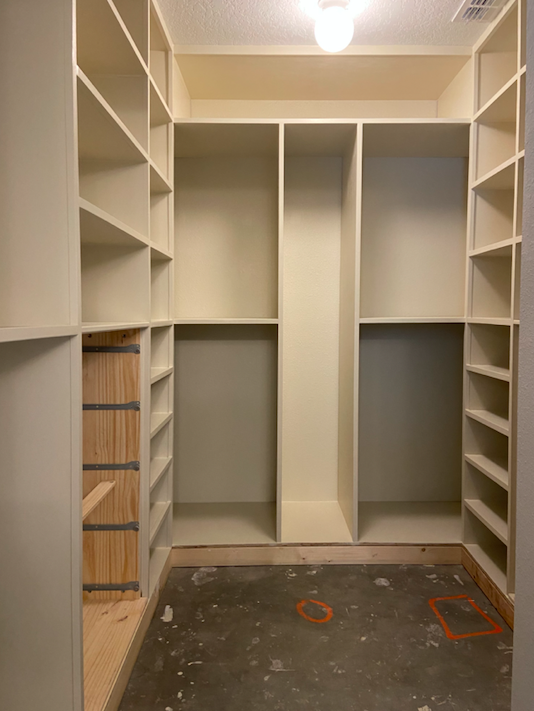
Closet dimensions ^^
LUMBER
| 3/4″ Sande plywood (for shelving) |
| 1″ x 6″ Boards (cut down to 3/4″ x 1″ for trim) |
| 4 1/4″ Baseboard trim |
TOOLS / SUPPLIES
| Miter saw / circle saw |
| Brad nailer / nails |
| Cordless drill |
| Kreg Jig |
| Pocket screws |
| Measuring tape |
| Level |
| Framing square |
| Hand Sander |
| Sanding Paper (rough & fine grit) |
| Respirator Mask |
| Safety Glasses |
| Putty Knife |
| Wood filler |
| Concrete & Mortar Repair |
| Behr Concrete & Masonry Bonding Primer (Clear) |
| Behr Porch & Patio Floor Paint (Park Avenue) |
| Painters Tape |
| Scraper (to get glue/ debris off concrete) |
| Paint Roller / Extension pole |
| Paint trays |
| Paint brush |
| Microfiber Roller Cover 5/16” Nap |
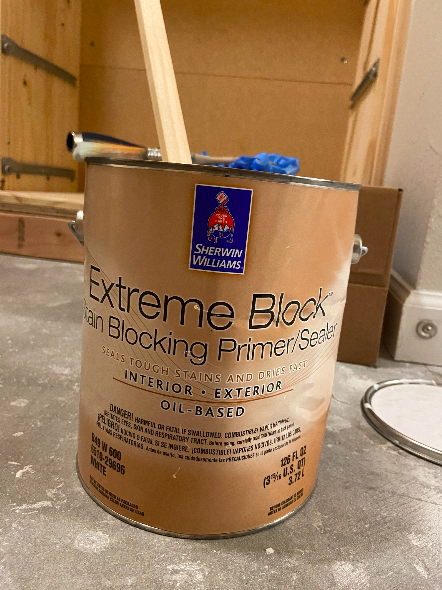
| Primer (Sherwin Williams extreme block stain blocking primer) |
| Paint (Sherwin Williams pro classic interior acrylic latex) |
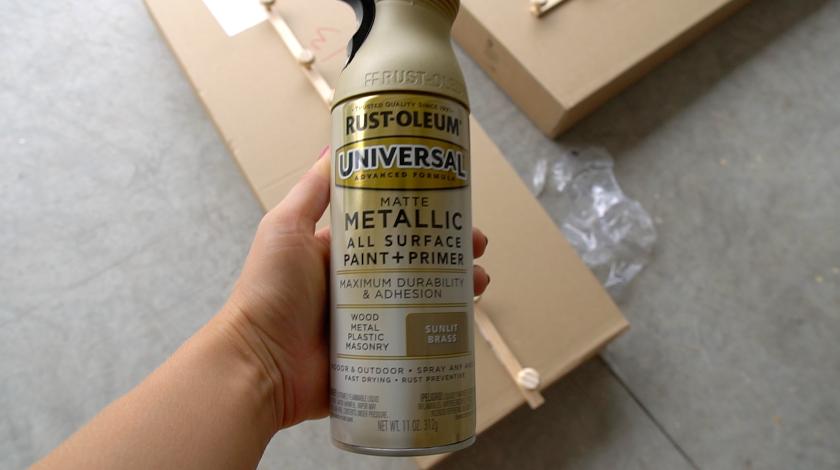
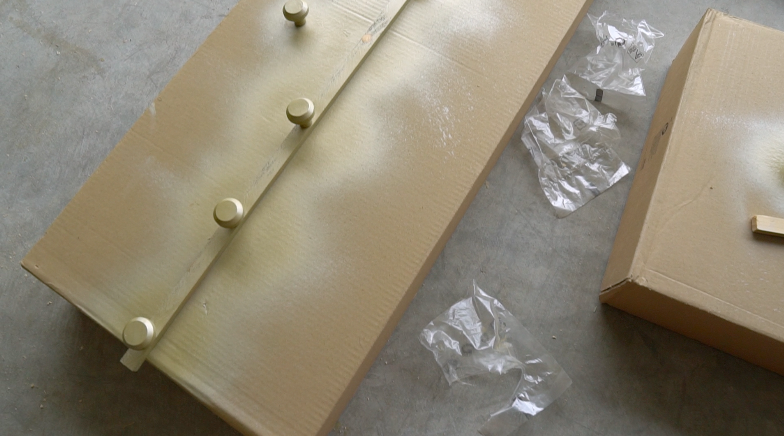
| Spray paint (for knobs | Sunlit brass) |
| Drywall mesh patch |
| Drywall spakcling |
| Caulk / Caulk gun |
This post contains affiliate links. If you decide to purchase from one of the links, I will receive a small commission at no additional cost to you. Thank you for your support!
![DIY Dream Closet Makeover on a Budget!!! [Part 2] | HomeWithStefani](https://i.ytimg.com/vi/ZHoNQ94vLGU/hqdefault.jpg)
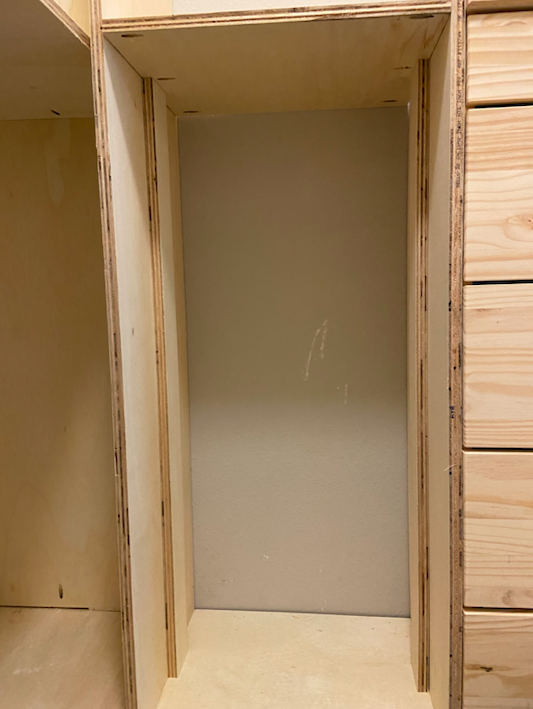
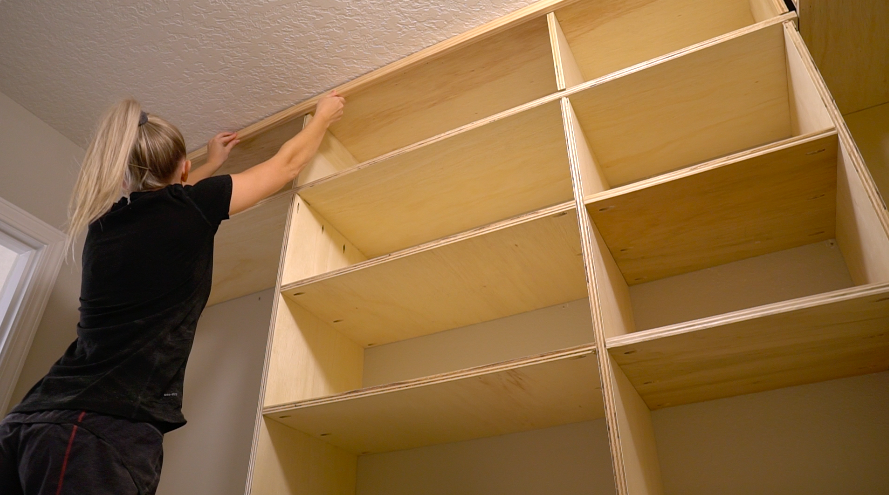
STEP 1: Install all horizontal supports
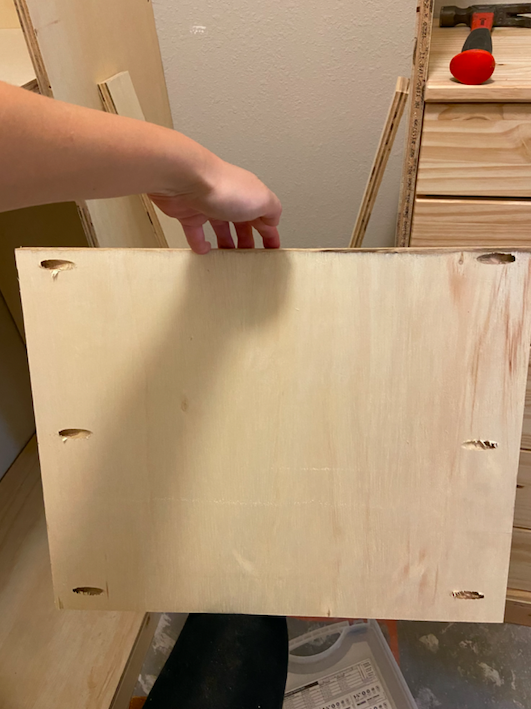
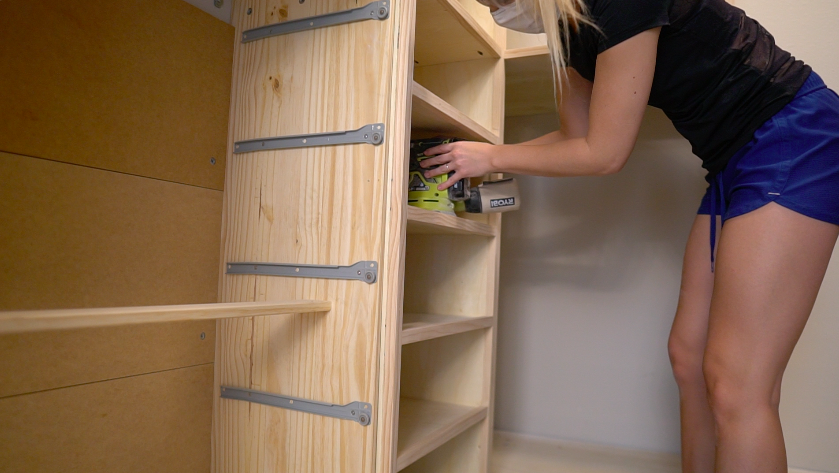
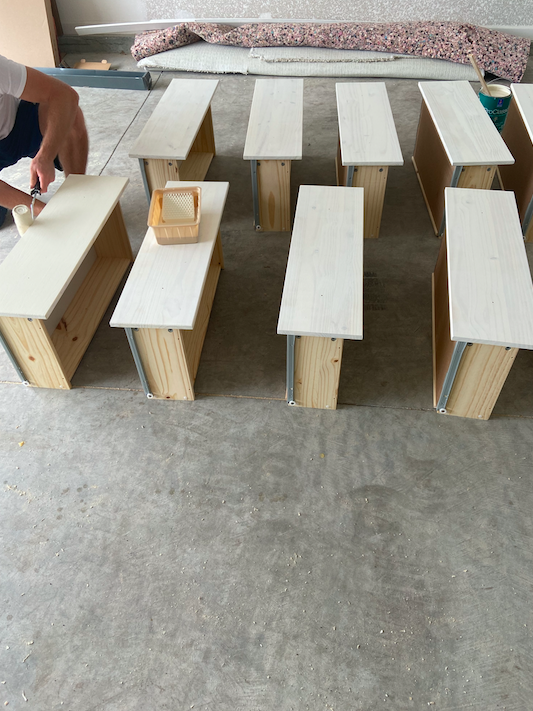
I started by cutting and installing all of the top horizontal shelf pieces. Then I went and installed all the smaller horizontal shelves. I drilled pocket holes in each of the shelves and secured it to the plywood frame with pocket screws.
It was tough to hold the shelves up and screw them in by myself so I cut some supports out of scrap wood so that they could hold up my shelves exactly where I needed them, while I screwed them in.
Make sure that your shelves are level and evenly spaced. For the very top shelves I had to add a few shims to get everything level and straight.


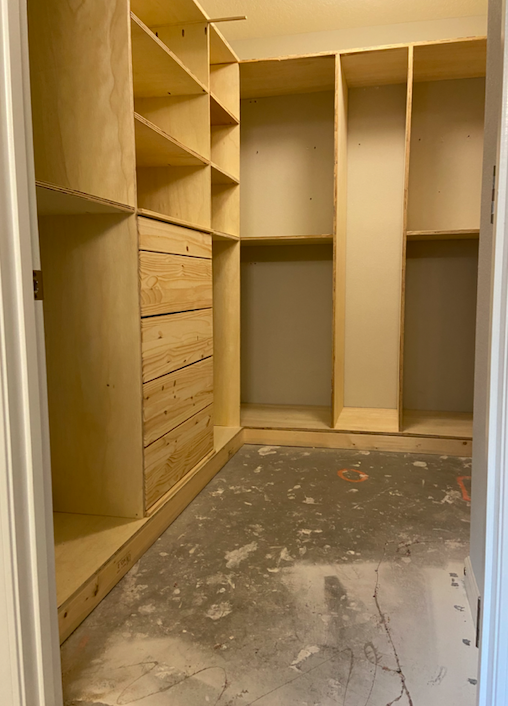


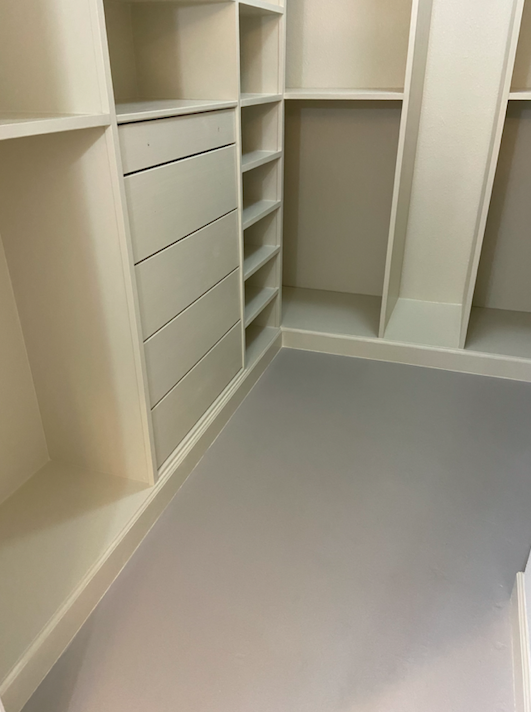
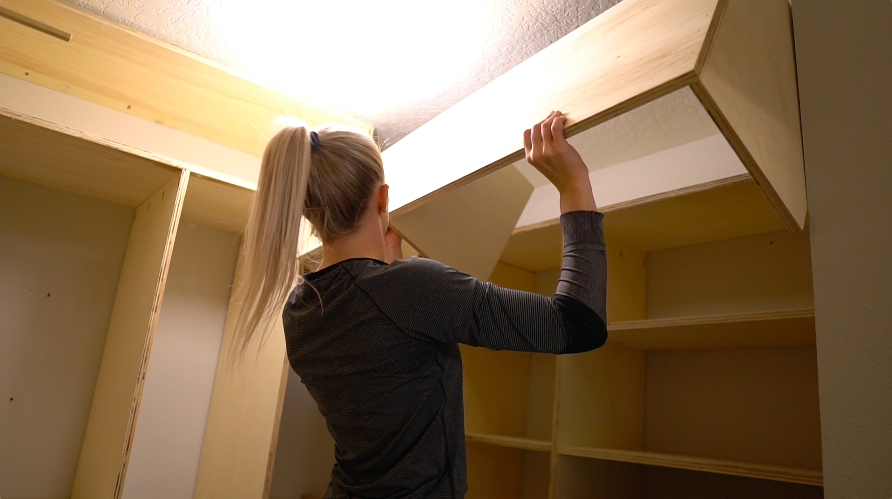
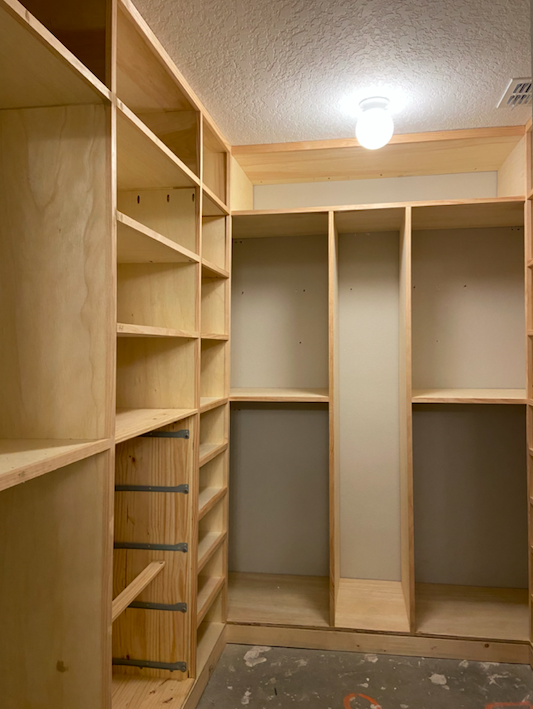
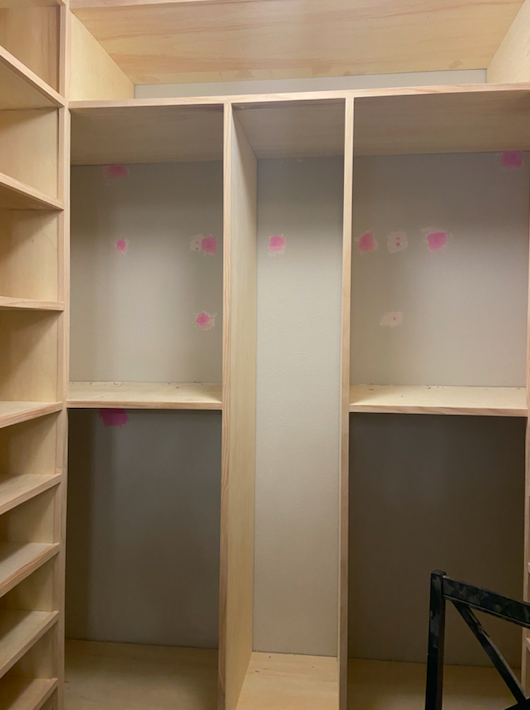
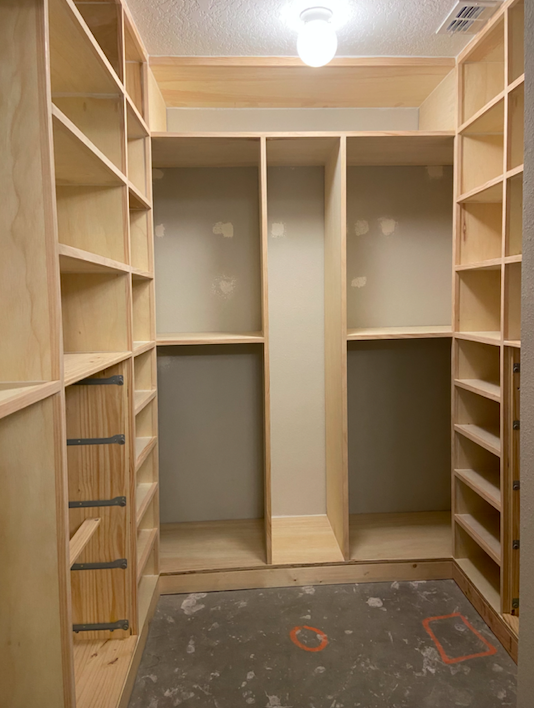
STEP 2: Install cubbies
After all of the plywood supports were installed, I built these cubbies to go along the top of the whole closet. I started with the back wall, then built the left and right cubbies. I secured the cubbies to my top plywood shelf using the brad nailer. After the cubbies were installed I cut off the wood shims that were sticking out.


STEP 3: Install face trim
I installed the 3/4″ x 1″ trim to every plywood face. I started with the horizontal pieces on top, then did the long vertical pieces and finished with the small horizontal shelving trim pieces.
For the trim, I bought 1″ x 6″ boards and ripped them down to 3/4″ x 1″ (actual).


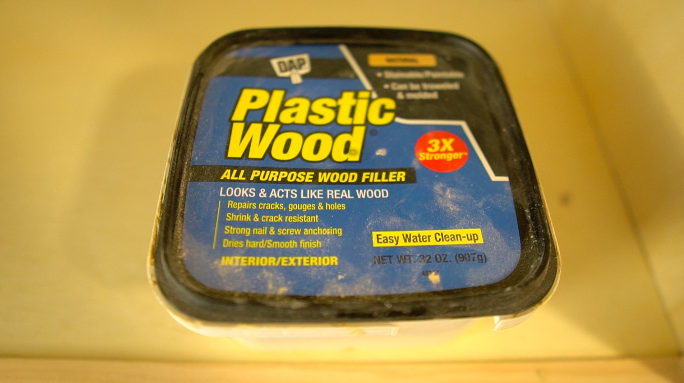
STEP 4: Fill nail holes & cracks
After all of the trim was on I filled all of the nail holes and cracks with this wood filler. I usually use my finger for the small nail holes and a putty knife for the larger cracks.

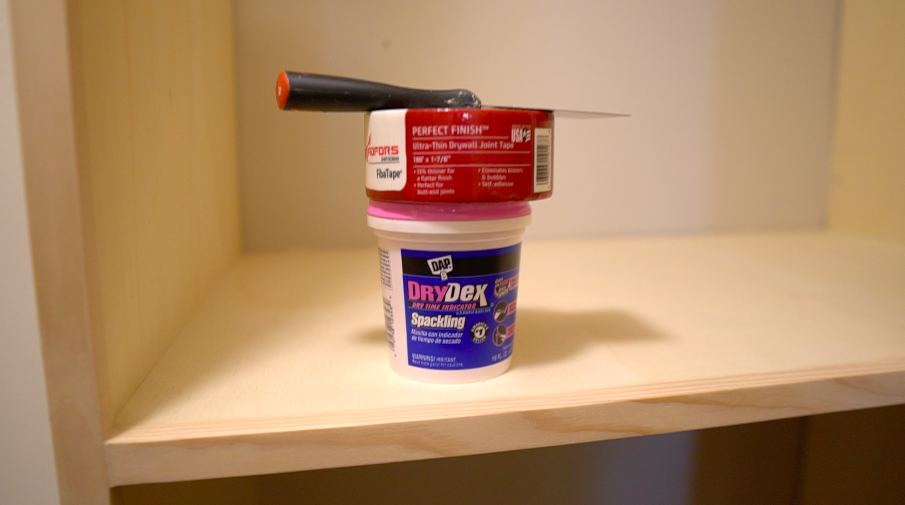
STEP 5: Patch drywall holes
We had wire racks in our closet previously and they left some holes in the drywall so I used this drywall mesh tape and spackling to fill the holes. The spackle goes on pink then dries white. After the spackle is dry, sand it down as much as you can without sanding the mesh tape. If you have textured walls you can spray some texture over the drywall patches.


STEP 6: Sand
This step is extremely tedious, annoying, messy, etc. but it’s so important! It took me a few days to get everything sanded down, but if you sand well your paint will go on so much nicer and you will have very smooth surfaces. I started with 120 then 180 and finished with 220 grit.

STEP 7: Caulk
Before caulking, I vacuumed the entire closet and wiped it down with a damp rag and some water. I find it best to put a thin bead of caulk in each of the seams and then to run my wet finger along the seam. Always have a wet rag or paper towels to clean up any extra caulk. I caulked every seam of the closet except for the ones that you will never see.


STEP 8: Paint
It took a full gallon of primer and paint for this entire closet. I actually bought 1 more gallon of the Creamy White paint so that I could do a second coat on some places that needed it (I also plan to use this color for other projects so I just bought another full gallon!).
The Ikea dresser came with wooden knobs and I spray painted them this bronze/gold color!


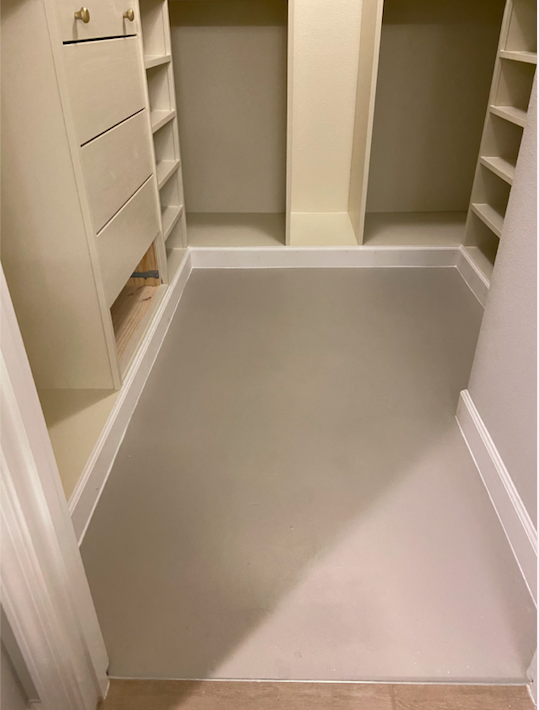
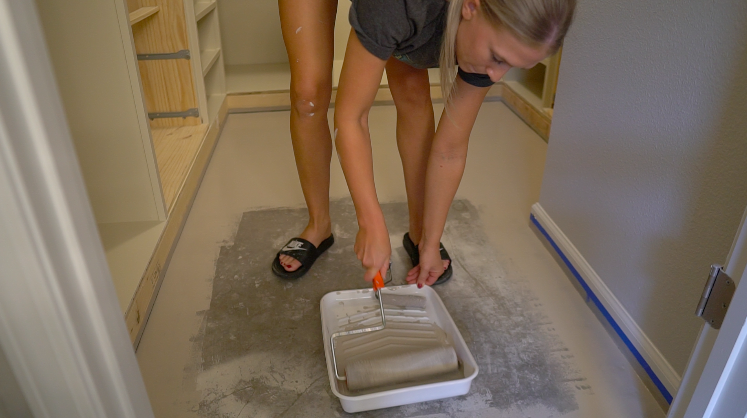
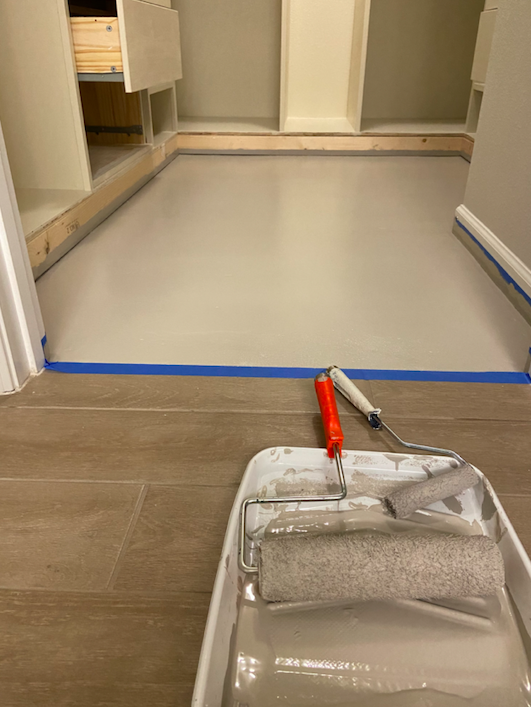
STEP 9: Paint concrete floors
We plan to eventually do a nice plank flooring in the closet, but for now I decided to paint the concrete floors! I did the same thing in our home office and I love how it turned out. Check out the tutorial HERE on how to paint your concrete floors!!
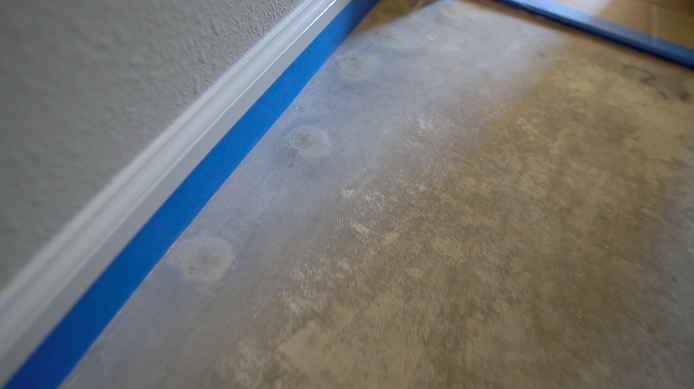
I started by removing any carpet glue and high paint spots with a scraper. Then I filled in the holes from the tack strips with concrete filler and a putty knife.
Next, I used concrete and masonry bonding primer, then finished with two coats of porch and patio floor paint from Behr! (see the tutorial for more details).


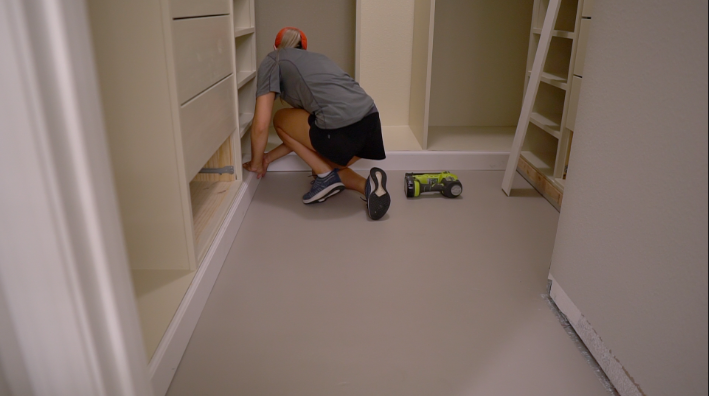
STEP 10: Install base trim
I used 4 1/4″ base trim and it fit my platform perfectly! I cut the corners at 45 degrees and nailed the baseboard to my 2×4 platform with a brad nailer. After my base trim was installed, I filled the nail holes with wood filler, caulked the top and bottom seams and then painted the base trim the same color as my built-ins.
Last, I let the paint to dry for 4-5 days before we put anything back in our closet.