Earlier this year I gave our walk in closet a huge makeover and so many of you loved the series!! In fact, over 2 million of you have watched the three part video makeover… like, what!?! I was overwhelmed with different questions about this makeover so I thought I would make another video/blog post answering the most asked questions and to also give you an update on how we like the closet after a few months using it.


HOW LONG DID THE PROJECT TAKE?
This project took me about 8 days to complete (10 hour days). Two of those days were spent designing the closet, coming up with list of tools and materials needed for the project and then going to actually get the materials. The other 6 days were spent executing the project! My husband was recovering from a broken arm at the time and couldn’t help with much so I did 90% of the project myself in 6 days. With some help you could get this project done much quicker!
COST
| Ikea Tarva dressers (2) | $300 |
| Lumber | $512 |
| Caulk & drywall patch | $13 |
| Wooden closet rods | $58 |
| Paint, primer, spray paint (knobs) | $87 |
| TOTAL | $970 |
I also tried to replicate the closet design with Ikea’s PAX Planner Tool. I was able to get the closet close, but I wasn’t able to get the PAX frames to fit tight in my closet. There would be a lot of large gaps in between each of the PAX frames and our walls/ceiling and that’s not the look I was going for. I was a bit surprised with how affordable their PAX products were though. It would have cost $1,410 if we were to do something close to our design with Ikea PAX.
If we were to go with a custom closet company like California Closets the cost of our closet would be $2,000+.
There are pros and cons to each of these options. Doing the closet myself was the most cost effective and we were able to make the closet EXACTLY how we wanted to but it was a lot of work and time.
The IKEA PAX system is another cost effective option and it doesn’t take as much time to put together. On the other hand, you aren’t getting the most high quality product, you won’t be able to get an exact fit and will likely have wasted space.
Doing your closet with a custom closet company saves A LOT of time but you will be paying a lot more for their services. I hope this helps you to determine how you want to tackle your own closet makeover!
HOW HAS THE CLOSET HELD UP?
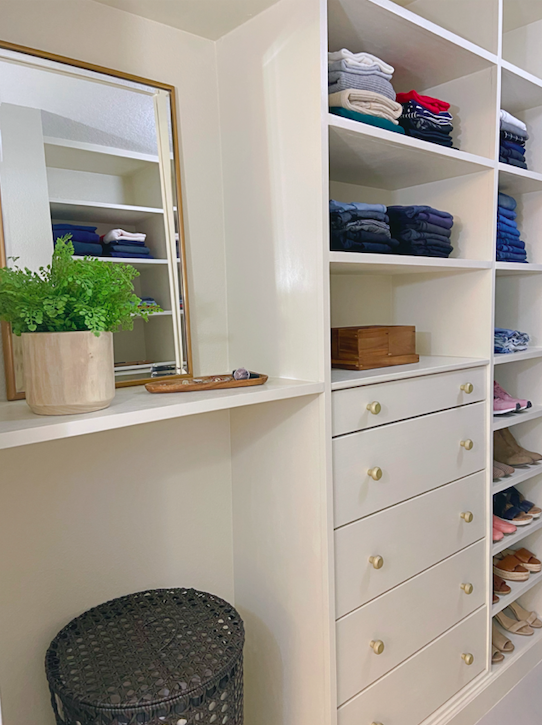
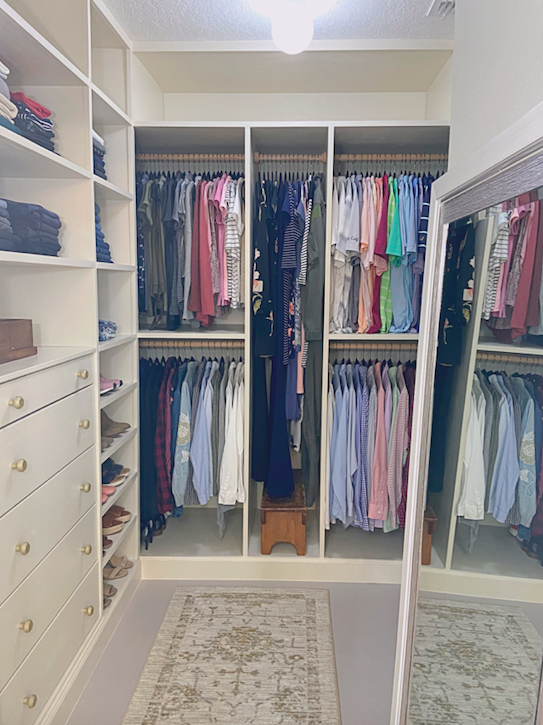
We are so happy with the closet design!! I designed it specifically for us and for the type/amount of clothes shoes, etc. that we have. Everything has a place and it’s so much easier and more enjoyable to put laundry away. The Tarva dressers have held up great. A few of the dresser knobs that the dresser came with have cracked, so I will end up replacing them with some nicer knobs down the road. But other than that, the closet has held up great and we couldn’t be happier. Also, we haven’t even touched the upper cubbies yet so we have some room to grow into it when we accumulate more stuff.
WHAT WOULD YOU DO DIFFERENTLY?
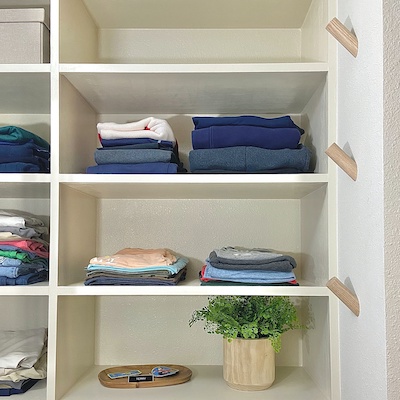
As far as the design of the closet, one thing I would’ve done differently is make the shirt space longer to fit his shirts. As you can see in the picture below his shirts on the top right side are a little long for the space. I wanted to keep the shelf height the same all the way around so aesthetically is looked even. But I could have easily brought this down a little bit to make the shirt spaces even.
Sand before installing: I got a little too excited and carried away with the project, I just wanted to get everything installed and worry about sanding/painting later. I wish I would’ve sanded everything down in the garage before installing it. I made such mess in here while sanding and it was really tough to get in all of the corners so sanding before installing would’ve been easier.
I wish I would’ve invested in a paint sprayer to paint the closet. I hand painted everything and it was sooo time consuming.
DO YOU NEED A LOT OF EXPERIENCE FOR THIS PROJECT?
I’m going to be honest here because I don’t want to set you up for failure. I wouldn’t recommend doing this project if you are a beginner and have no experience with carpentry. There is a lot of planning, measuring, cutting and precision involved. BUT if you have the tools, some carpentry knowledge (or the help of someone with knowledge/experience) and you’re up for the challenge, then 100% GO FOR IT!
WHERE DID YOU GET YOUR CLOSET ITEMS?
Check out the image slider below for my closet items.

The Tarva dressers are from IKEA, I also bought some drawer dividers from IKEA that help to keep the drawers nice and organized
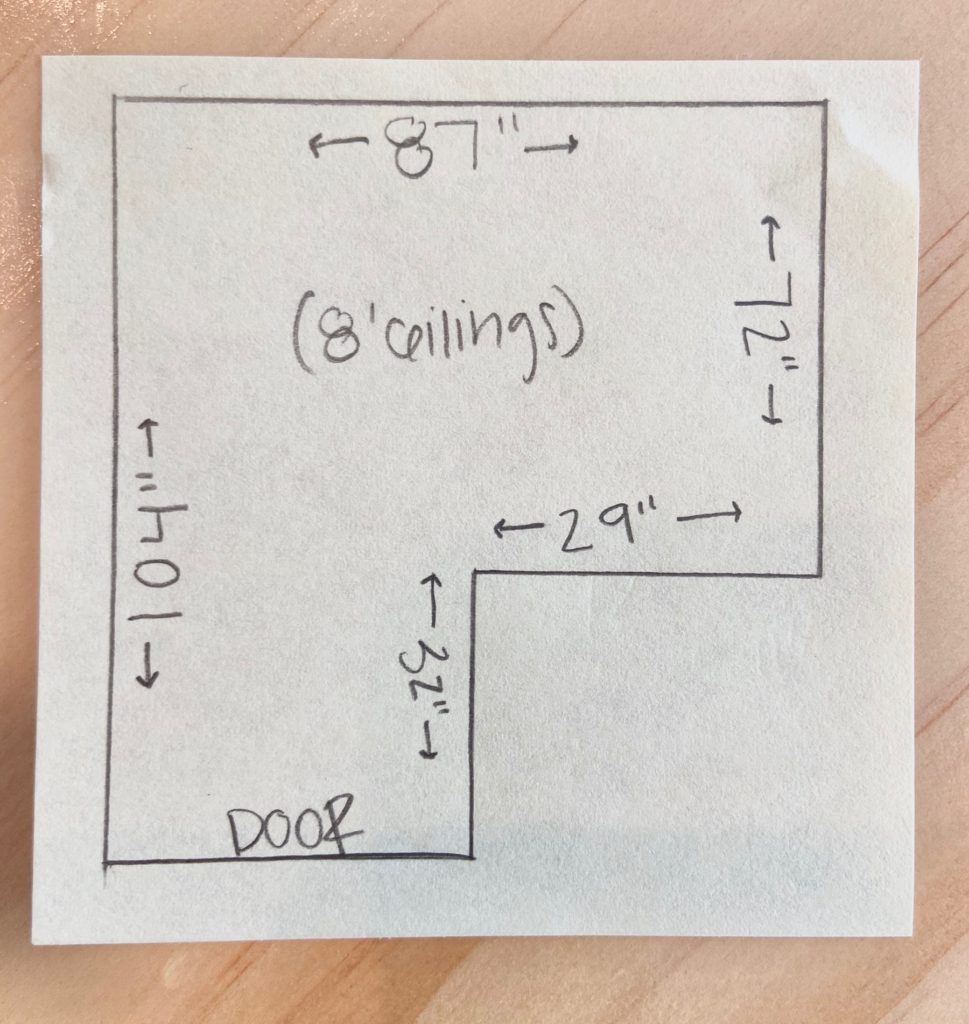
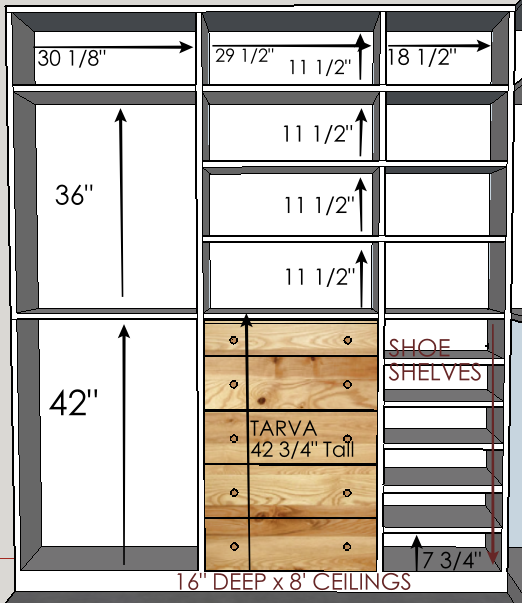
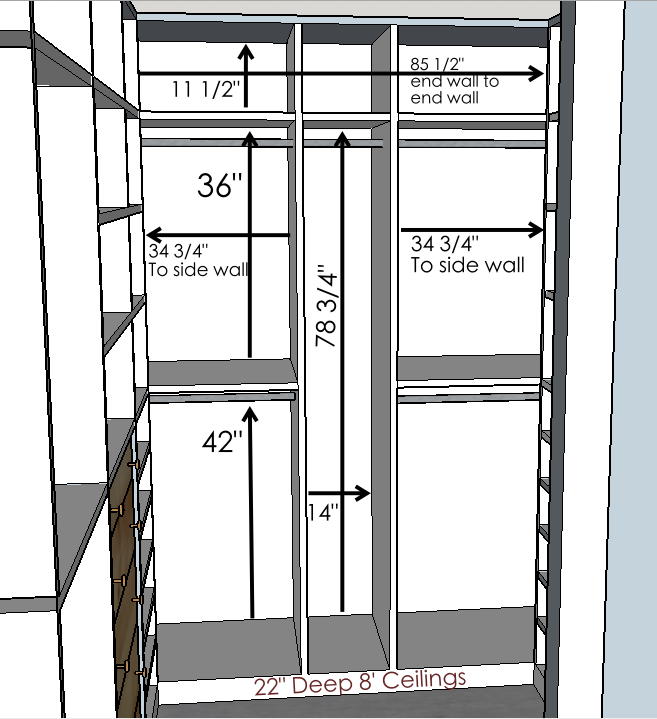
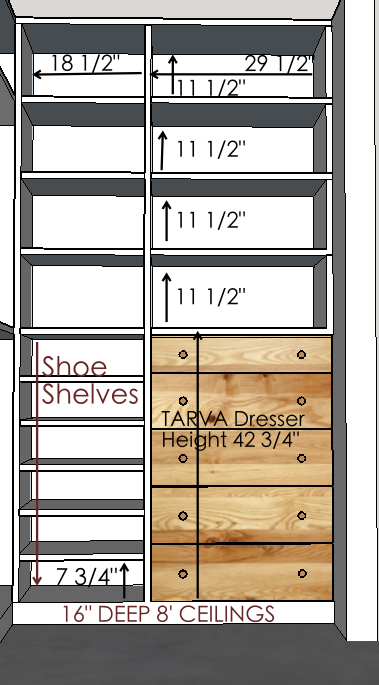
WHAT ARE THE CLOSET DIMENSIONS?
Check out the pictures below for my specific closet dimensions. I didn’t provide a cut list because everyone’s closet is going to be different. During the designing phase I used this website as a guide. They list standard dimensions for storage of different clothing/shoe items.
I recommend sketching out your closet on a piece of paper first to get a good idea of the layout you want. Then start to get dimensions and do the math for a material list. I also designed my pantry in the SketchUp program. I recently did a tutorial on how to design a pantry, but you can use the same principles from that tutorial to make your closet in SketchUp.


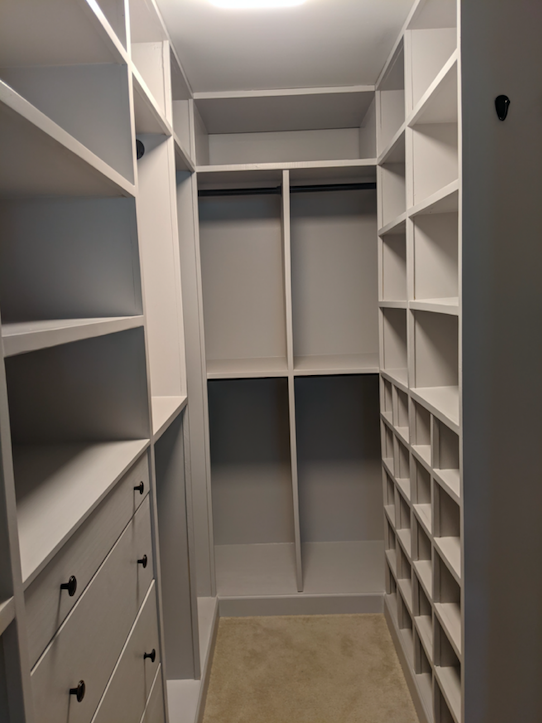
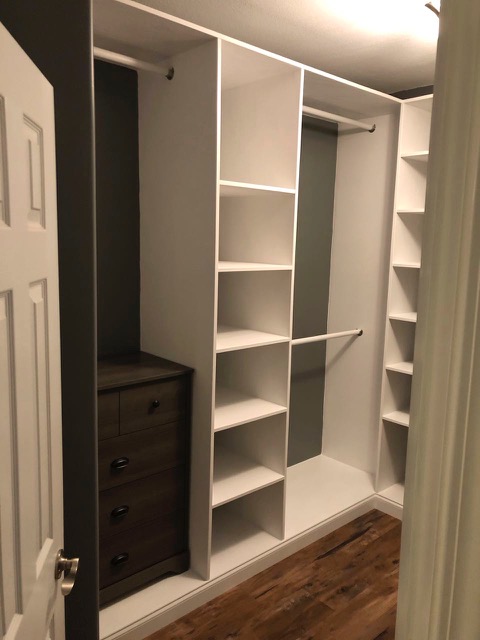
WHY DID YOU MAKE A BASE?
I made a base for my closet system to sit on so that I had something to secure my vertical supports to. All of the vertical supports are screwed down into the base. I also think it just looks nicer and more high end when everything is up off the floor and I can add some nice trim to it.
WHY DID YOU TAKE THE CARPET OUT? DO YOU HAVE TO?
I plan to do some nice wood flooring or tile in the closet eventually, so I wanted to take the carpet out. Instead of leaving the plain ugly concrete I decided to paint it a soft gray color! You don’t have to remove your carpeting for this project, you can build right over the carpeting.
WHAT DID YOU USE FOR TRIM?
For the trim I bought 1″ x 6″ pine boards and ripped them down into 1″ strips. The plywood in the closet is 3/4″ but I wanted to add a bit more bulk to the face trim to make the shelves look a bit thicker. To attach the trim I centered the 1″ trim on the 3/4″ plywood so there was a bit of overhang on each side then used a brad nailer and 1″ brad nails to secure it.
WHAT TOOLS/MATERIALS DID YOU USE?
I have a blog post for each part of the closet makeover that goes over all the tools/materials I used for each step! You can find the links below:
Tools and materials for Part 1: PART 1
Tool and materials for Part 2: PART 2
WHAT SIZE SCREWS DID YOU USE AND HOW DID YOU FILL POCKET HOLES?
I used 1 1/4″ pocket screws and wood filler to fill all of the pocket holes!
BEST LIGHTING FOR A CLOSET?
I suggest using a cooler Daylight LED light bulb in your closet. If you use a soft white light bulb your clothes may appear to have a yellow tint. A daylight LED type light bulb will allow you to see the true color of your clothes and it makes such a huge difference!!
Check out a few others who have followed the closet makeover tutorials!