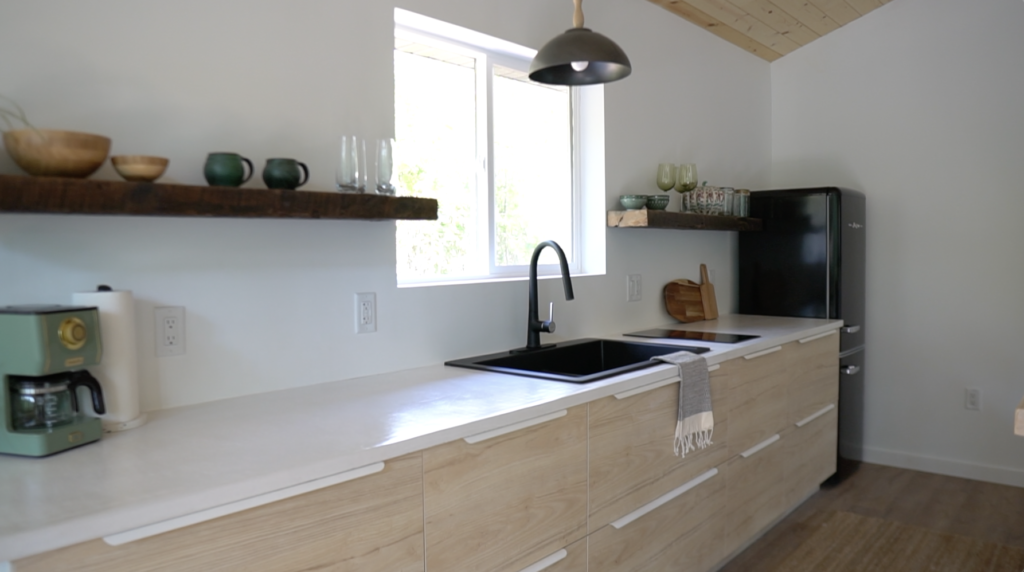
This summer I helped my parents build a Scandinavian inspired vacation rental. The minimalist design featured clean lines, natural lighting, and wood accents. It was only fitting to incorporate organic looking white concrete countertops. We poured our own countertops and they turned out beautiful. It was quite the process though so I’m breaking down the project step by step for you guys so you can DIY your own concrete countertops!


DIY White Concrete Countertops [Video Tutorial]
MATERIAL LIST
| Material | Link |
| 1/4” cement board | |
| 1 1/2” styrofoam | |
| Scrap wood to reinforce cabinets | |
| EuroForm – Square Edge Countertop Form (90” Half Package $139) | https://concretecountertopsolutions.com/collections/countertop-forms/products/euroform-square-edge |
| 3/8” by #10 panhead screws | https://concretecountertopsolutions.com/products/construction-screw |
| White Countertop Mix ($29 a bag) | https://concretecountertopsolutions.com/collections/cement-products/products/white-countertop-mix |
| Bright white color pack ($8.50 per pack) | https://concretecountertopsolutions.com/products/color-pack |
| Z Clips ($20 euro form) | https://concretecountertopsolutions.com/products/z-clips?variant=40303953412284 |
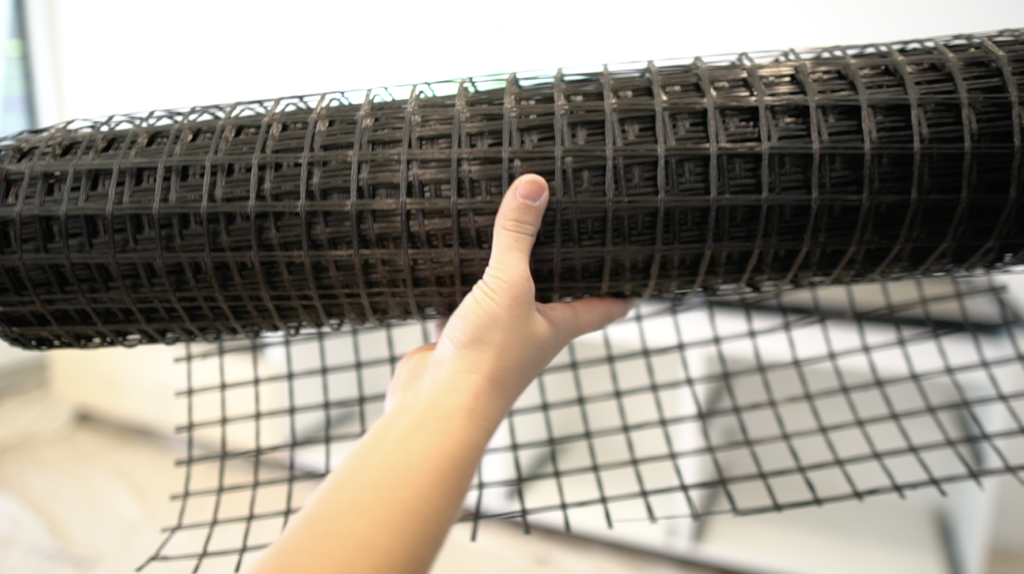
| Fiber Mesh Reinforcement ($50) | https://concretecountertopsolutions.com/products/fg50-alkali-resistant-fiber-mesh-reinforcement?_pos=1&_sid=311e35c30&_ss=r |
| Aqua-poxy Sealer | https://concretecountertopsolutions.com/products/z-aqua-poxy-2-qt-epoxy-sealer?_pos=2&_sid=c7a190801&_ss=r |
TOOL LIST
| Tool |
| Caulk gun |
| Silicone adhesive |
| Duct tape |
| Sanding block |
| Orbital hand sander (grit) |
| Jig saw |
| Trowels |
| Putty knife |
| Utility knife |
| Miter saw |
| Impact driver |
| Tape measure |
| Construction screws |
| 5 gallon buckets |
| Mixing drill & paddle bit |
| Paddle bit |
| Finishing tools |
| Keyhole saw |
| Shop vac |
| Foam roller for sealer |
1) Prep Cabinets
Step one is to reinforce the top of your cabinets. We are using 1/4” cement board for the base of the countertops and it felt a little flimsy spanning across the cabinets. We secured some temporary 1×4 blocking to the center of all the cabinets with wood screws. After the countertop is set we’ll take the blocking out so make sure you’re able to access the screws from underneath the countertop.

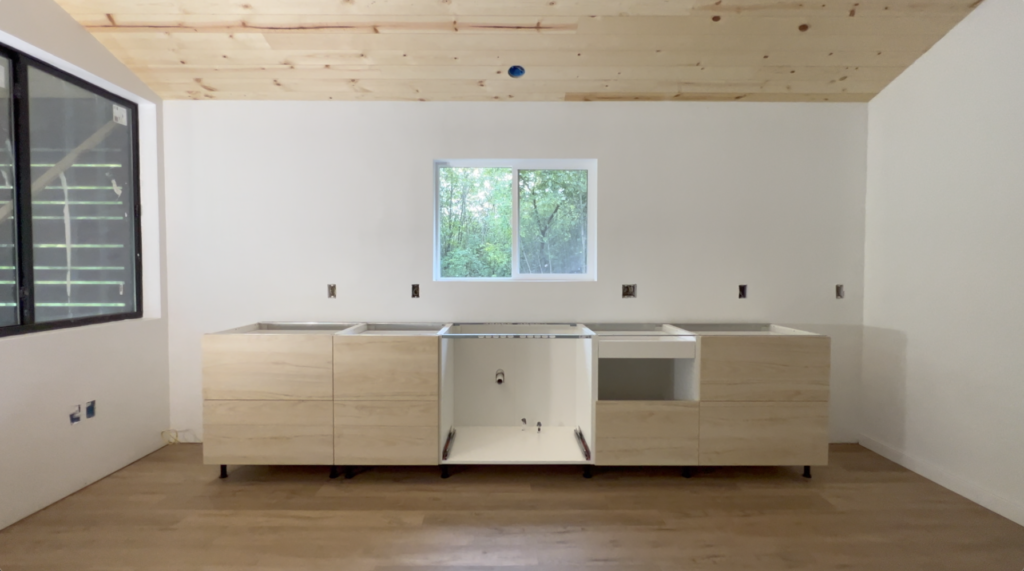

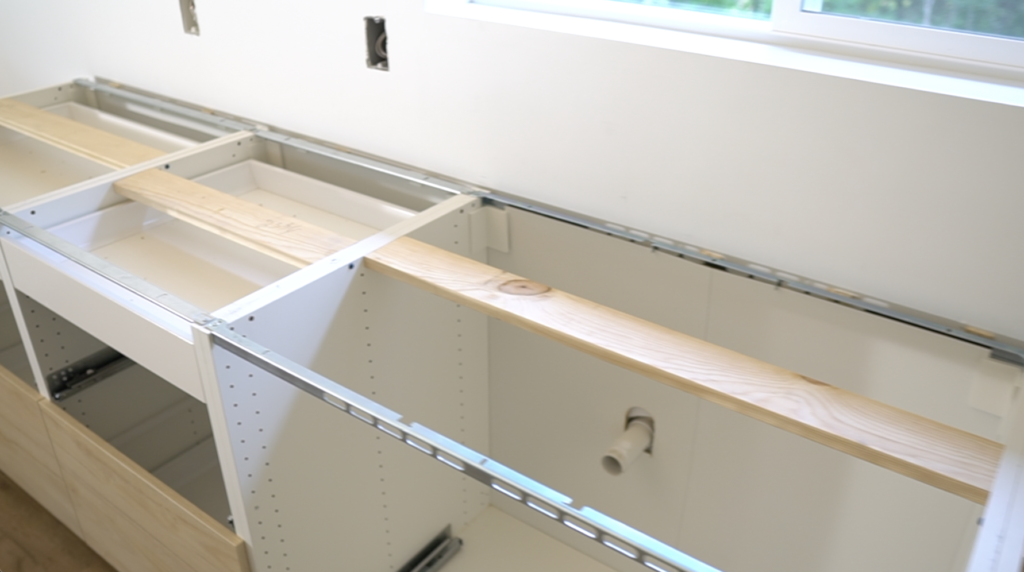
Plastic off your cabinets and lay some drop cloths on the floor in case there is any spillover.
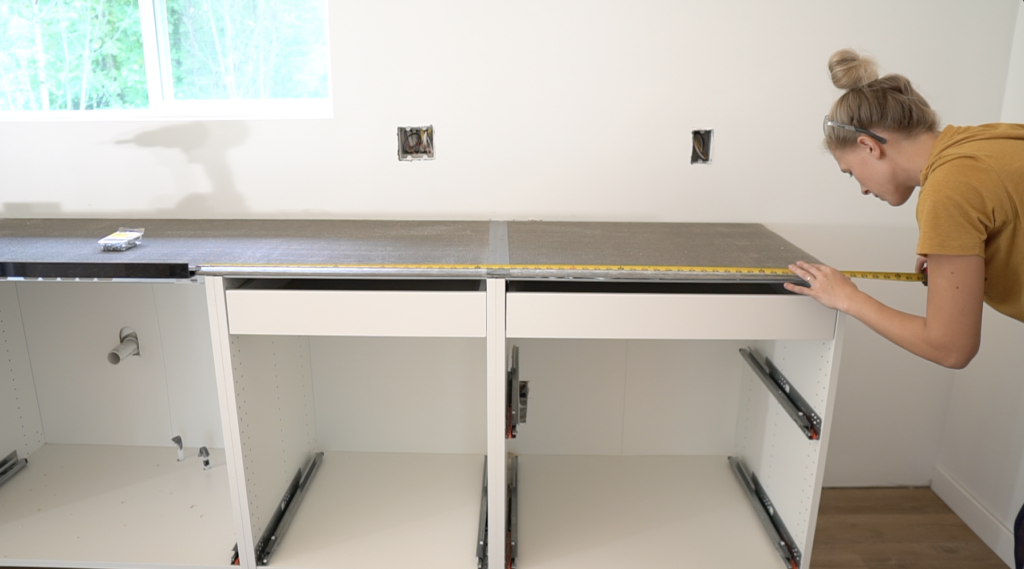
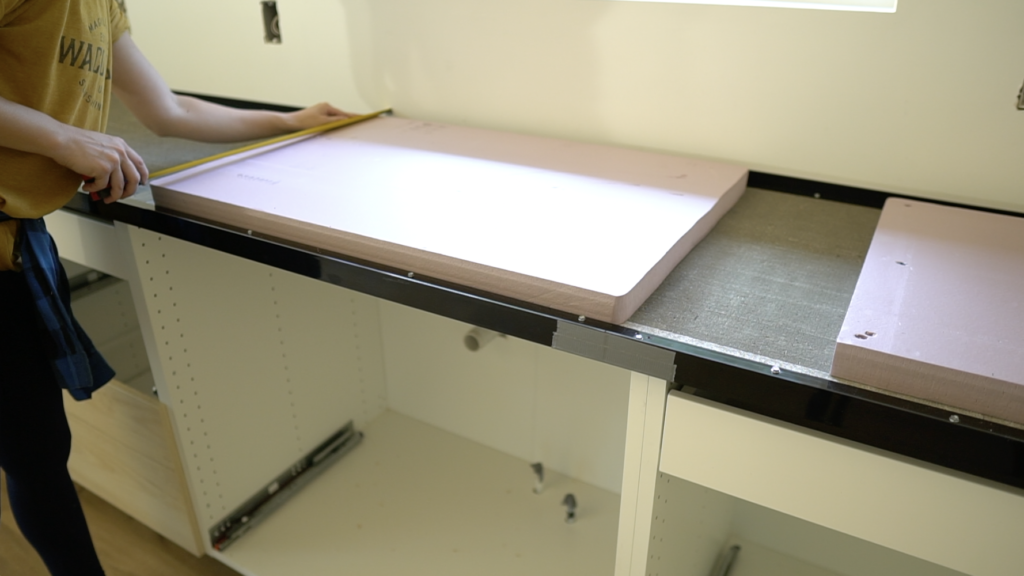
2) Measure & Cut Cement Board
We used 1/4” cement board for the base of our countertops but you can also use 1/4” hardie backer. We measured the cement board so that it sits flush to the edge of the cabinets. To cut the board you can use a sharp utility knife to score a line and then use your knee to break the board. If you need to splice the boards make sure to do so where the frame of the cabinet is and not in the opening of the cabinet.

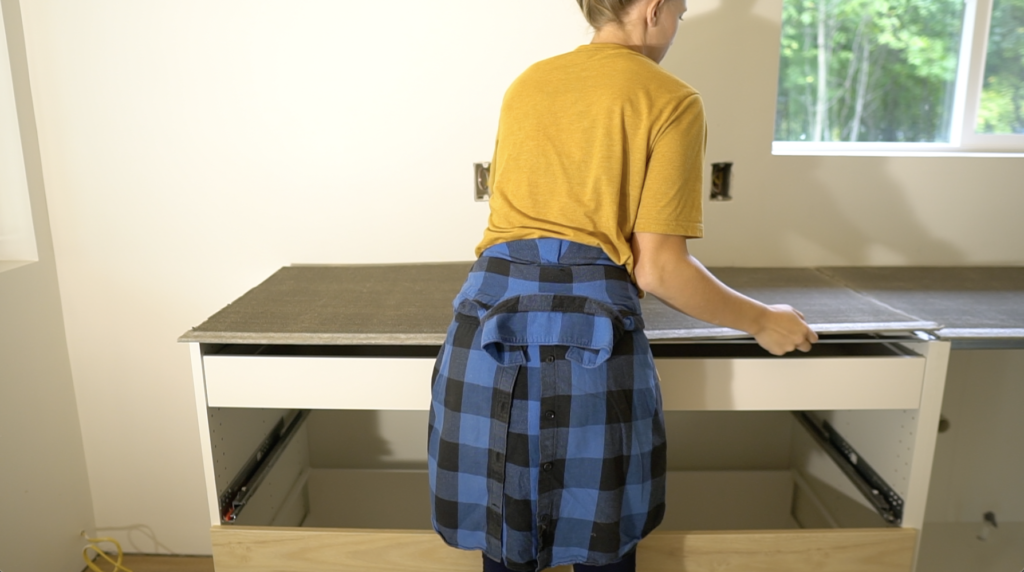

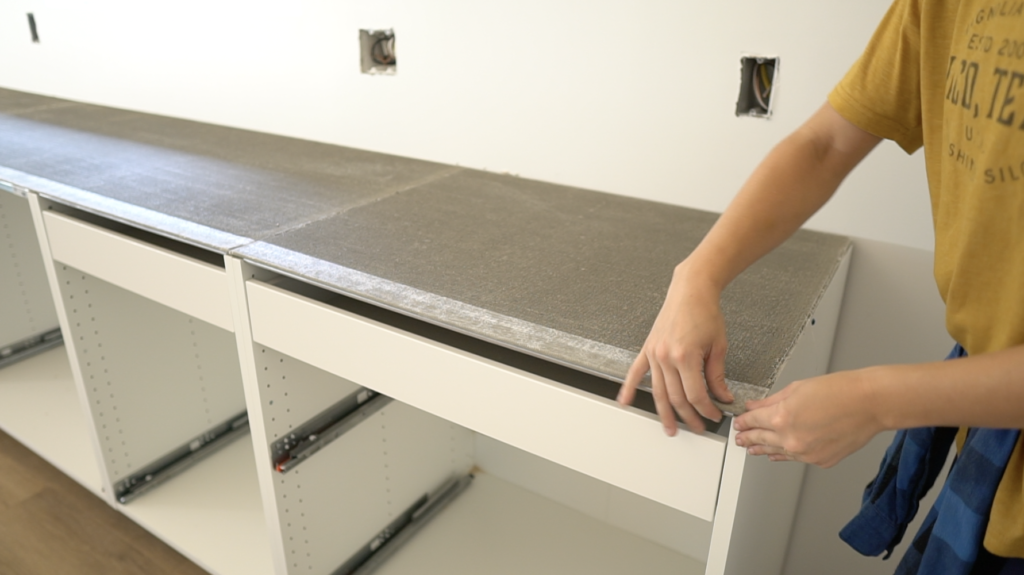
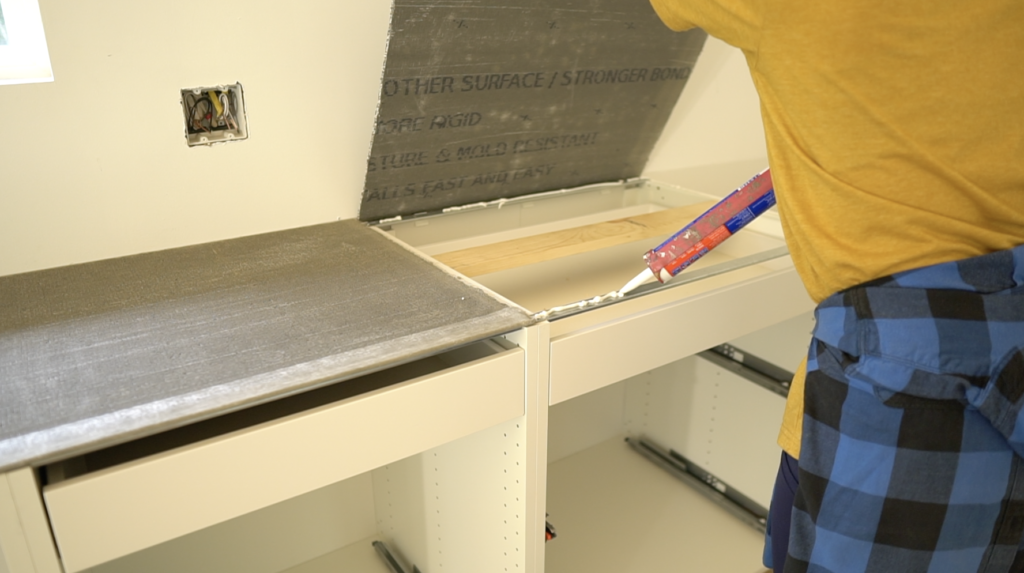
3) Secure Cement Board
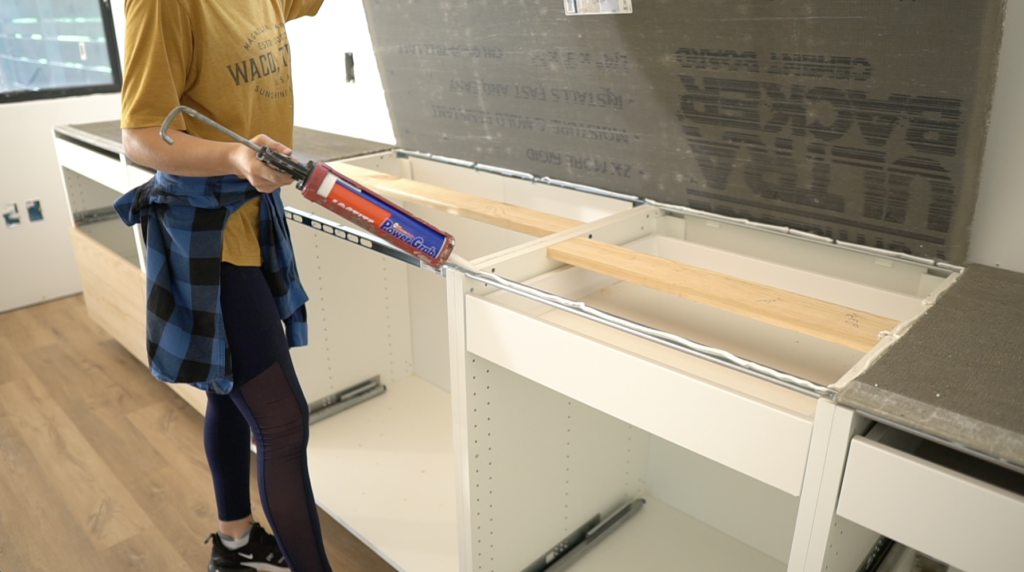
Once your cement board is cut and dry fit, secure the cement board to the top of your cabinets with silicon caulking. After that, take some duct tape to cover all of the seams.


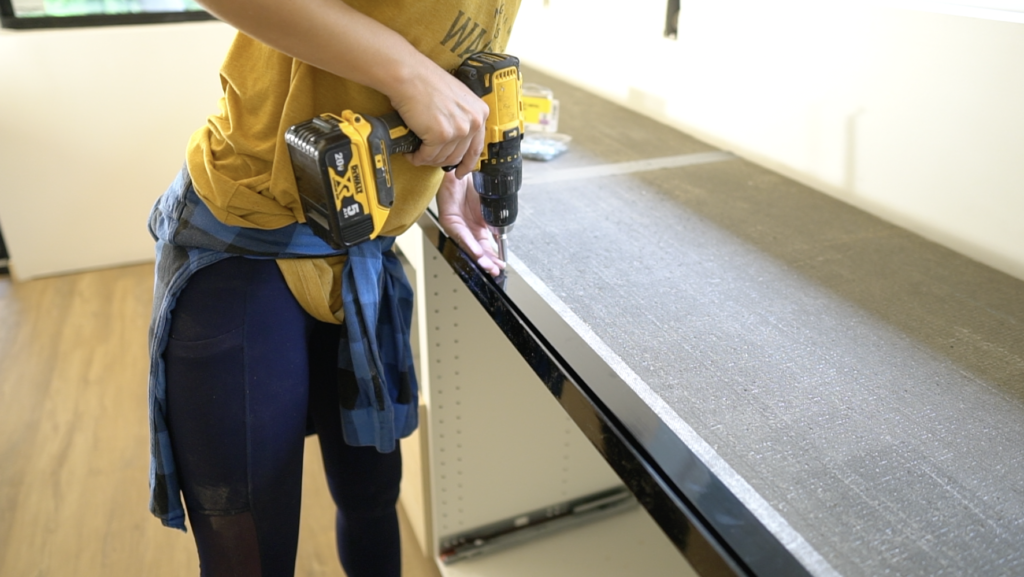
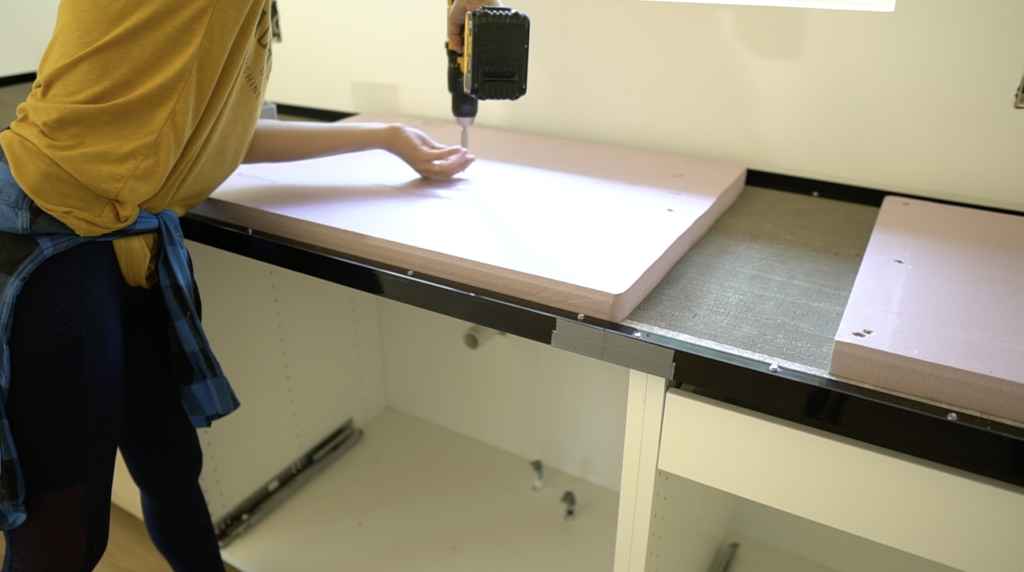
4) Cut and Install Countertop Form
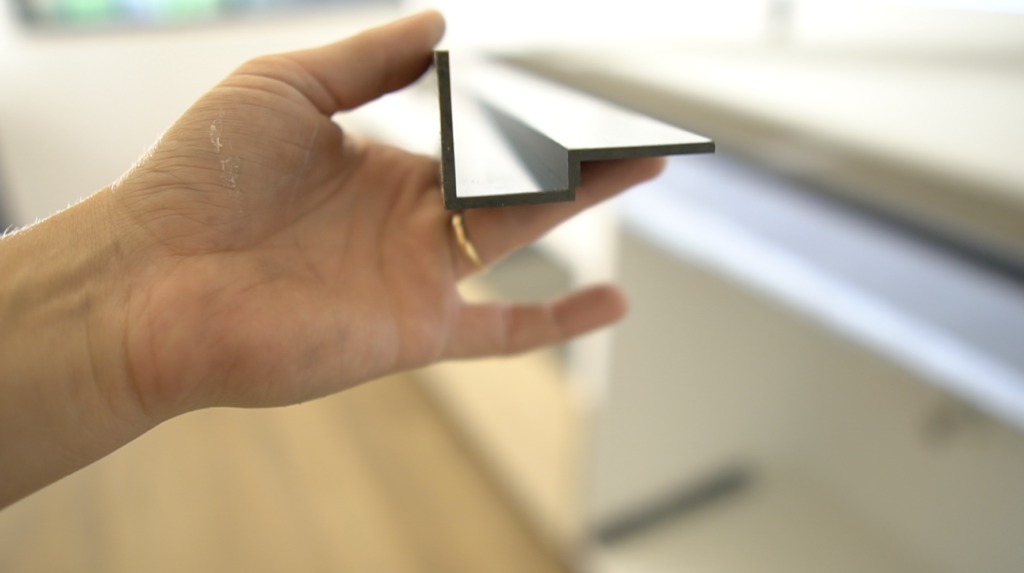
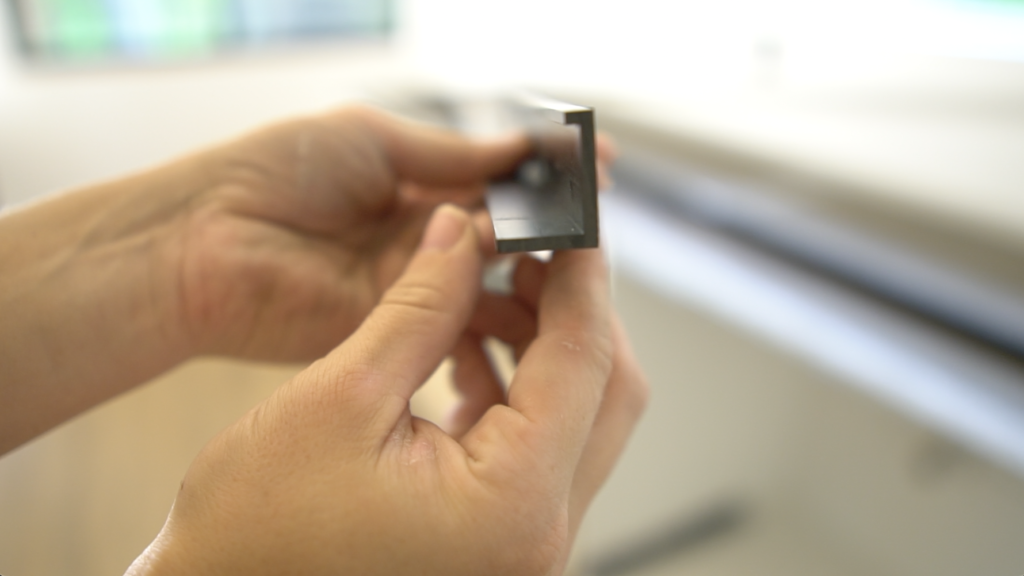
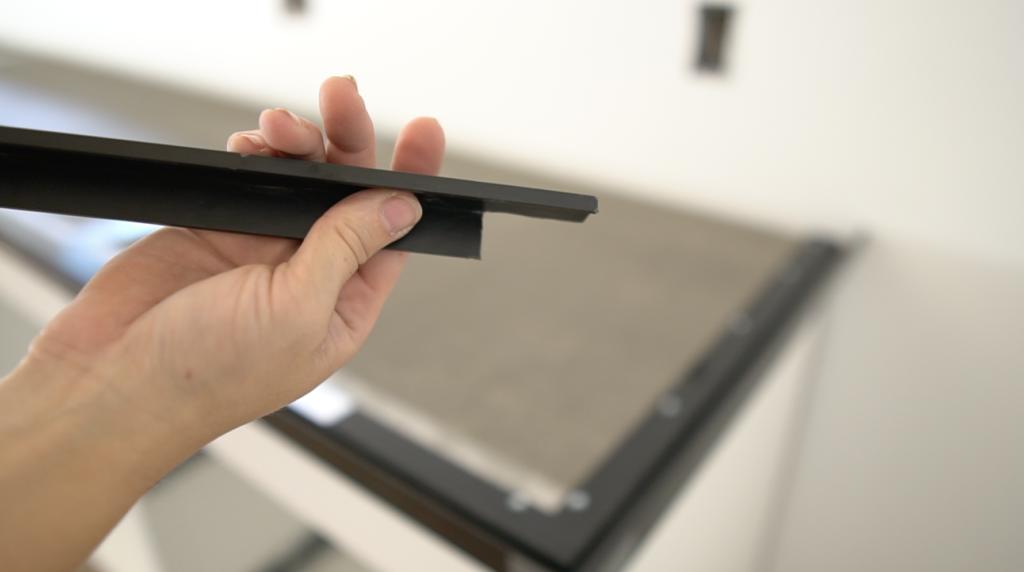
I bought a bunch of our countertop supplies from Concrete Countertop Solution’s website here. I have all the products linked above. For the forms we are using the EuroForm – Square Edge Countertop Form. The EuroForm has a 1-1/4″ tall front edge but you’re only pouring 1″ of concrete. We’re working with a very small kitchen so we bought the 90” half package which includes (4) 90” Euroform pieces and (4) 90” back wall pieces. We had a bunch leftover but that was the smallest package to order. They have different countertop forms available depending on the profile you’re going for!


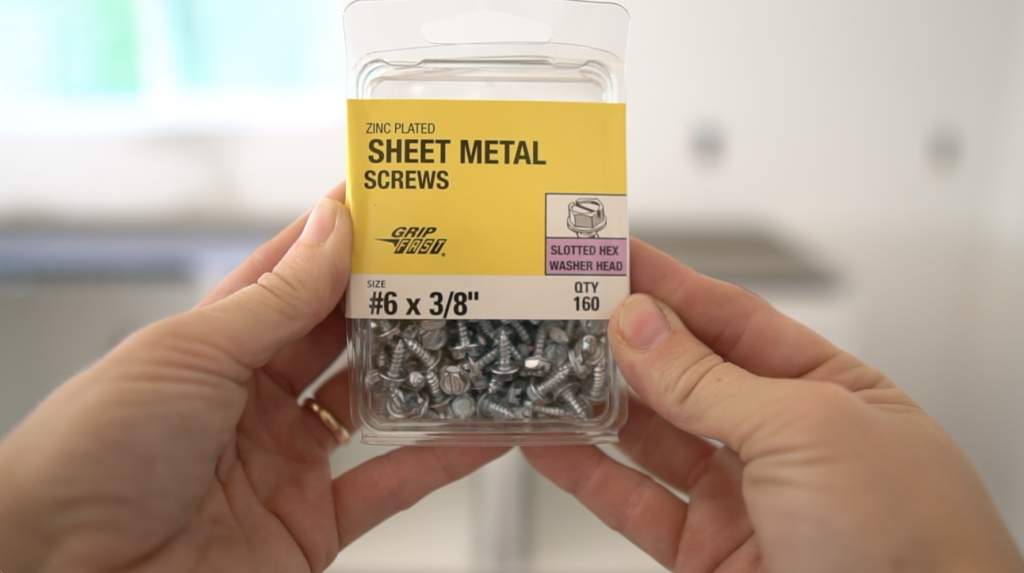
I took a full 90″ Euroform piece and mitered one end at 45 degrees on my miter saw then secured the piece down with #6 x 3/8″ screws every 6-8”.


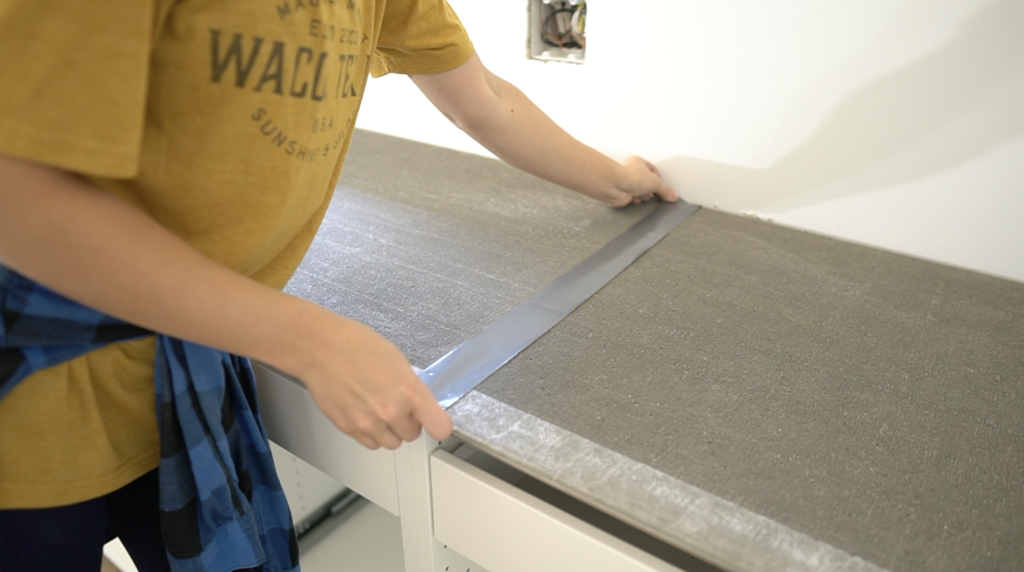
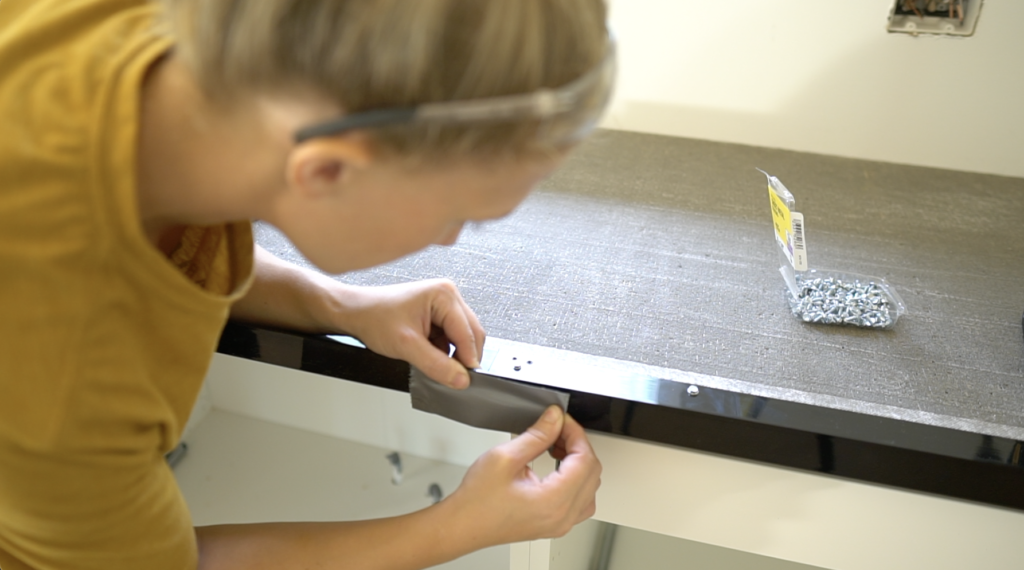
Cut a test piece for your corners to make sure you have the angle perfect to create a nice tight seam. Use duct tape to tape the entire corner seam.

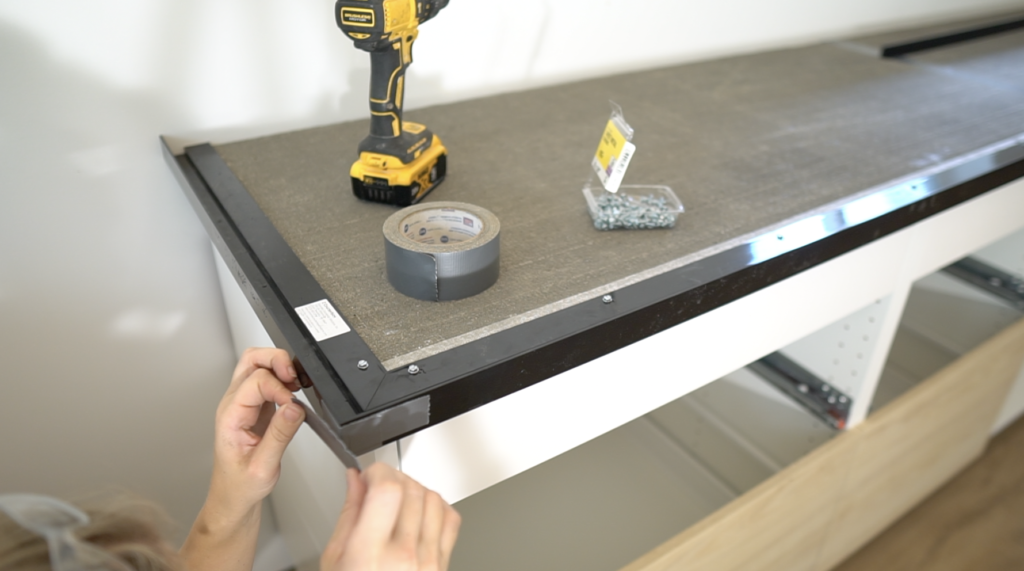


Use duct tape to tape any additional seams.


Now that the Euroforms are installed we can work on the back edge piece. I notched out a tiny bit of the back piece to fit closer to the Euroform. Take the same small screws and secure the back edge down every 6-8” making sure to push it tight against the back wall.


I ended up going around and taping the entire inside of the form to the cement board just to make sure no concrete could seep under the form.

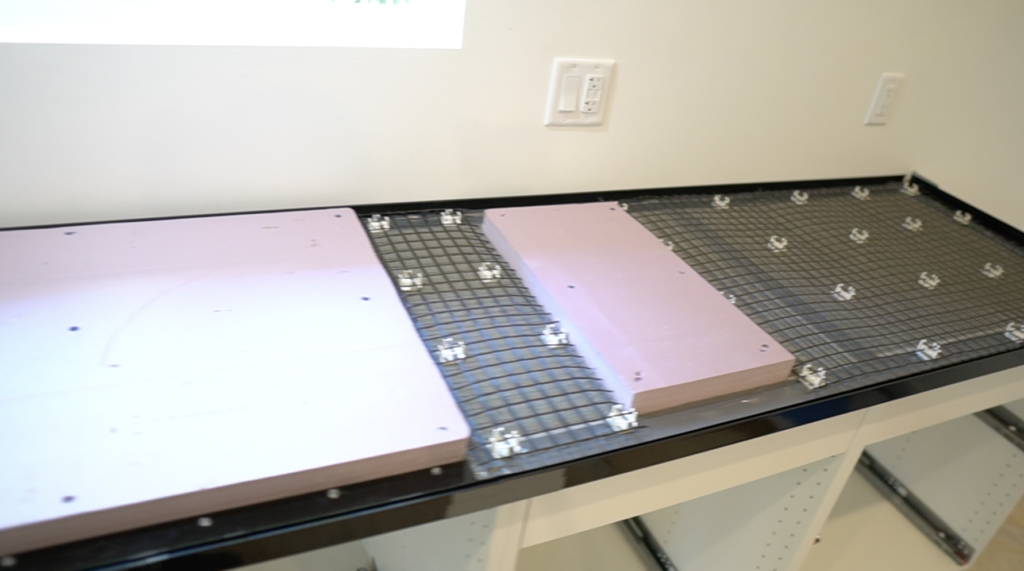
5) Make Forms for Kitchen Sink and Appliances
I have a drop in sink and a stove top that we had to make forms for. If you have an under-mount sink or other appliances to account for – I suggest checking out the Concrete Countertop Solution’s website because they have tutorials for different types of forms that you can use.

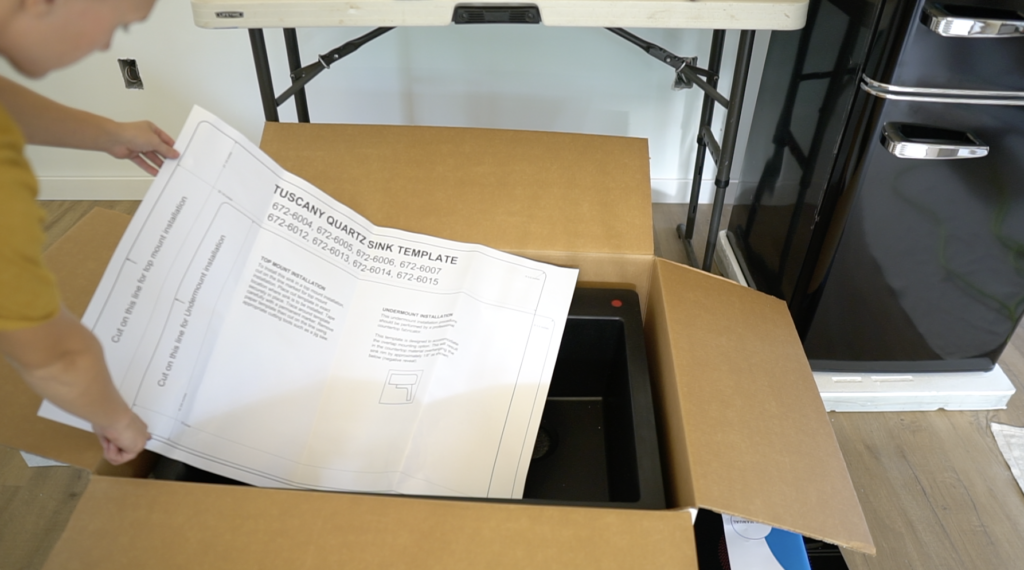


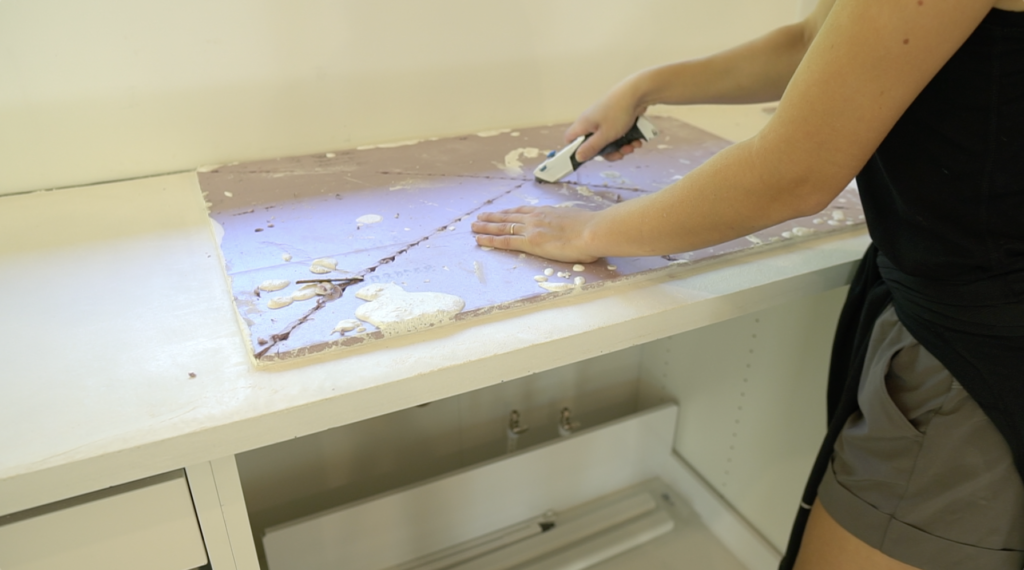
If you’re installing a new sink – it should come with a paper template that you can reference – otherwise you can just take some measurements. I grabbed that template – and then I took measurements of the stovetop making sure to leave a little bit of wiggle room. Last, I double checked the faucet to make sure it would fit in the sink opening.
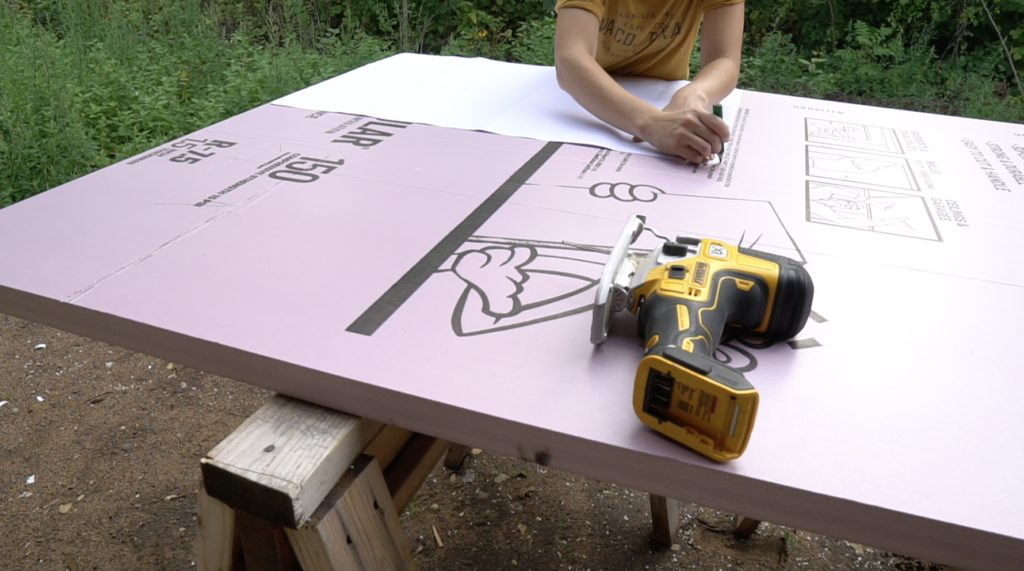
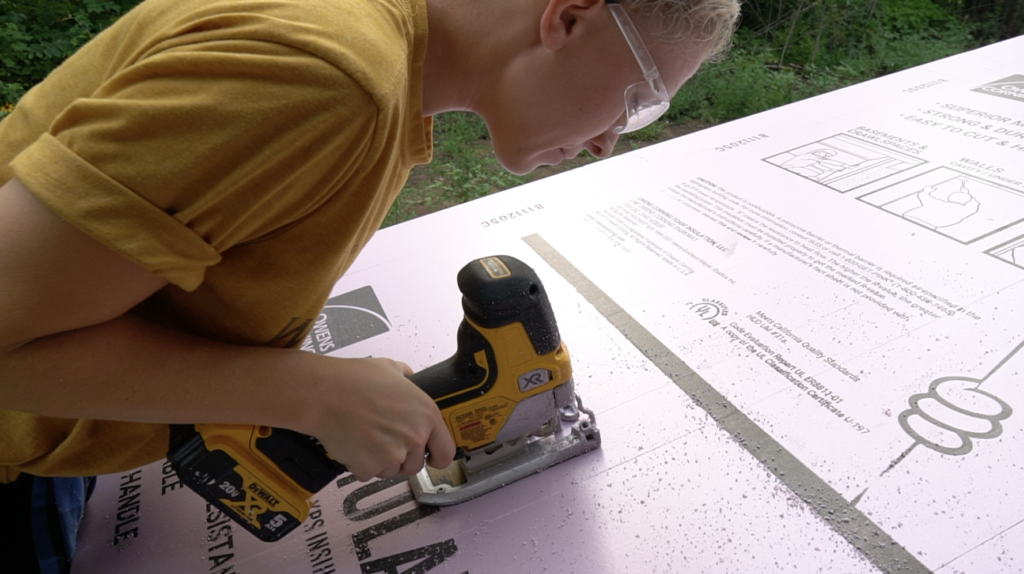
I transferred the measurements onto the 1 1/2″ styrofoam and then cut out each item with a jig saw.


Place your styrofoam on the cement board and take measurements to center them if necessary. Secure the foam to the cement board at an angle with 2” screws.
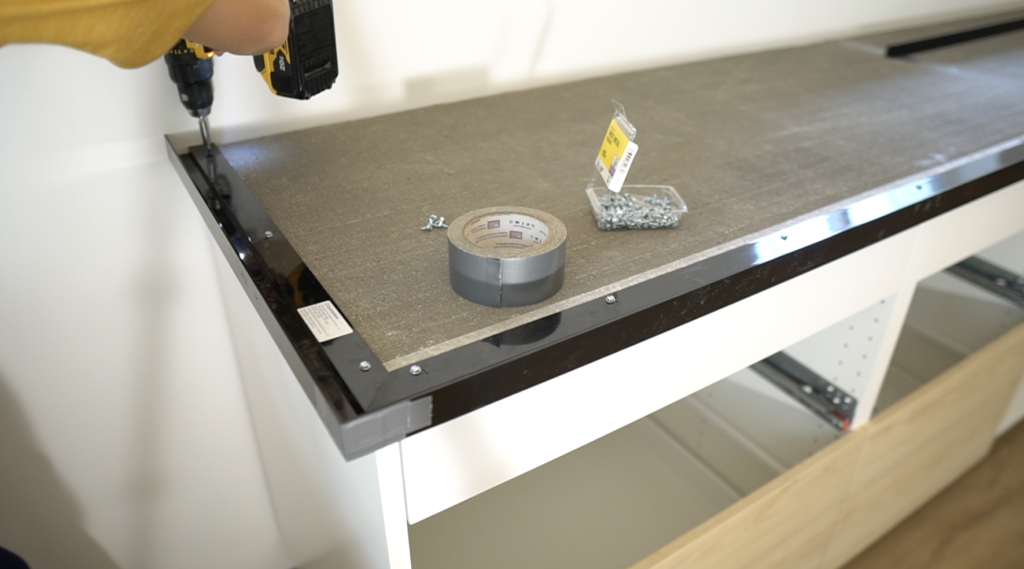
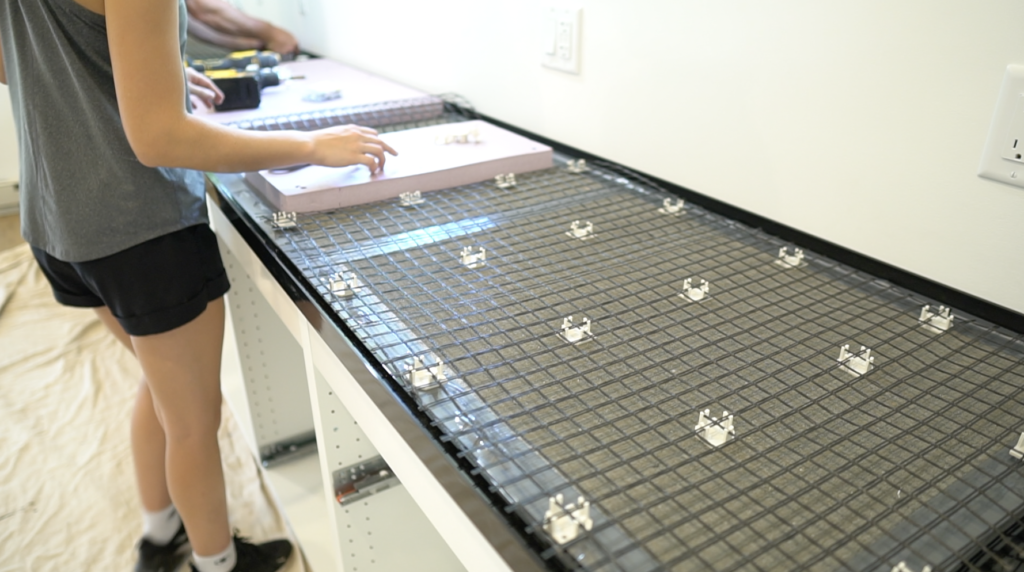
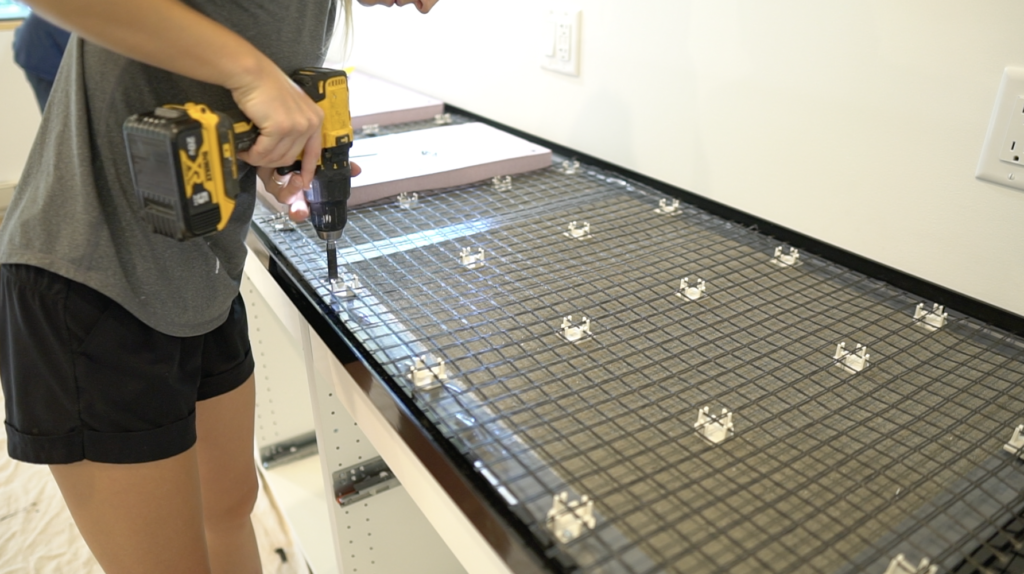
6) Install Z Clips & Mesh
I’m using these z clips and mesh to reinforce the concrete. I rolled out the mesh and cut it with a scissors. We attached the z clips to the mesh and then used the same #6 screws to secure the z clips and mesh down into the cement board.

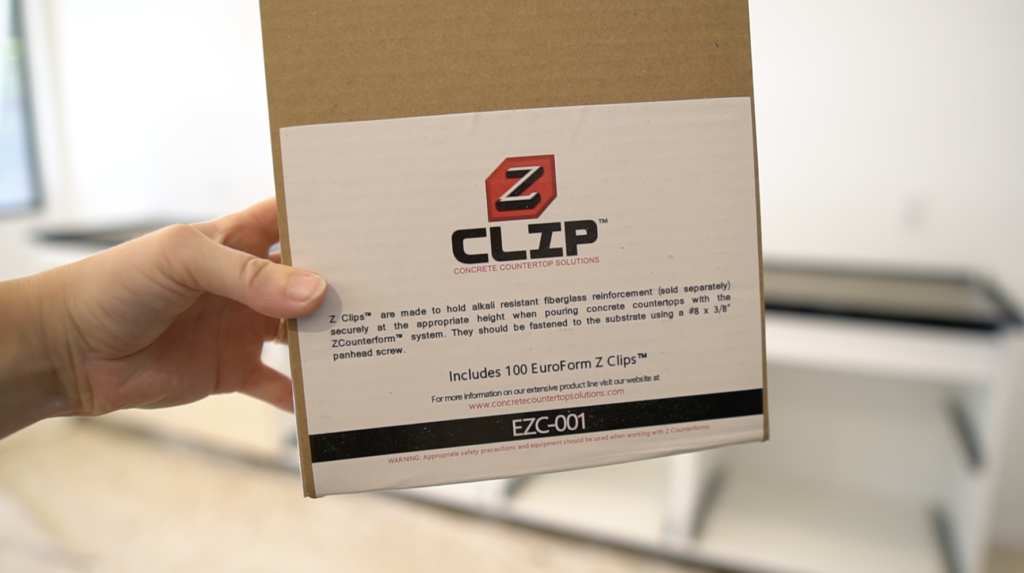

Like I said this helps to reinforce the concrete and the z clips hold the mesh down so the mesh doesn’t float to the top when pouring concrete.


7) Mix & Pour Concrete
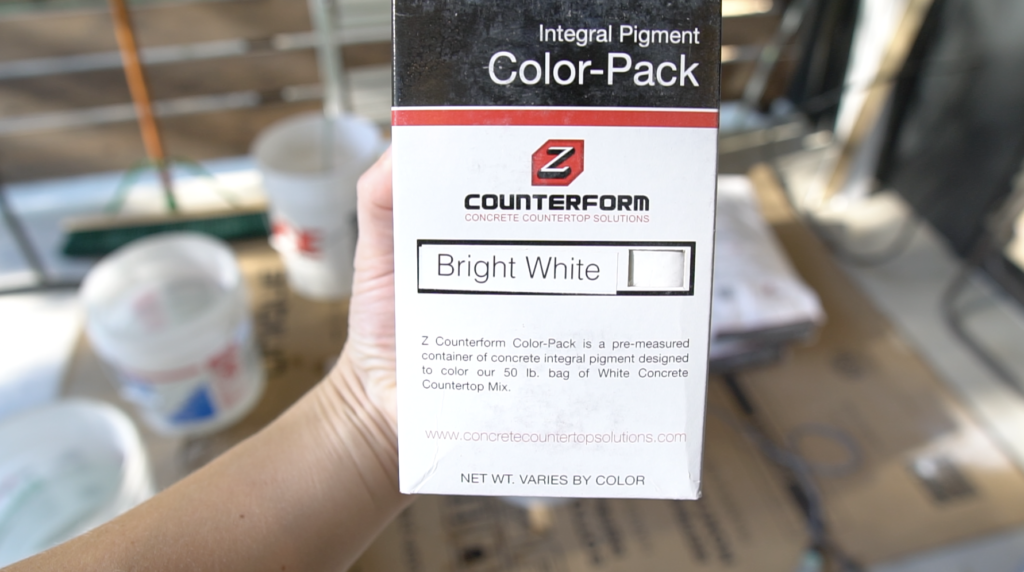
We’re using the white concrete countertop mix from Concrete Countertop Solution’s website as well as their bright White Color-Pack to whiten the mix even more. For a 12’ span of cabinets we ended up using 5 bags of concrete and 5 bright white color packs – one per bag.

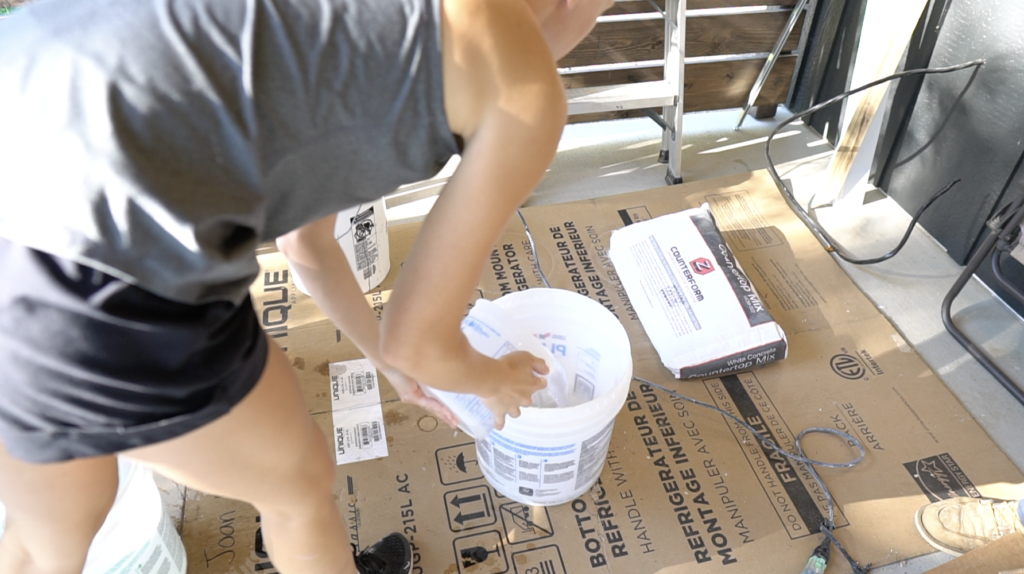

We started with 2 1/2 quarts of water in the bucket, and a 1/2 quart of water on the side. We mixed in the bright white color pack first. and then slowly mixed in the concrete mix. My dad kept the mixer turning and once the mix started to tighten up I slowly added that extra 1/2” quart of water to the mix.
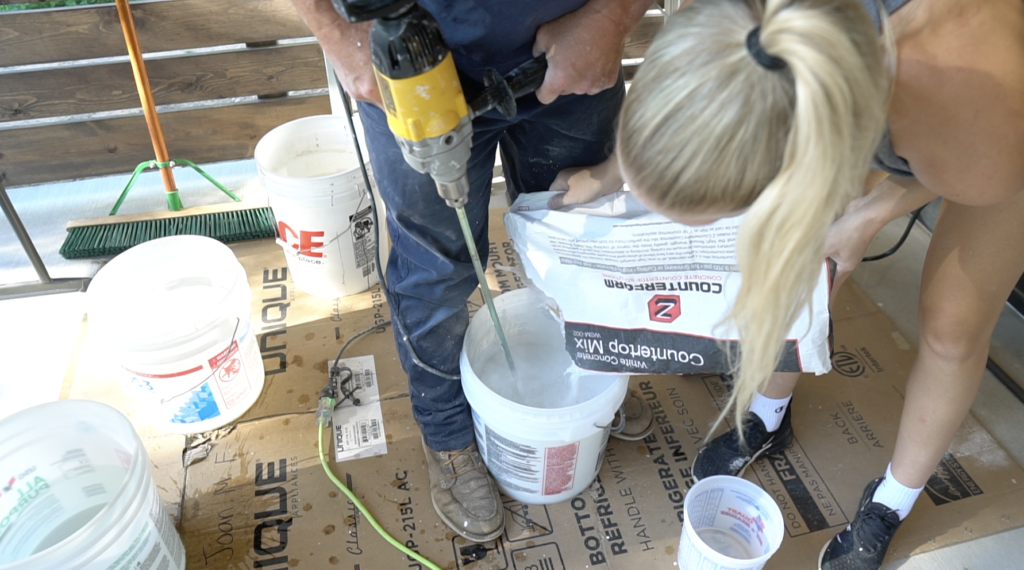
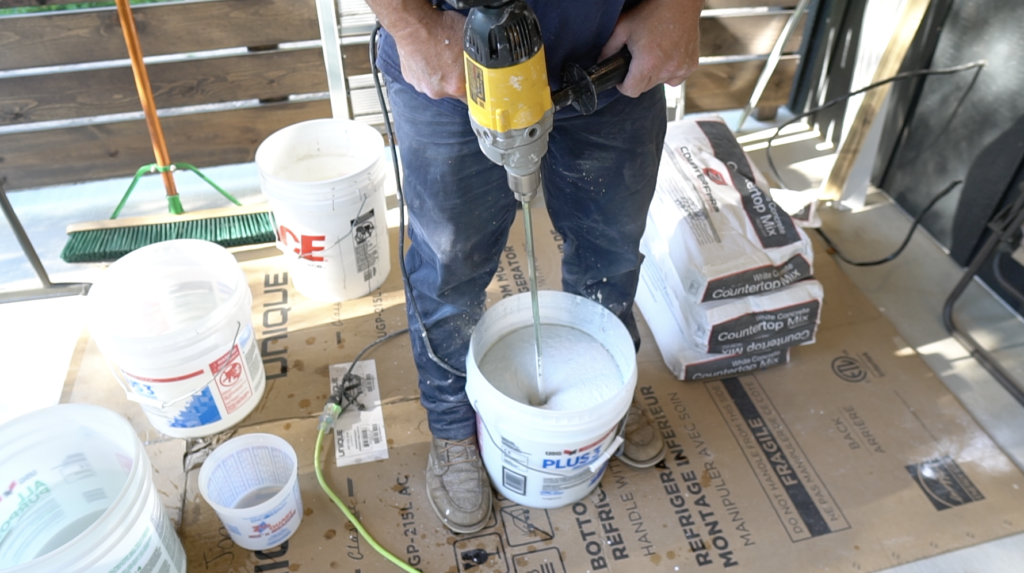
Once all the ingredients are combined you’ll want to mix for 1 minute until the mixture becomes flowable.

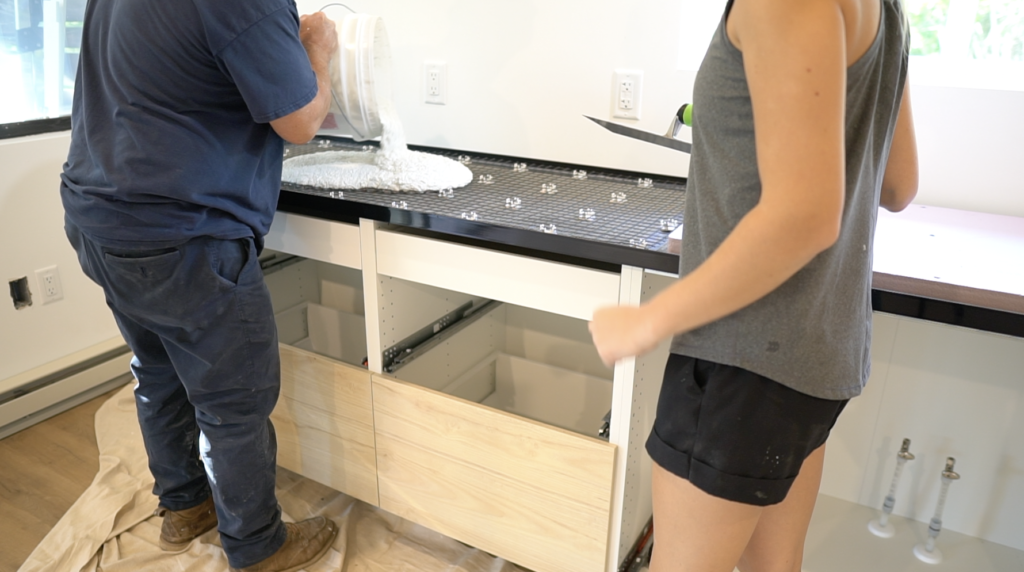

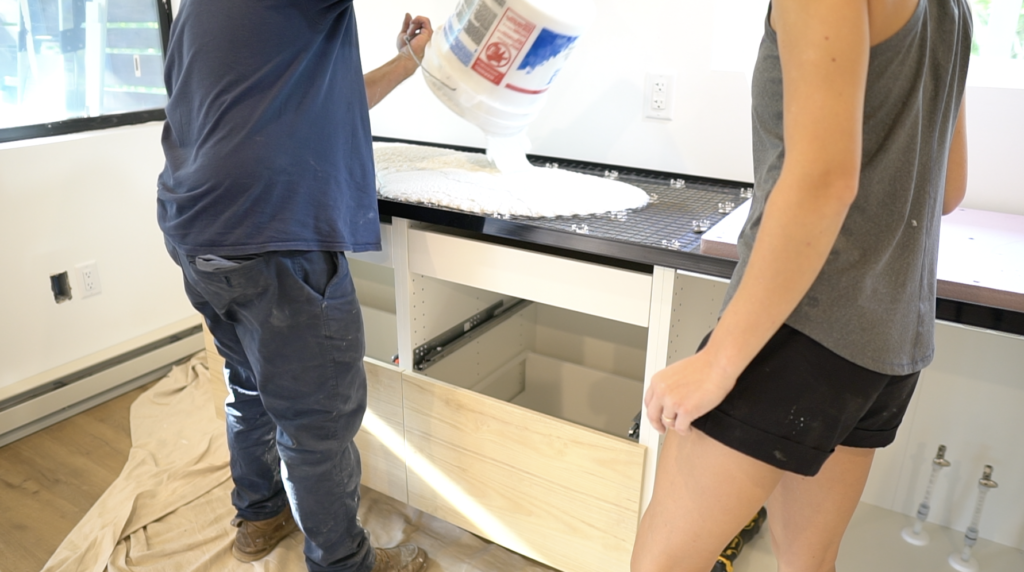
We poured a bucket of mix in place spread it out a bit and then mixed up the next bucket right away. Our first mix seemed a little bit too firm so we added a bit more water for the remaining batches. This mixture is near self-leveling so it’s pretty easy to manage.


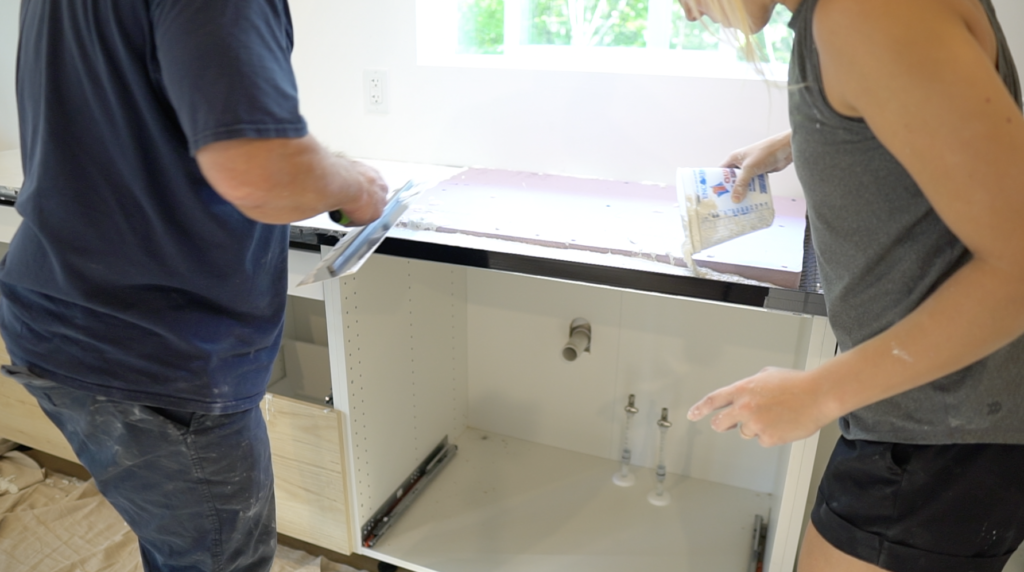
One thing we didn’t use was a screed which I think is really important to use first to really level off your concrete. The screed should go the full depth of the countertop and you should make a few passes with that first to take out any high spots and to bring the water to the top. If you have low spots you can just fill it in with some more concrete. We ended up having some low spots and that’s where the white coloring kind of puddled up.

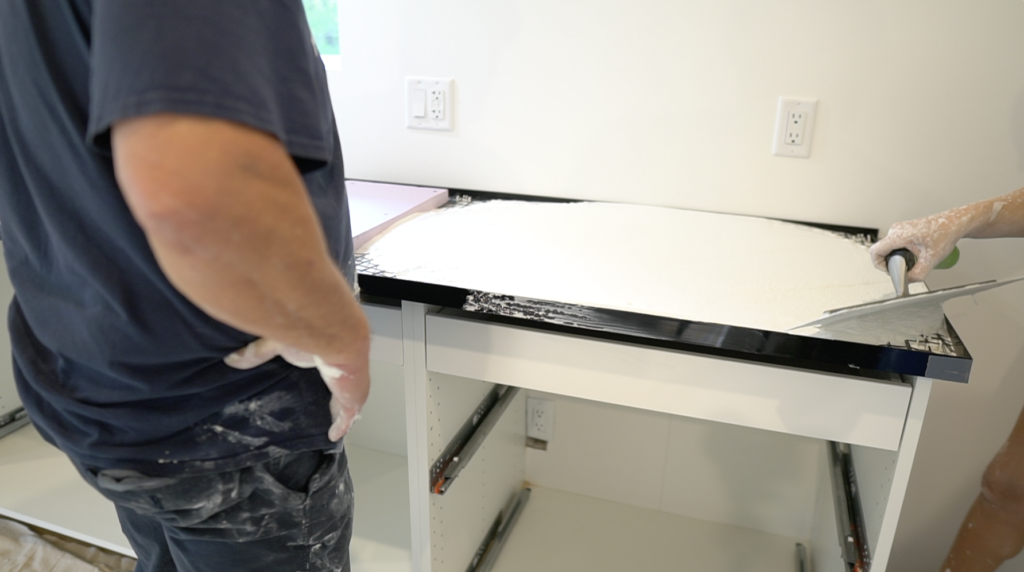
You want to get your concrete right to the top of the forms and vibrate the forms to get any of the air that might be trapped. You can take the end of your margin tool and tap forms. You’ll see air bubbles come up and pop at the surface.

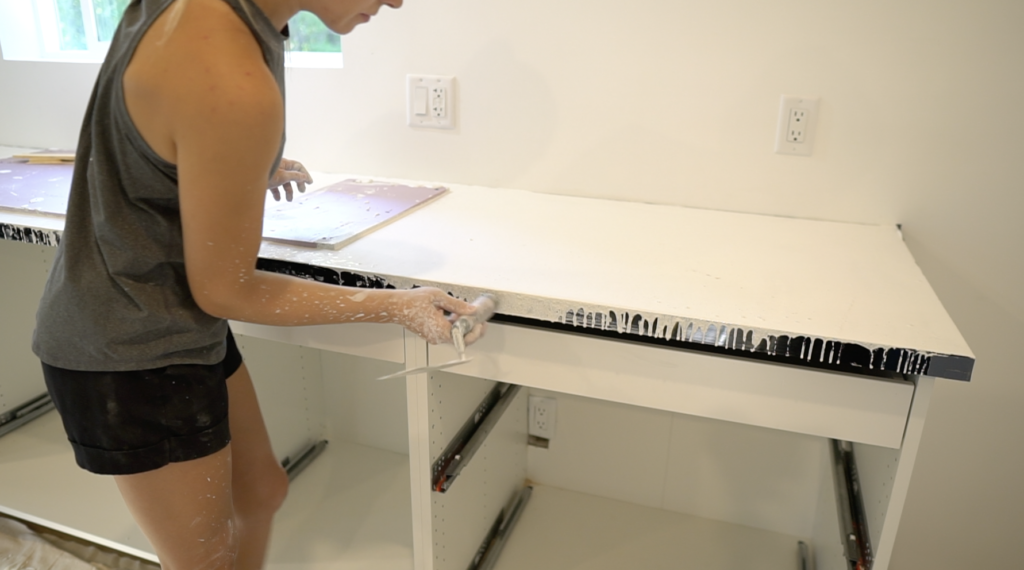

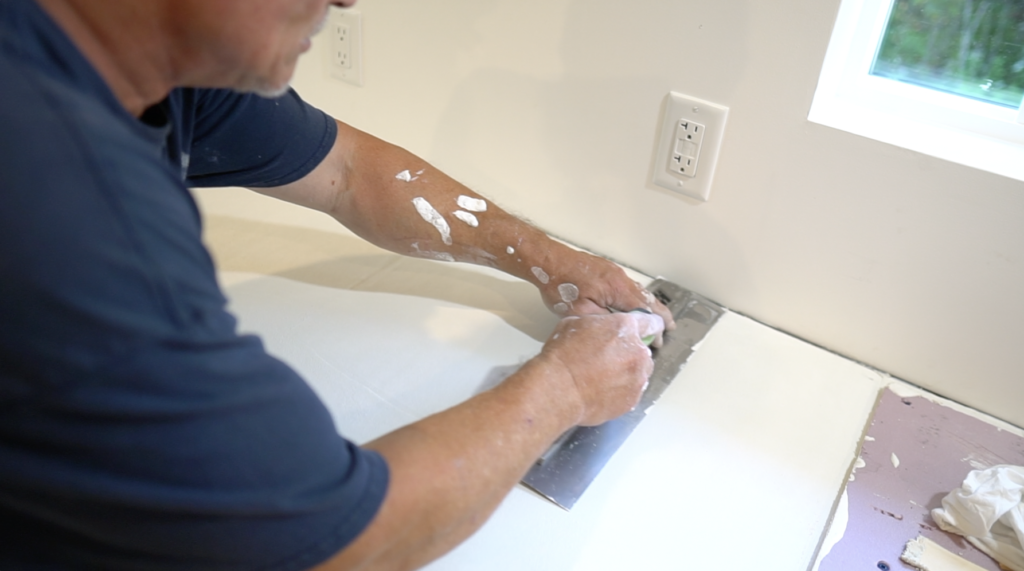
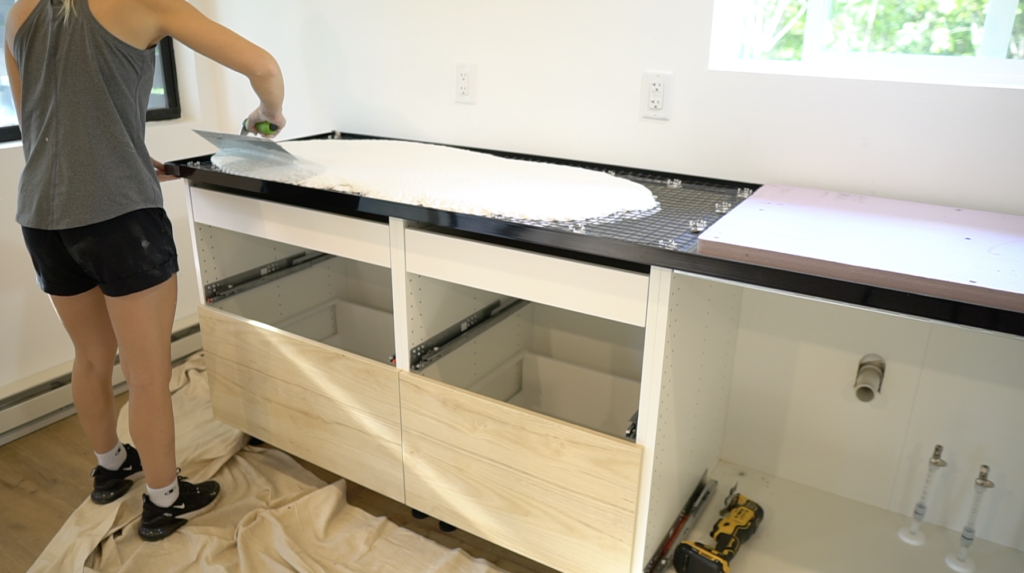
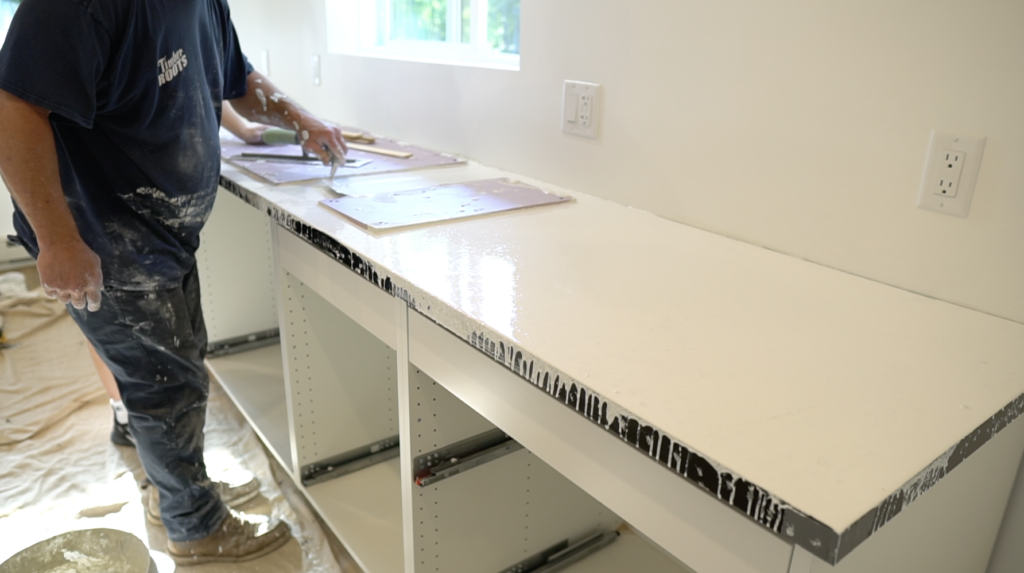
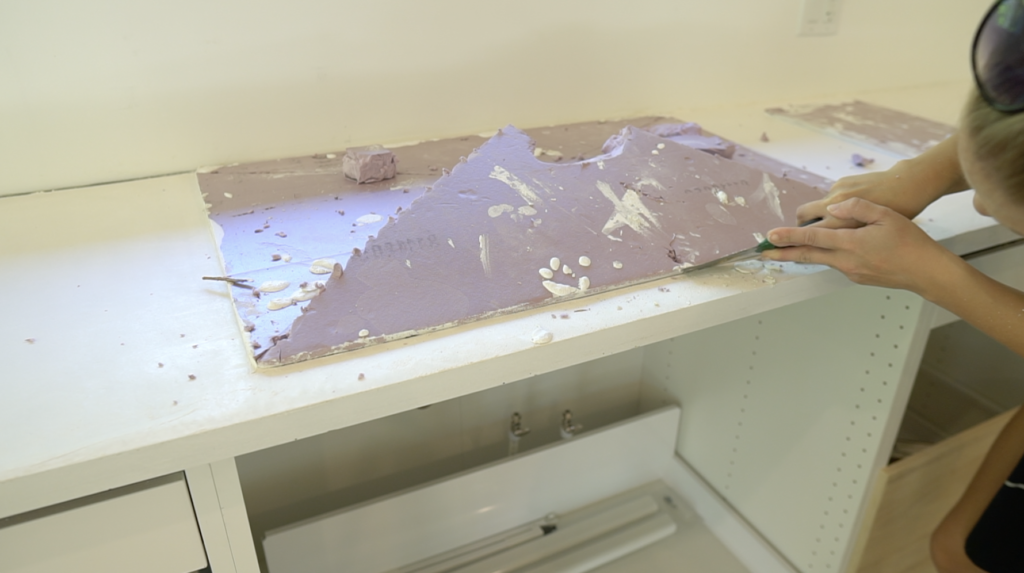
8) Smooth Concrete Countertop
After it’s all floated off and stiffened up a bit they recommend using a magnesium float to smooth and flatten the concrete.
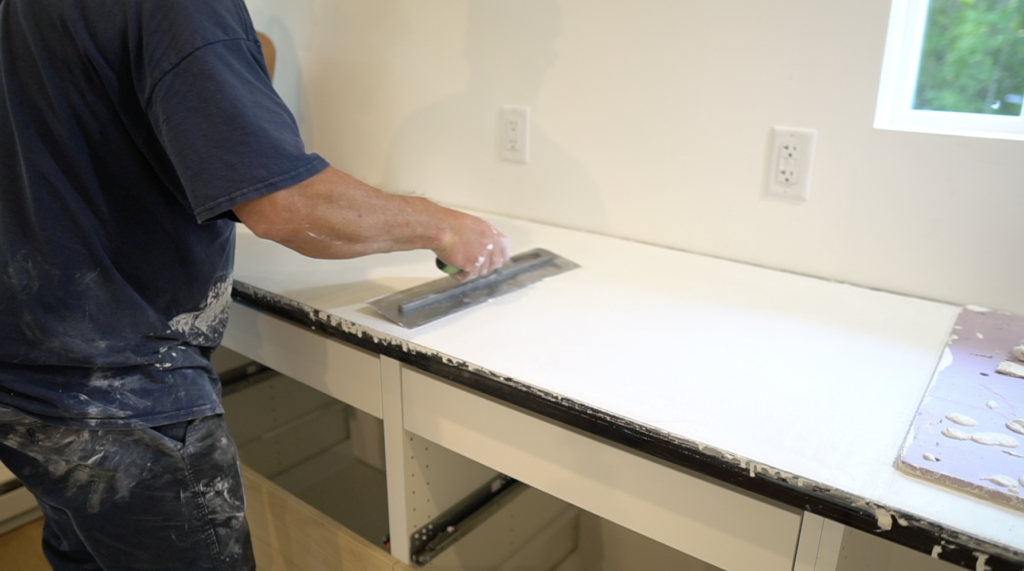

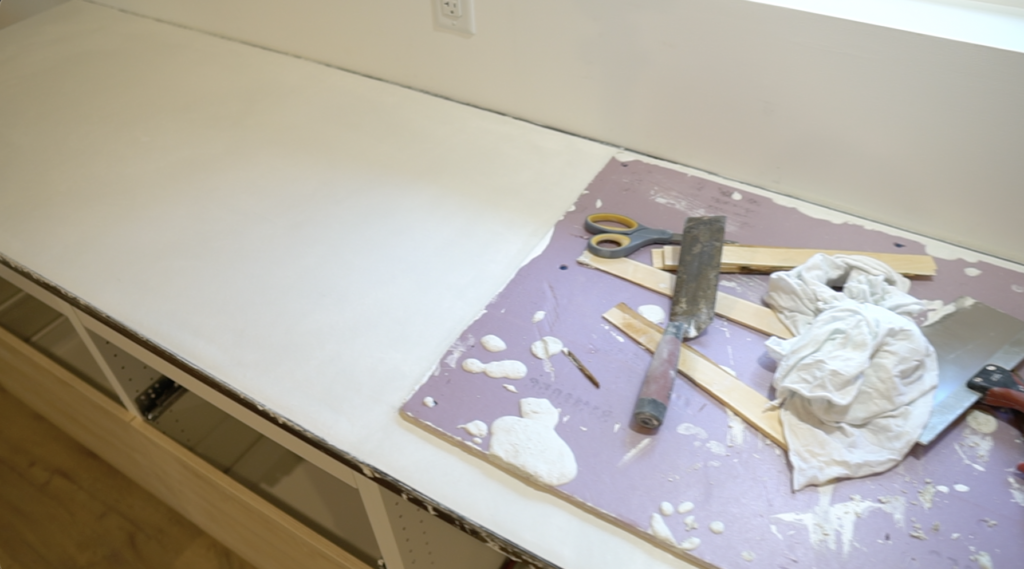
After the concrete mix is set and you can barely leave a fingerprint you can finish with a steel trowel to polish it off like you see us doing here.
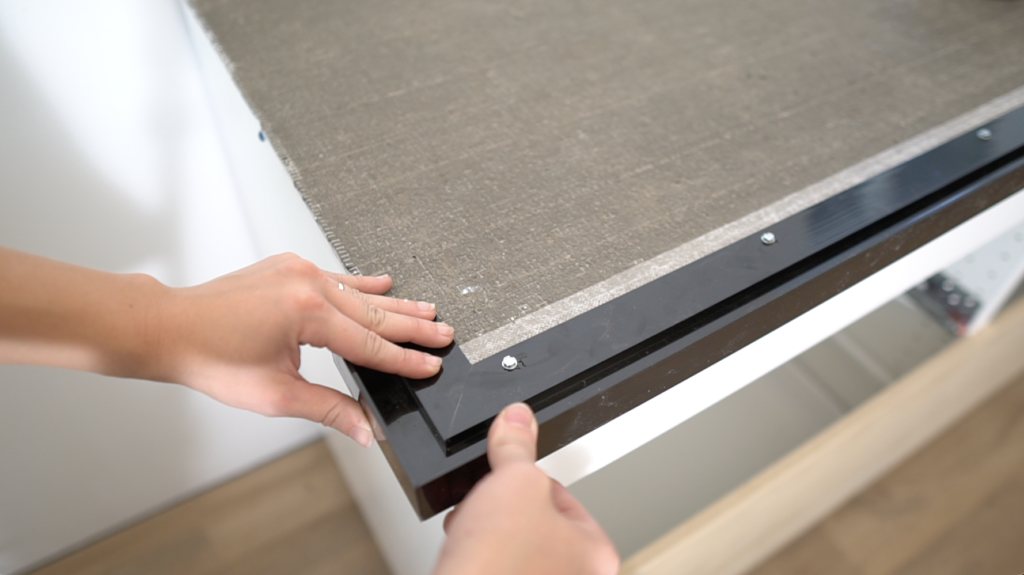
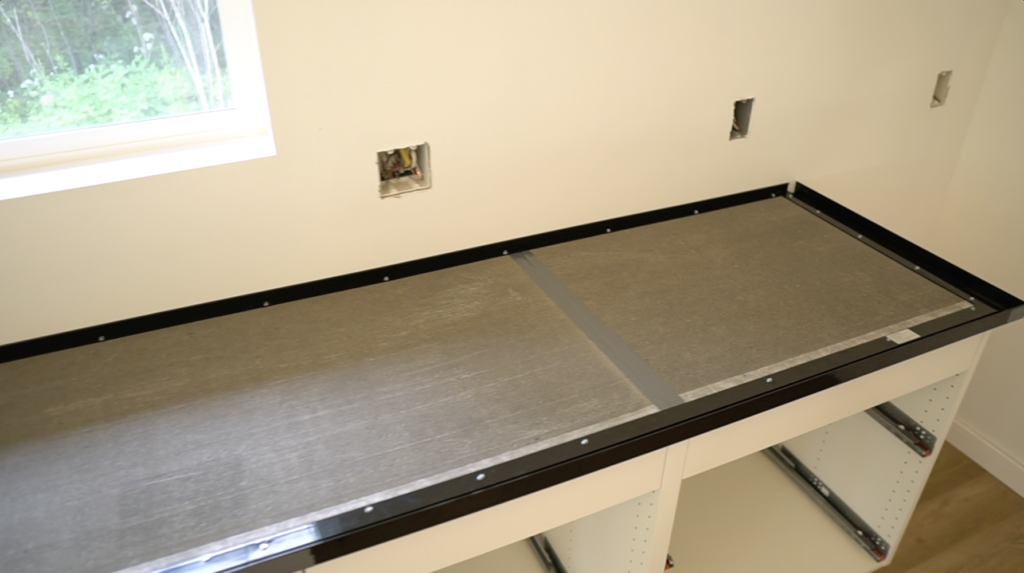
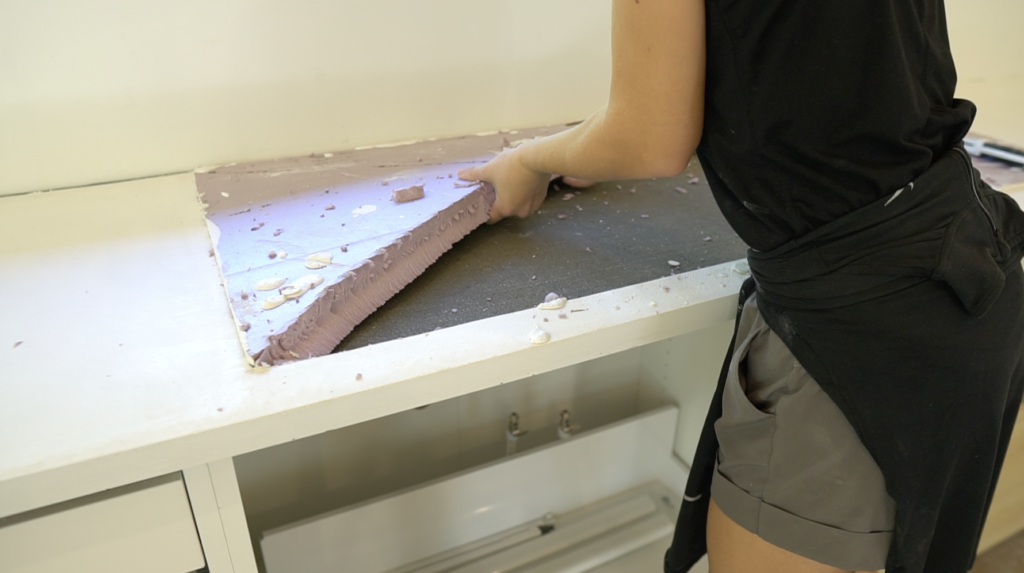
9) Remove Forms & Styrofoam
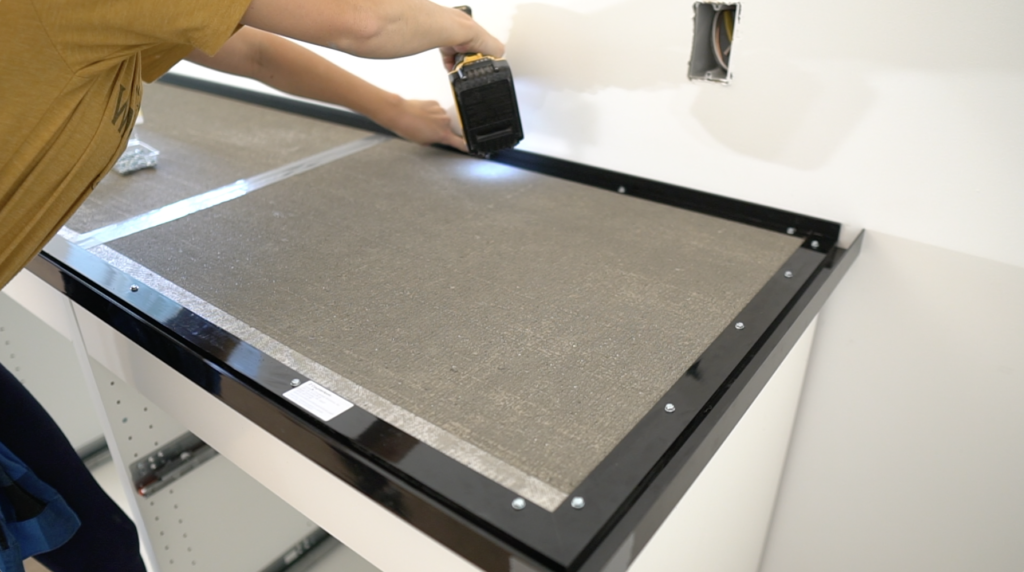
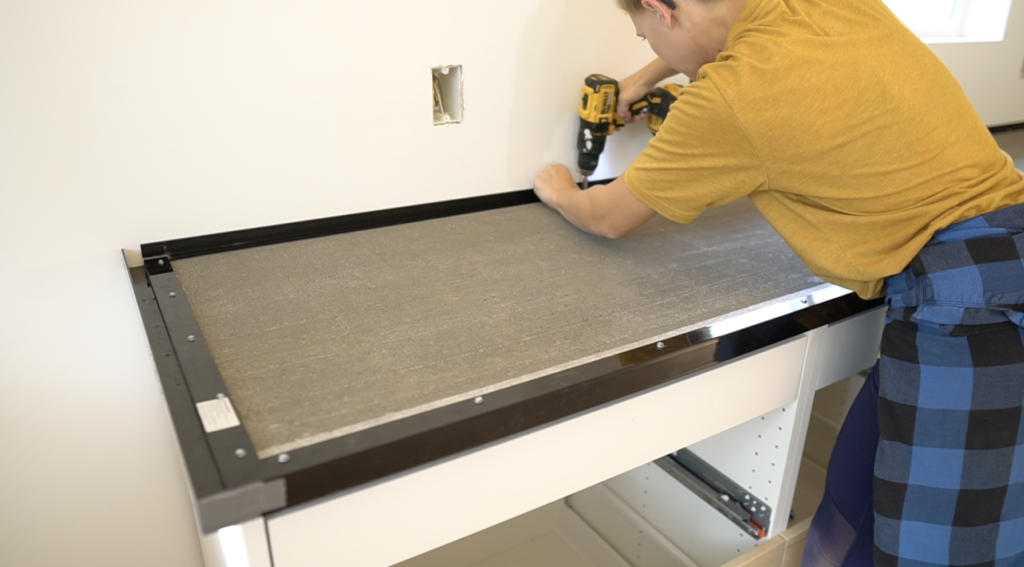
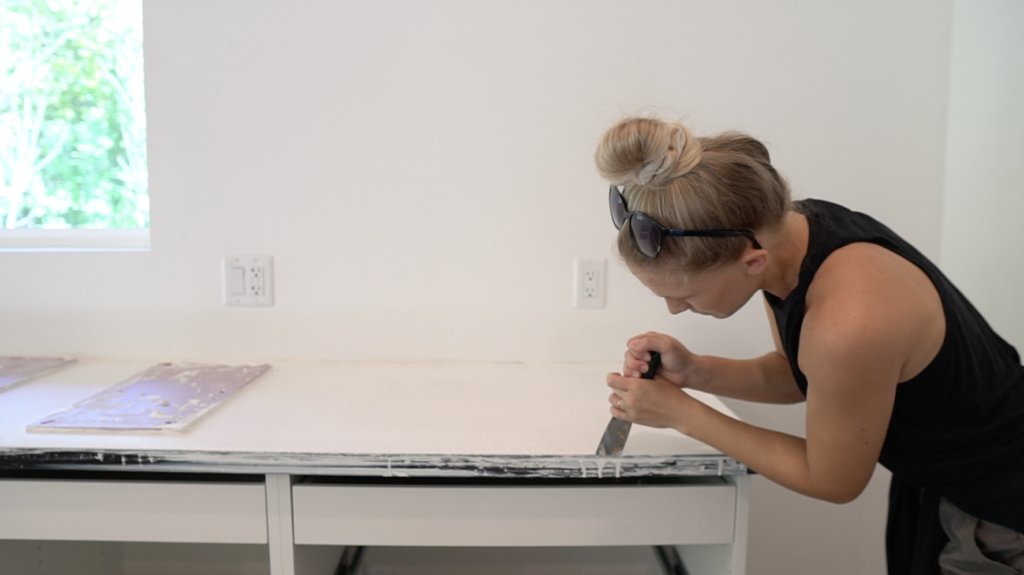
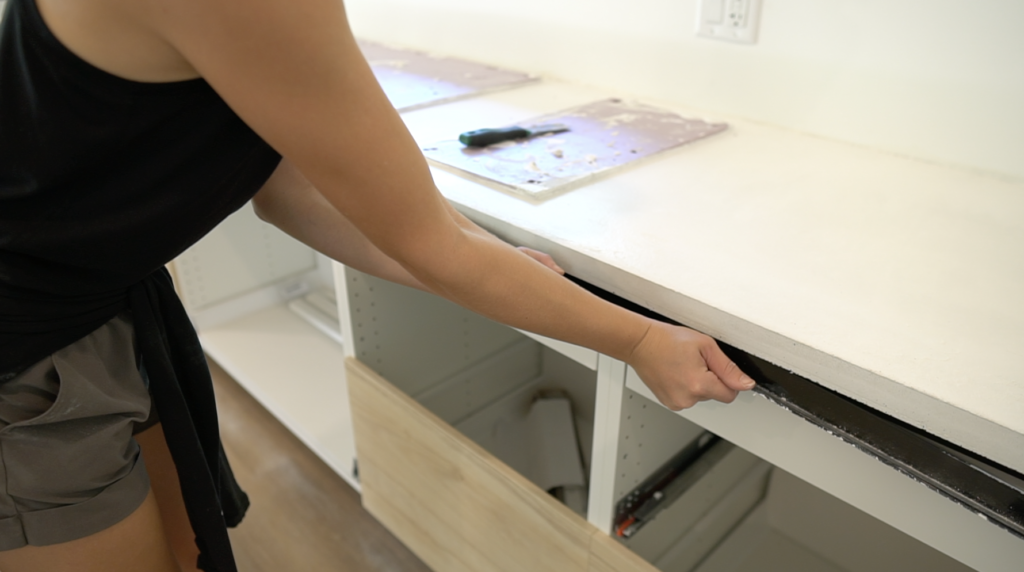
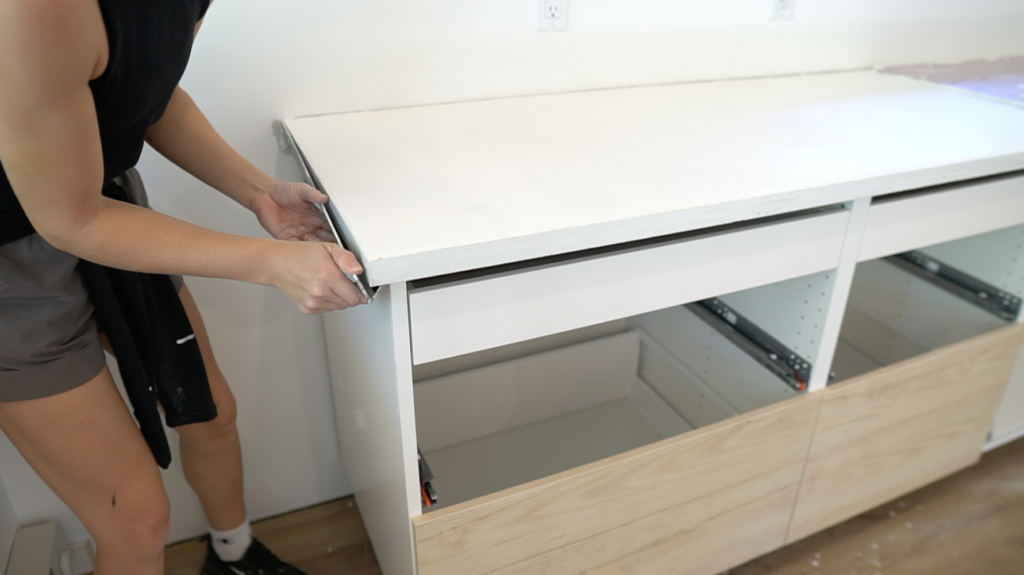
After letting the concrete cure for 24 hours you can remove the forms and styrofoam. You can remove the blocking from underneath as well if you added any. Before removing the forms take a block sander and sand off the top of the forms to clean up any concrete that is attached to the form so it doesn’t chip when trying to remove the forms.

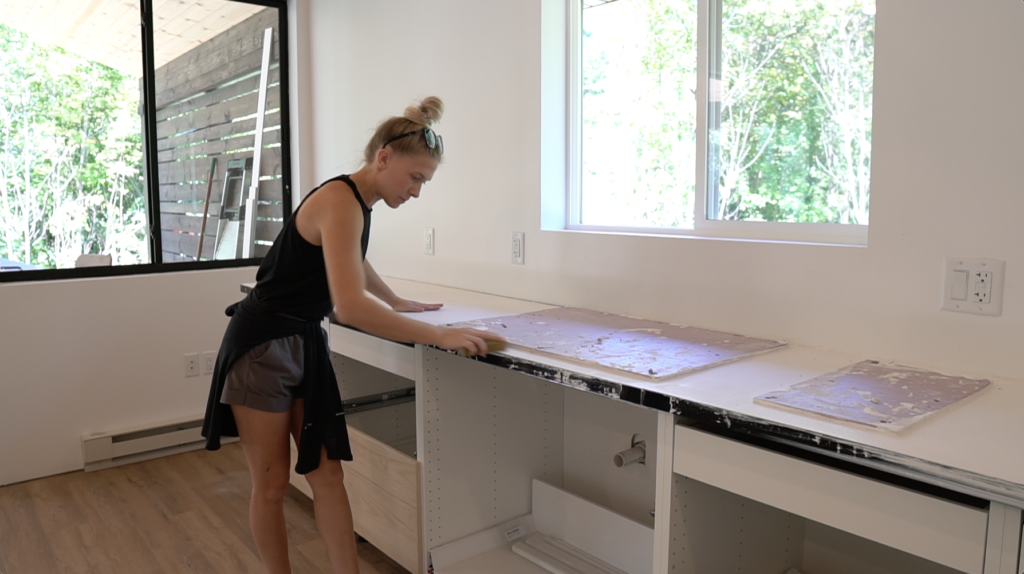
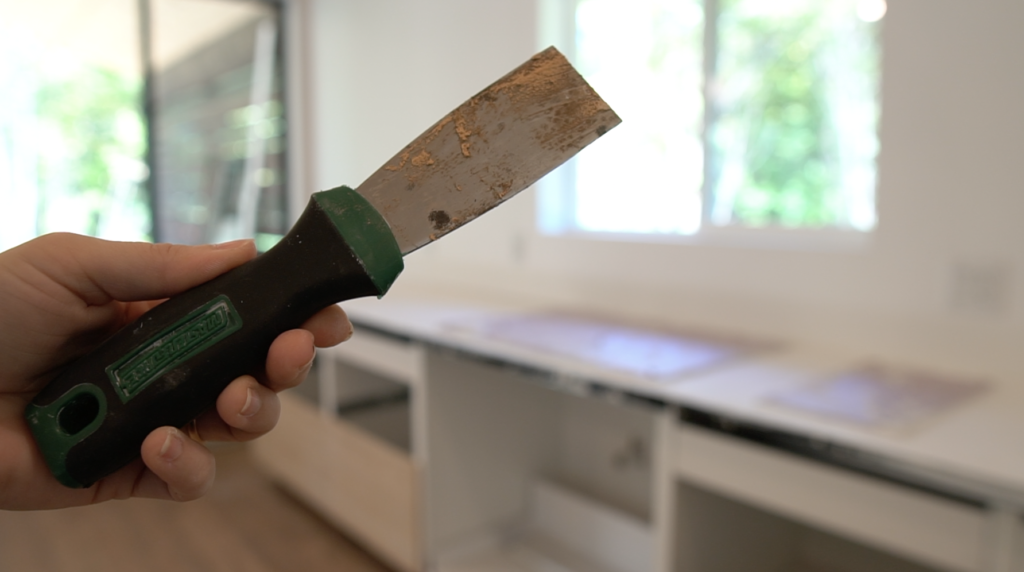
Next, take a margin tool or putty knife and run it along the seam to separate the form from the concrete
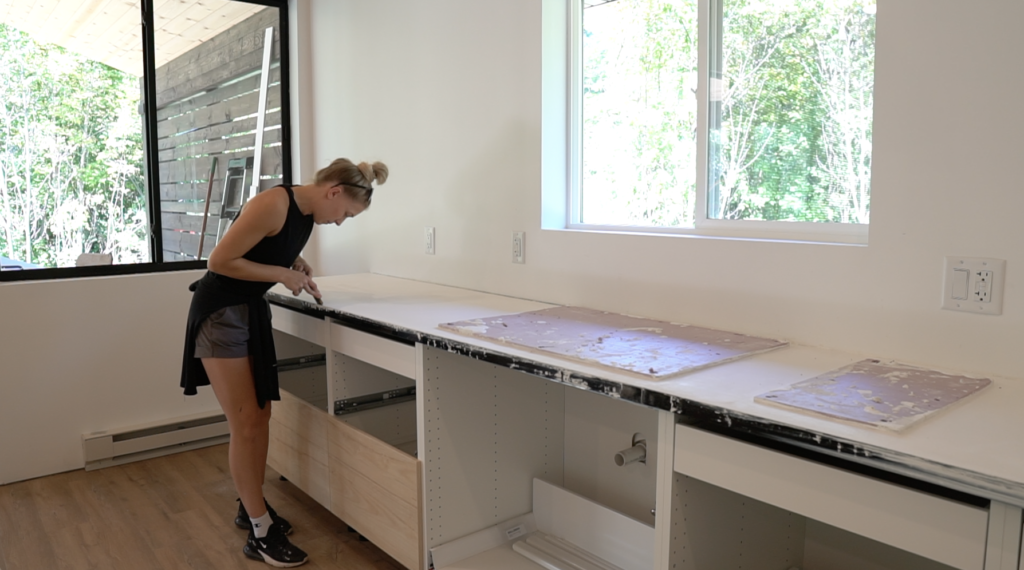

These forms have a “break point” and once it’s separated from the concrete you can just snap off the front half of the form to reveal a beautiful edge!


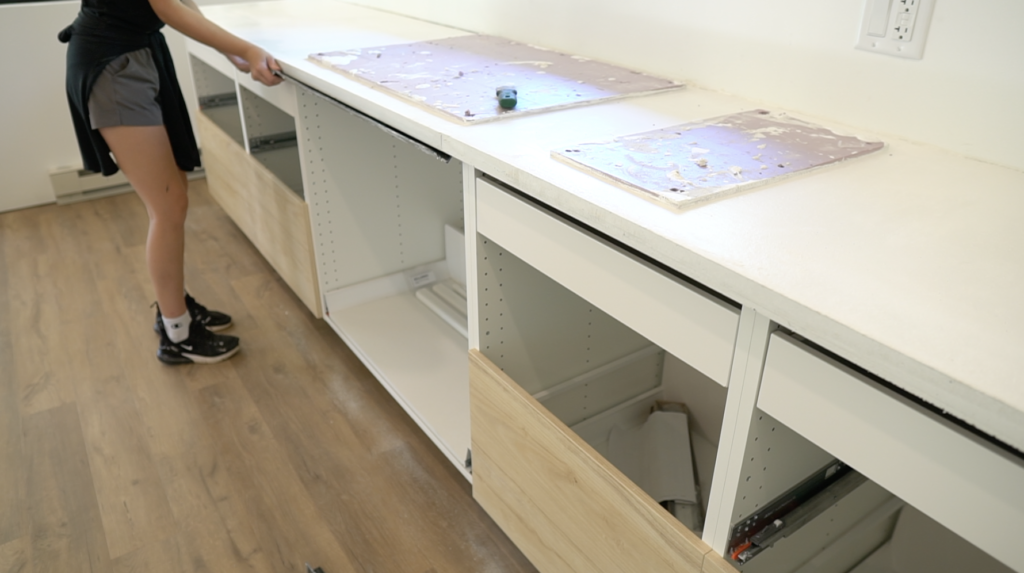


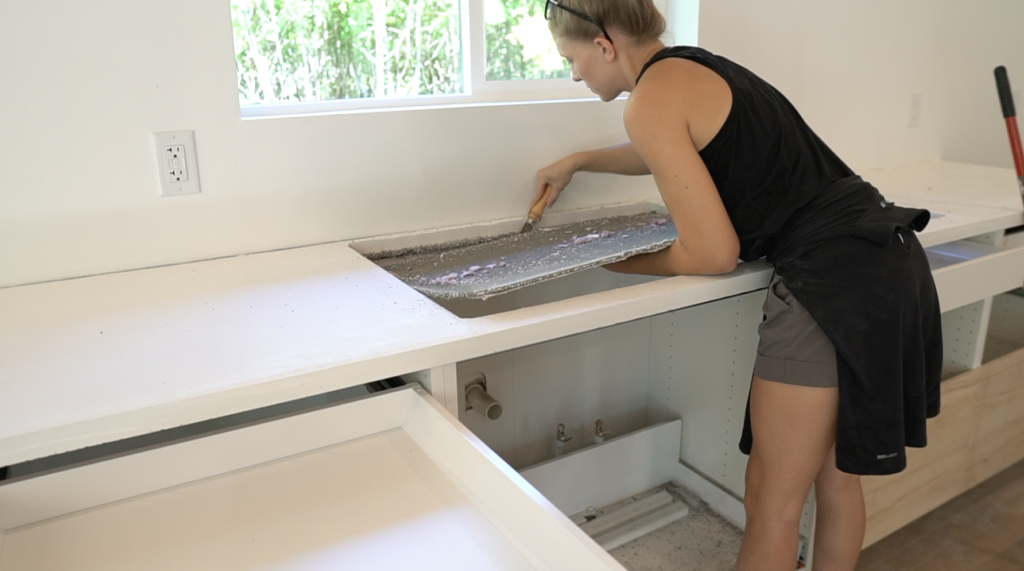
To remove the styrofoam I removed the screws first, cut an x into the foam and then dug out a hole were I could reach in and pull the foam up.

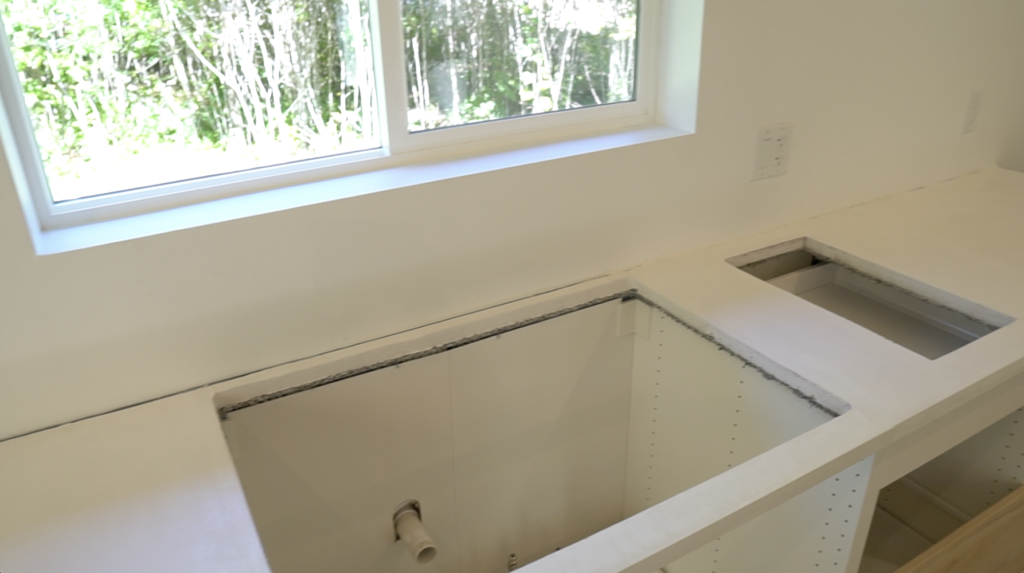
Now I’m taking a keyhole saw to cut the opening out for the sink and stovetop.

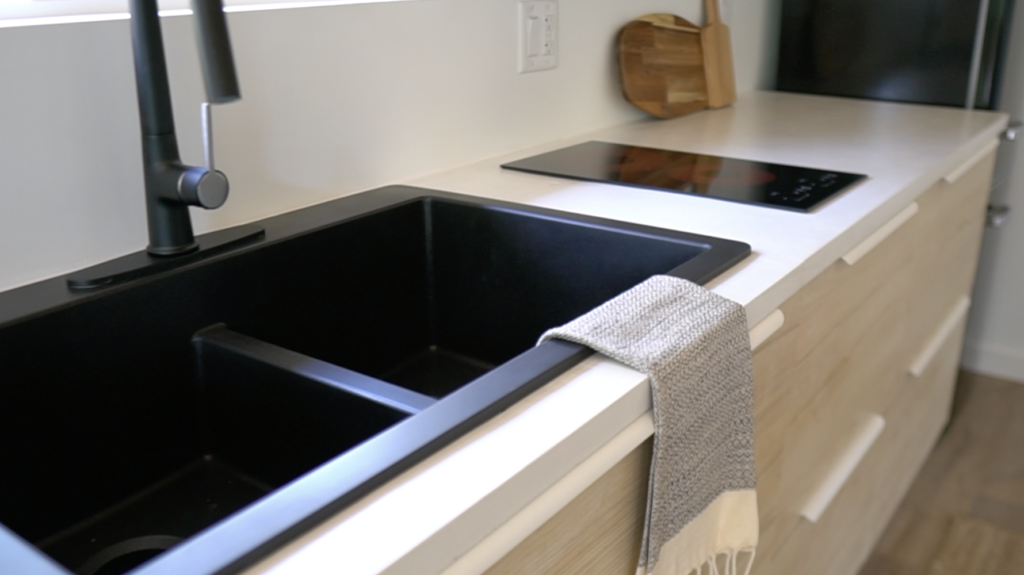
10) Finish Concrete Countertop
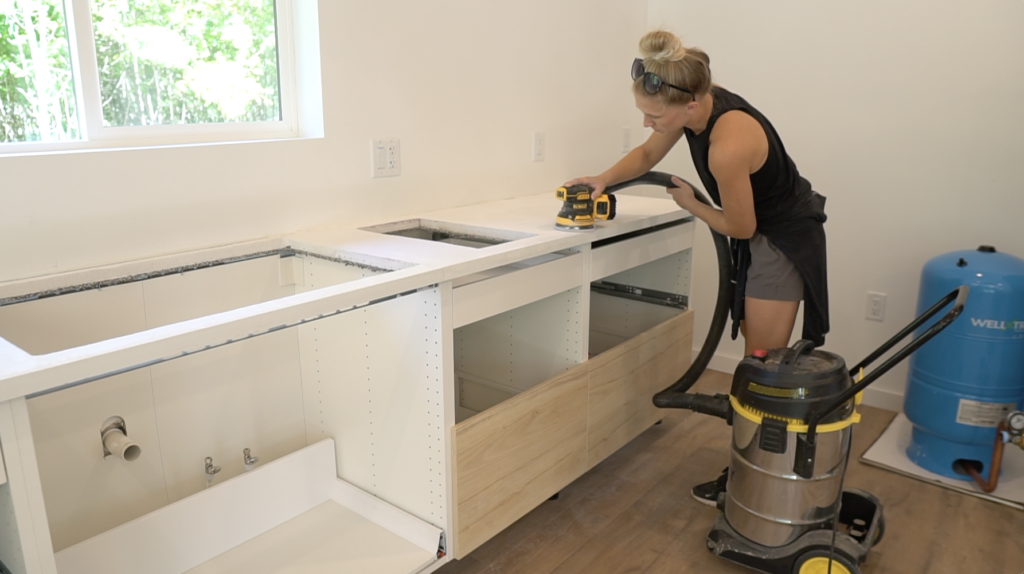
We had some bumps in the concrete so we smoothed them down with an orbital sander and 80/120/220 grit sand paper. I attached the sander to the shop vac to pick up all the concrete dust. You’ll also want to hit the edges carefully with your sander or a sanding block so that your edges and corners aren’t sharp.

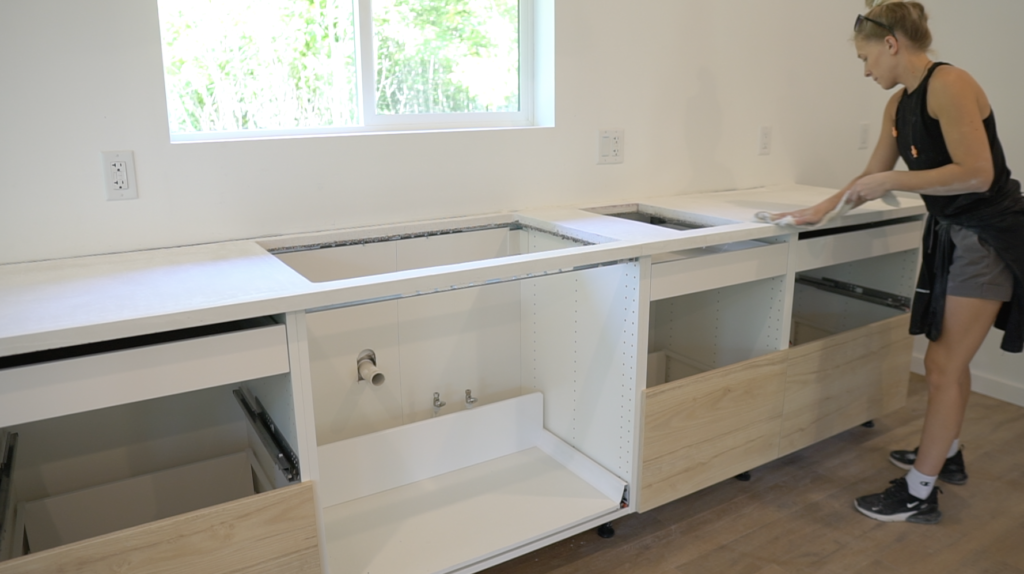
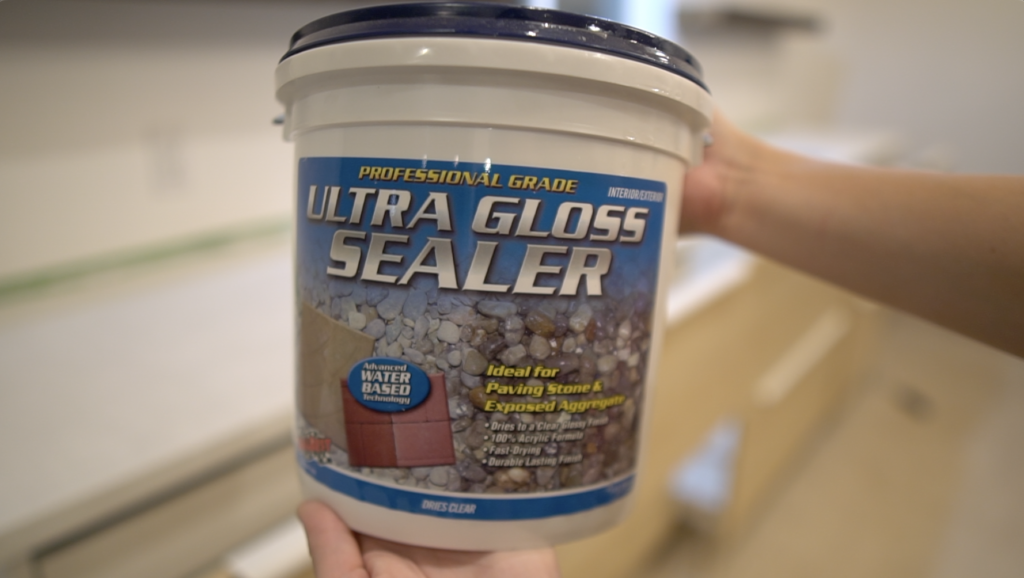
After sanding, take a bucket of water and wash the countertops down with a wet rag to get all the dust up. Last, I’m using this professional grade concrete sealer to seal the concrete. I taped off the wall and then used a foam roller to roll on 3 coats of this sealer. I sanded very lightly in between coats.


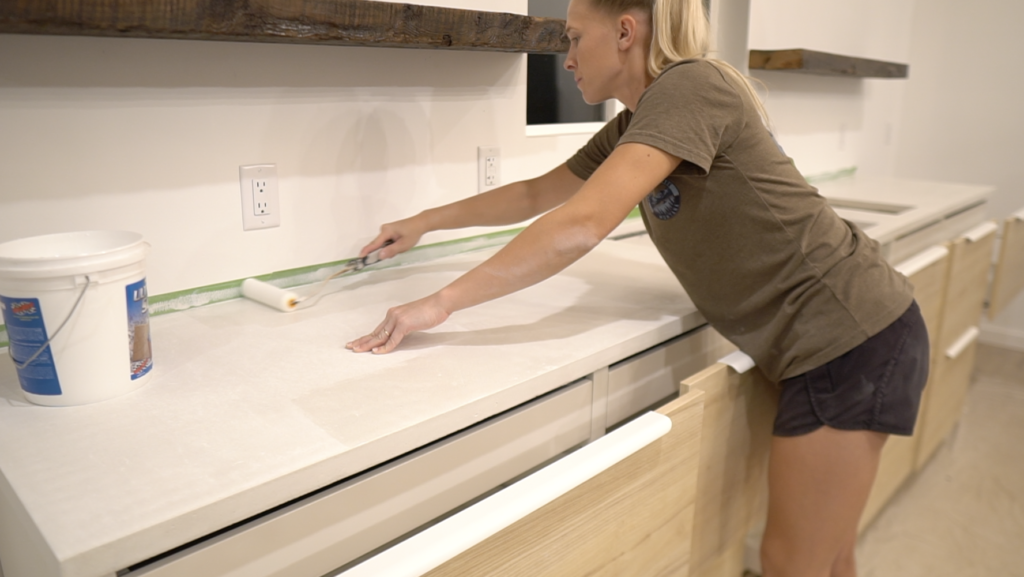
Finish off your countertop with a bead of water proof silicone caulking where your countertop meets the wall.

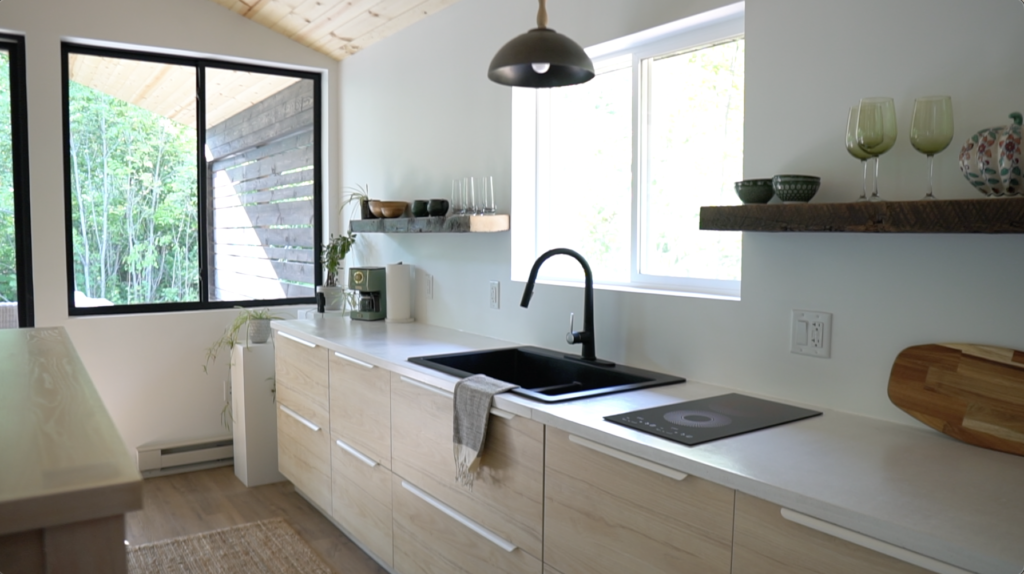
And there you have your own concrete countertops!! I hope you found this tutorial helpful.