


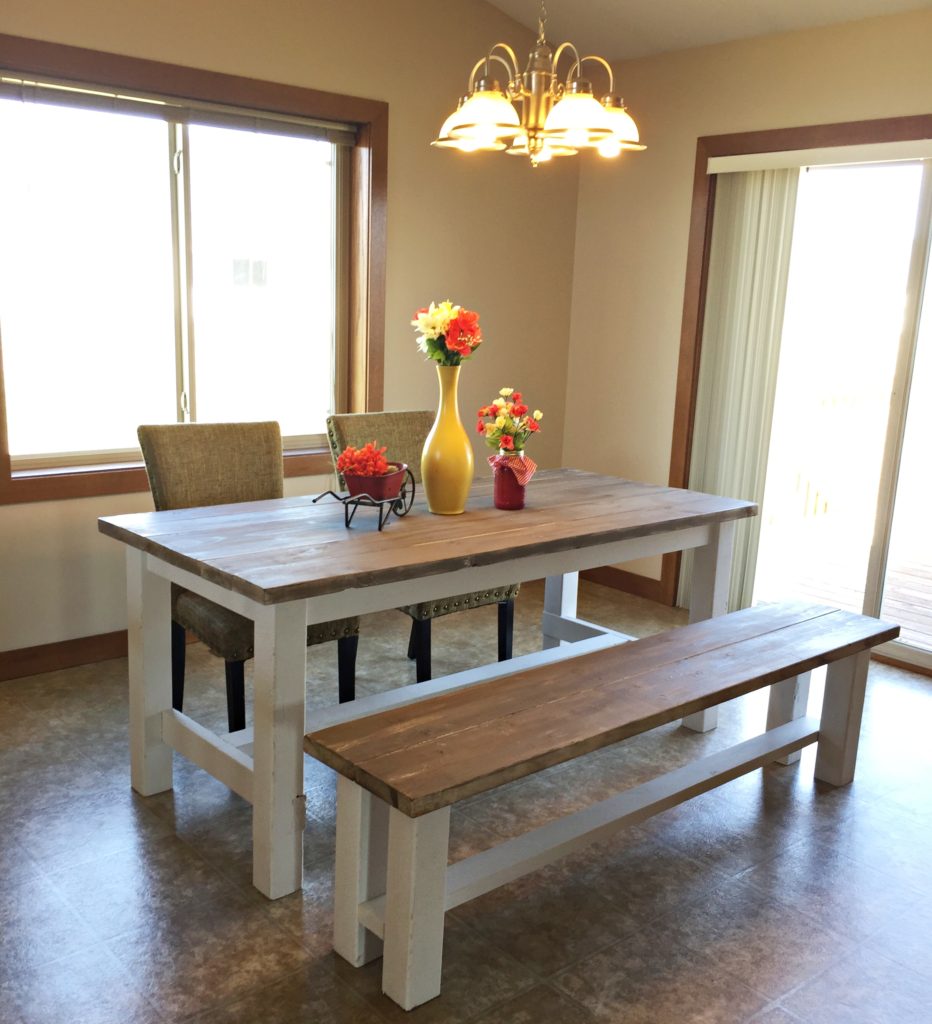
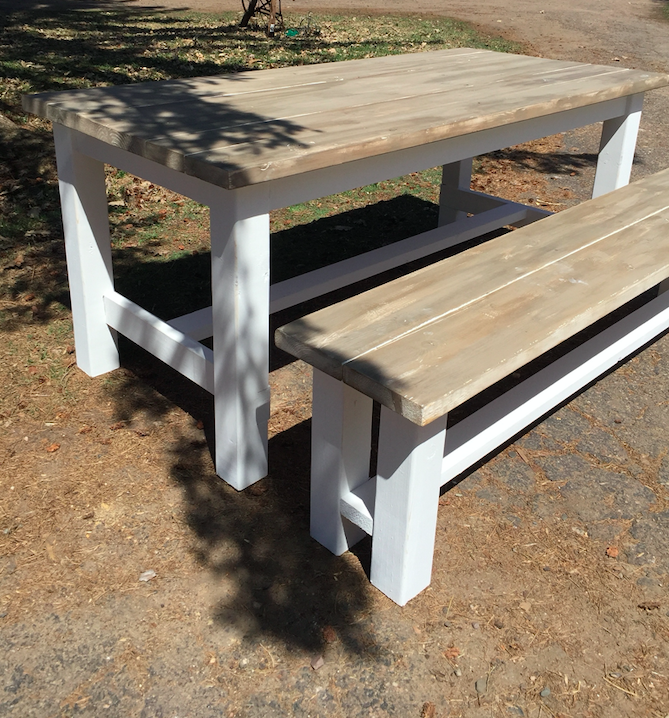
My obsession with the farmhouse style is REAL and I love building rustic elements to embrace this design trend. My best friend needed a dining room table and we thought that this would be the perfect table to fit her home. After a little research, and some trial and error, we created this beautiful table and bench where her and her family can enjoy breakfast lunch and dinner!
For instructions on how to build a matching farmhouse bench, click HERE!

This post contains affiliate links. If you decide to purchase from one of the links, I will receive a small commission at no additional cost to you. Thank you for your support!
TOOLS
| Miter Saw or Circle Saw |
| Tape Measure |
| Speed Square |
| Kreg Jig |
| 2 1/2″ Pocket screws |
| Pocket Hole Drill Bit |
| Cordless Drill |
| Chisel |
| Hammer |
| Wood Glue |
| Hand Sander |
| Sanding Paper |
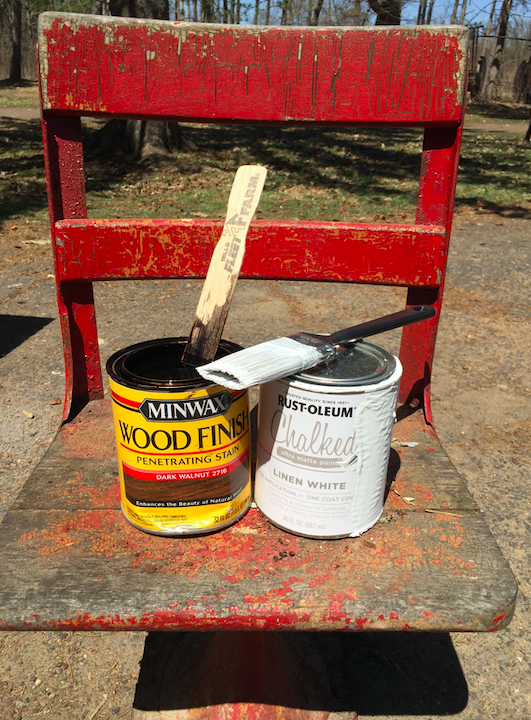
| Minwax Dark Walnut Stain |
| Rust-oleum Chalked Lined White Paint |
| Oil-based Wipe-on Polyurethane |
| Paint Brush |
| Rags |
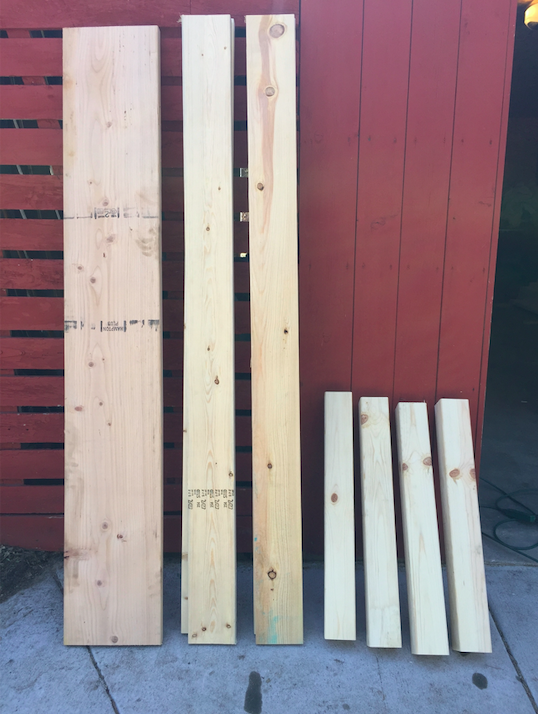
LUMBER LIST
| (#) | DIMENSION |
| (1) | 2″ x 10″ x 6′ |
| (4) | 2″ x 6″ x 6′ |
| (1) | 4″ x 4″ x 10′ |
| (4) | 2″ x 4″ x 8′ |
CUT LIST
| (#) | WOOD | LENGTH |
| (1) | 2″ x 10″ | @ 70″ (Table top plank) |
| (4) | 2″ x 6″ | @ 70″ (Table top planks) |
| (4) | 4″ x 4″ | @ 29″ (Legs) |
| (1) | 2″ x 4″ | @ 61″ (Stretcher) |
| (2) | 2″ x 4″ | @ 59″ (Long aprons) |
| (2) | 2″ x 4″ | @ 20 1/4″ (Short aprons) |
| (2) | 2″ x 4″ | @ 27 1/4″ (Lower leg supports) |
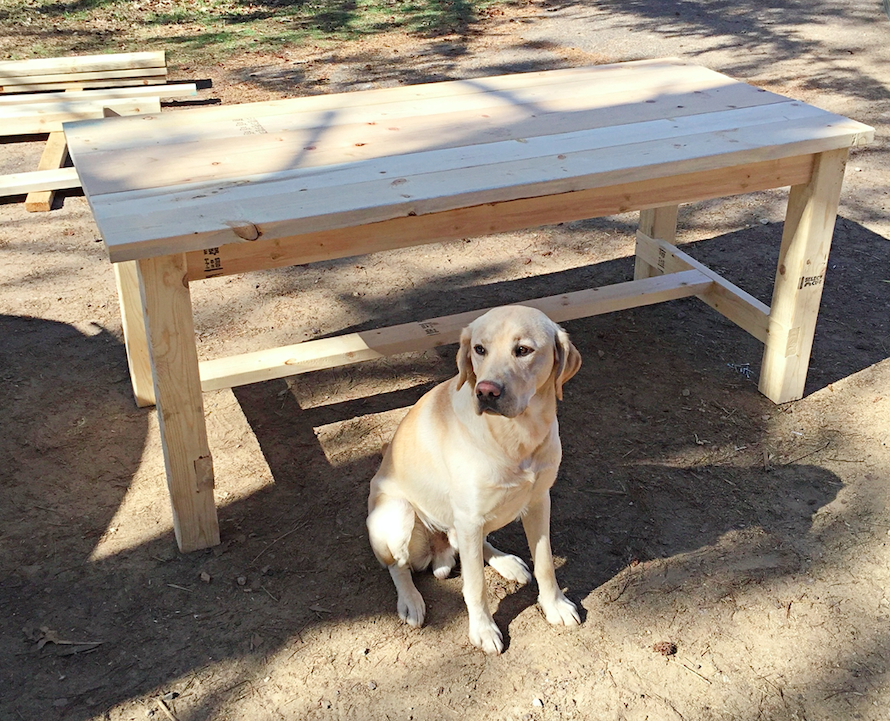
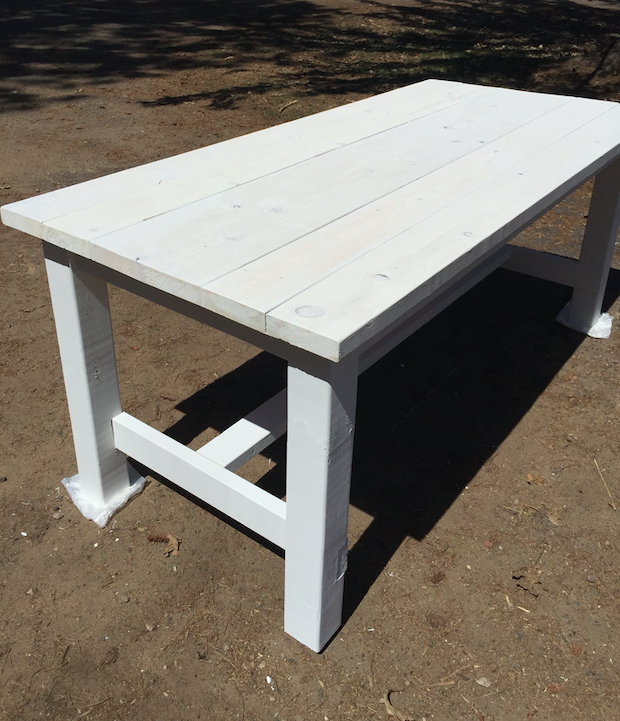
Our table top overall dimensions: 31 1/4″ wide x 70″ long x 30 1/2″ tall
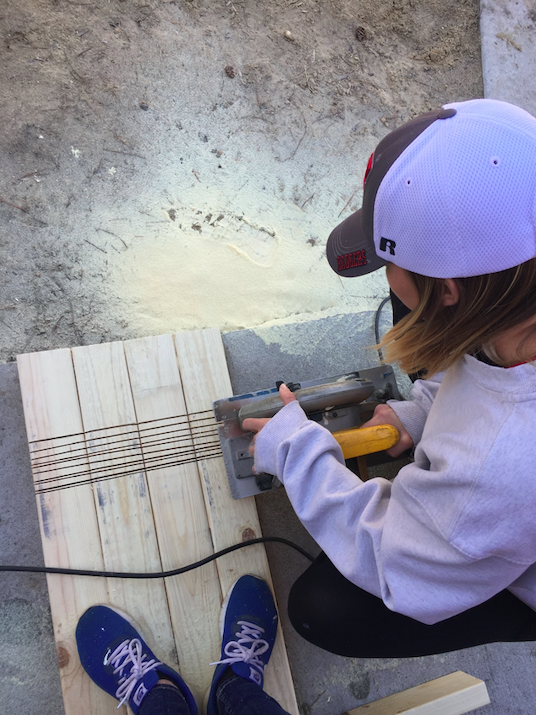
STEP 1: Cut wood to size
See cut list above.

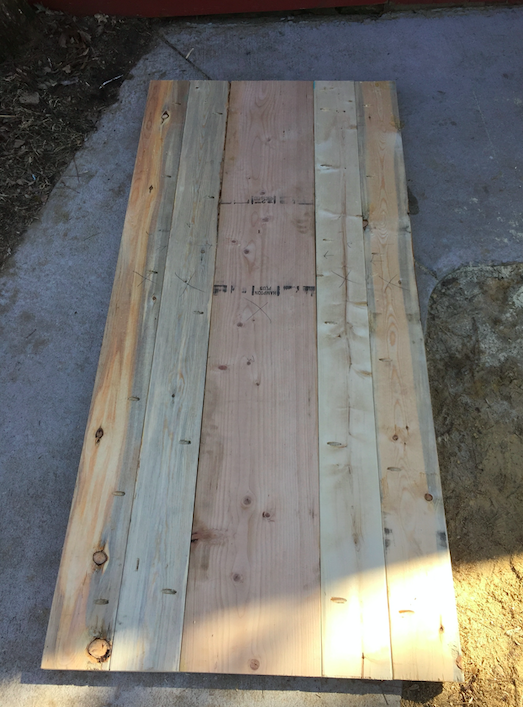
STEP 2: Construct table top
Take one 2×10 and four 2×6 boards and screw them together. The 2×10 piece goes in the middle. In order to screw these boards together, use a kreg jig and drill 6-8 pocket holes in each board. Using your 2 1/2″ pocket hole screws, secure each of the boards together.
For instructions on how to use a kreg jig, check out this video!
**Ensure you are on a flat surface, and that the good side of your lumber is facing down
**Use wood glue and clamps for extra bonding

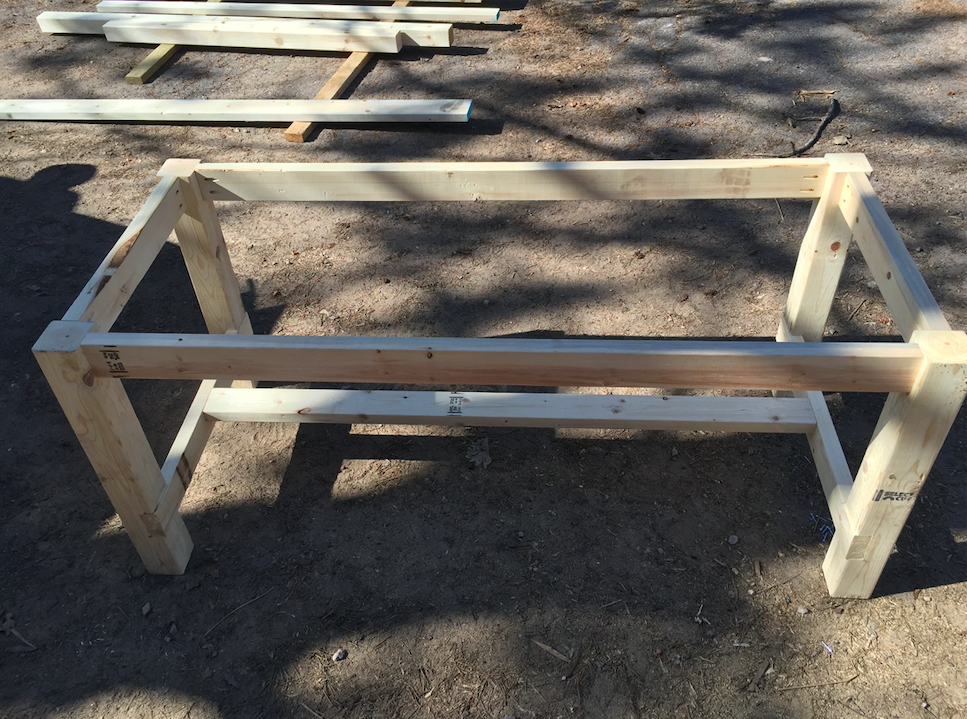
STEP 3: Cut notches in 4×4 legs
Set your circle saw to 1 1/2″ depth (depth of your 2×4). Put all of your legs together and secure with clamps or by standing on them ;). Measure up 6″ from the bottom of your legs, this is where you will start your cuts. Your cuts will need to be 3 1/2″ wide (width of your 2×4). Cut multiple lines through your 4×4’s.
After you’ve made all your cuts, take a hammer and chisel out all of the wood slits. A 2×4 should fit in each notch, so test it out with a scrap 2×4. If the 2×4 doesn’t sit flush with the 4×4 leg then you will need to chisel out more wood.

STEP 4: Construct table base
Attach each set of legs together with your 27 1/4″ lower leg supports. Place wood glue in each notch and slide your 2×4’s into the notch. Make sure that your 2×4’s are flush with the 4×4 legs.
Take the 59″ long aprons, drill two holes at each end with a kreg jig, and screw the 2×4 into the 4×4 using pocket hole screws. Make sure that your 2×4 is centered on the 4×4 and the top of the 2×4 is flush with the 4×4’s.
Take the 20 1/4″ short aprons and screw them in to your 4×4 legs using the kreg jig. Again, make sure that these 2×4’s are centered on the 4×4 and that it is flush with the top of the 4×4 leg.
Take the 61″ stretcher, and screw it into your lower leg supports using the kreg jig. Make sure that the stretcher is centered on your leg supports and flush at the top. Put these screws on the bottom of the 2×4 so you don’t see them.

STEP 5: Attach table top to base
Using your kreg jig, make pocket holes in your 2×4 support boards. Use pocket screws to secure the table top to the 2×4 boards by screwing up into the table top. Make sure that your table top is centered and the overhang is even on all sides.
**If you followed our dimensions, you should have a 2″ overhang on each side of the 4×4 legs.

STEP 6: Sand!
Using your hand sander, sand the entire table. Try and make the table top as smooth as possible. Be sure to sand all corners and edges so they aren’t sharp. Start with a coarse grit then work your way to a fine grit sandpaper.
STEP 7: Stain or paint
For the base of the table, we used the Rust-oleum Chalked Lined White Paint. For the table top, we mixed half water and half white chalk paint in a plastic cup. Brush on the water/paint mixture to the entire table top. To get the gray washed look we took a rag, dipped it in stain then rubbed long streaks of the stain on the table top. With a dry rag, blend in all the streaks and harsh lines.
Apply oil-based wipe-on polyurethane. I recommend this type of poly because it is durable, food safe, and easy to apply!
**Practice on a scrap piece of wood until you find what works best for you!


STEP 8: Build matching farmhouse bench
To see DIY instruction of the matching farmhouse bench, click HERE!
