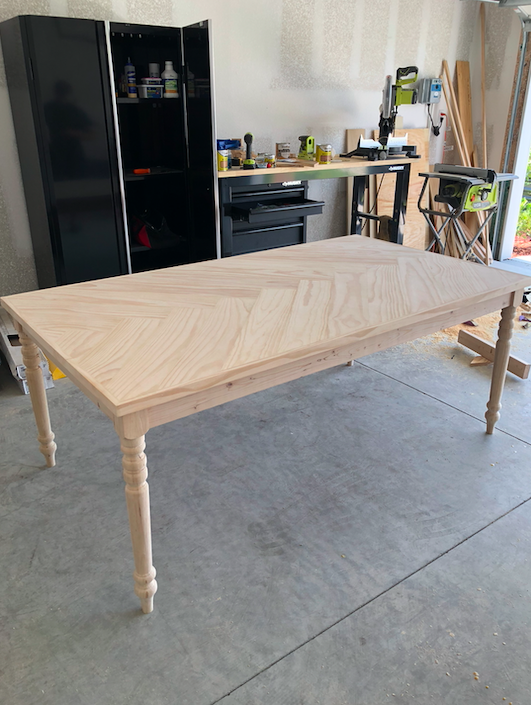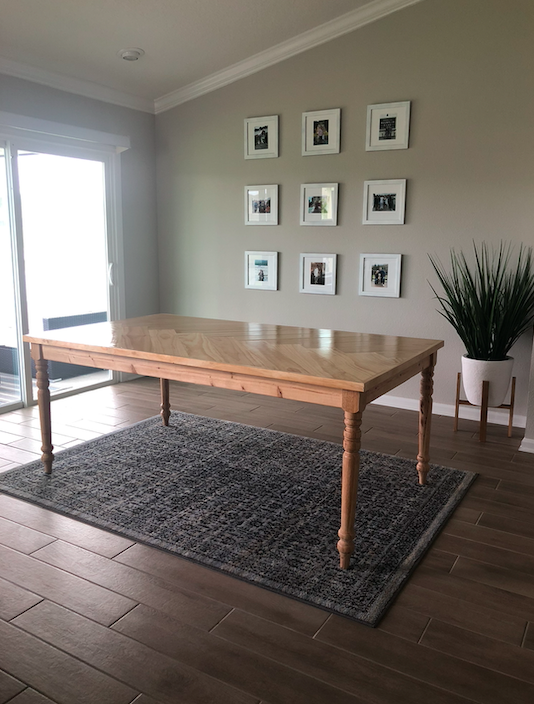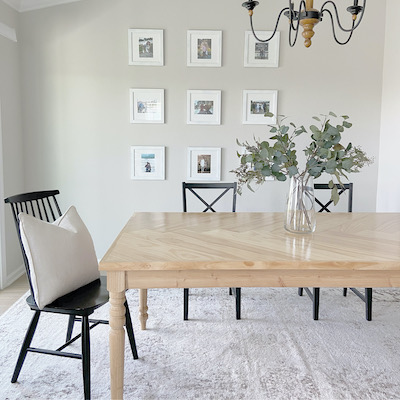
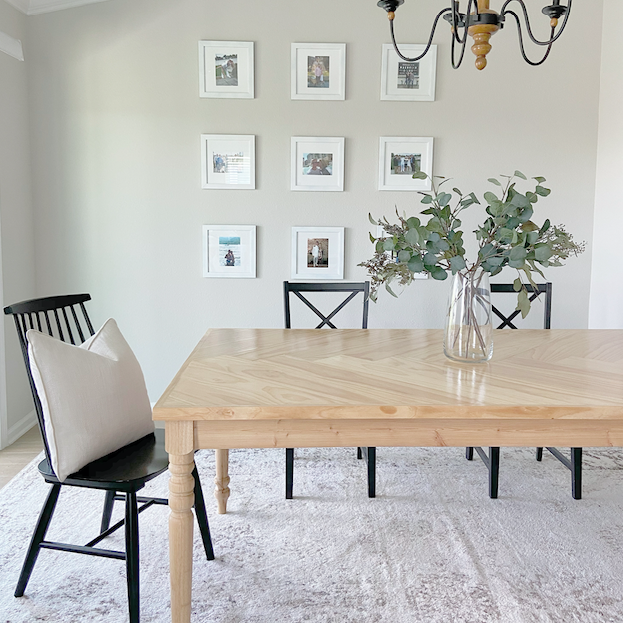
I love the herringbone pattern and I wanted to try and incorporate it into our dining room table design. We hosted friends for the first time in our new home and it was such a blessing to have everyone sit around the dining room table that I worked on for hours. We are looking forward to creating many more memories at this table!
This post contains affiliate links. If you decide to purchase from one of the links, I will receive a small commission at no additional cost to you. Thank you for your support!

TOOLS
| Miter Saw or Circle Saw |
| Tape Measure |
| Speed Square |
| Kreg Jig w/ drill bit |
| 2″ Pocket screws |
| 2 1/2″ Pocket screws |
| Cordless Drill |
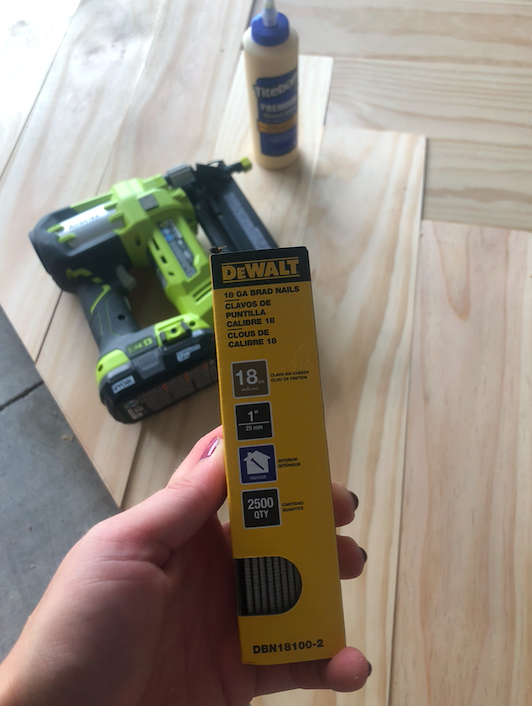
| Nailer with 1 1/4″ Brad Nails |
| Wood Glue |
| Wood Filler |
| Putty Knife |
| Hand Sander |
| Sanding Paper |
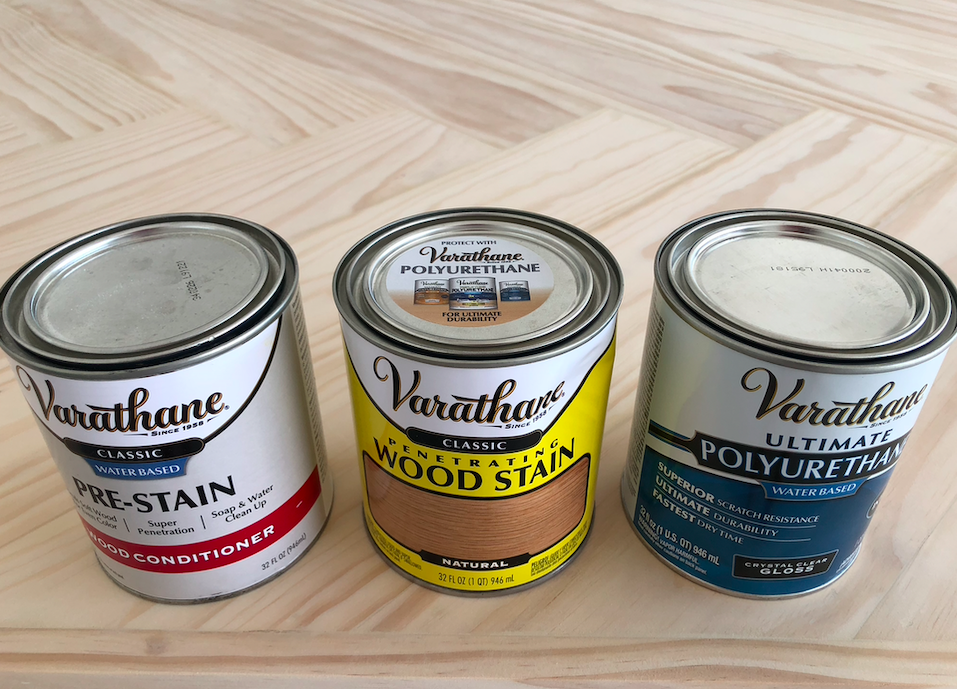
| Water Based Pre Stain Wood Conditioner |
| Stain (Natural) |
| Water Based Polyurethane (Gloss) |
| Poly Brush |
| Rags (for wood conditioner & staining) |
LUMBER LIST
| (#) | DIMENSION |
| (3) | 2″ x 4″ x 8′ (4 Supports) |
| (1) | 2″ x 2″ x 8′ (1 Middle Support) |
| (3) | 3/4″ x 1″ x 8′ Poplar (Table Trim) |
| (1) | 4′ x 8′ x 15/32″ Plywood (Table Top) |
| (5) | 1″ x 6″ x 8′ Poplar (Herringbone Top) |
| (3) | 1″ x 6″ x 6′ Poplar (Herringbone Top) |
| (4) | Table legs (Eco Relics Store) |
CUT LIST
| (#) | WOOD | LENGTH |
| (2) | 2″ x 4″ | @ 66 1/2″ (Long Supports) |
| (2) | 2″ x 4″ | @ 34 1/2″ (Short Support) |
| (1) | 2″ x 2″ | @ 37″ (Middle Support) |
| (1) | 15/32″ x 4′ x 8′ | @ 72 1/2″ x 40 1/2″ (Table Top) |
| (2) | 3/4″ x 1″ | @ 74″ (Long Table Trim 45 degree long end to long end) |
| (2) | 3/4″ x 1″ | @ 42″ (Short Table Trim 45 degree long end to long end) |
| (TBD) | 1″ x 6″ | Dimensions TBD (Herringbone Top) |
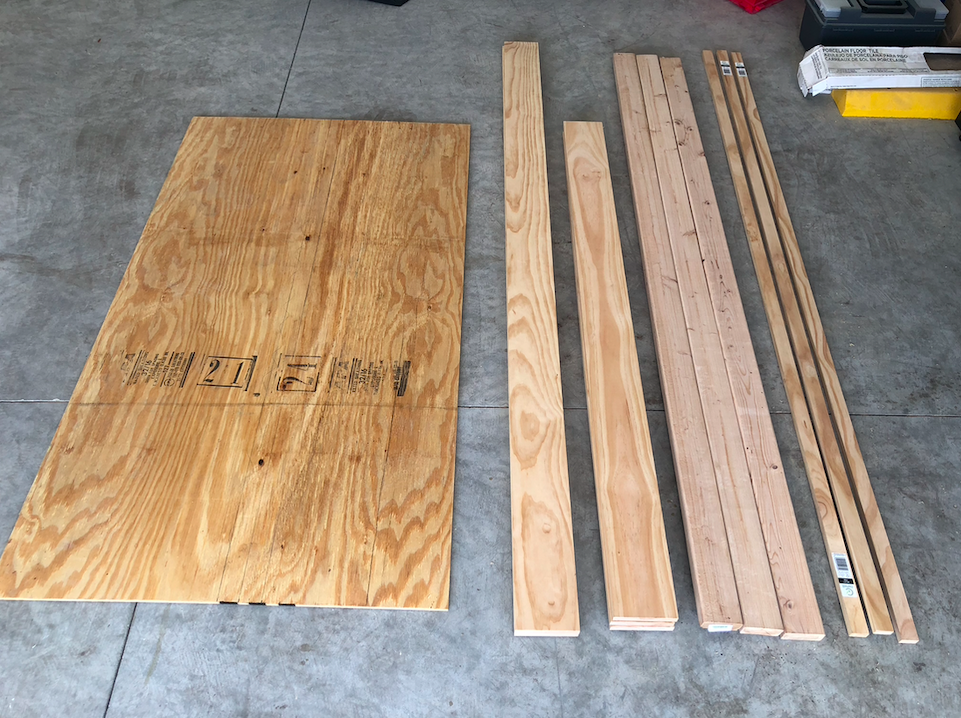
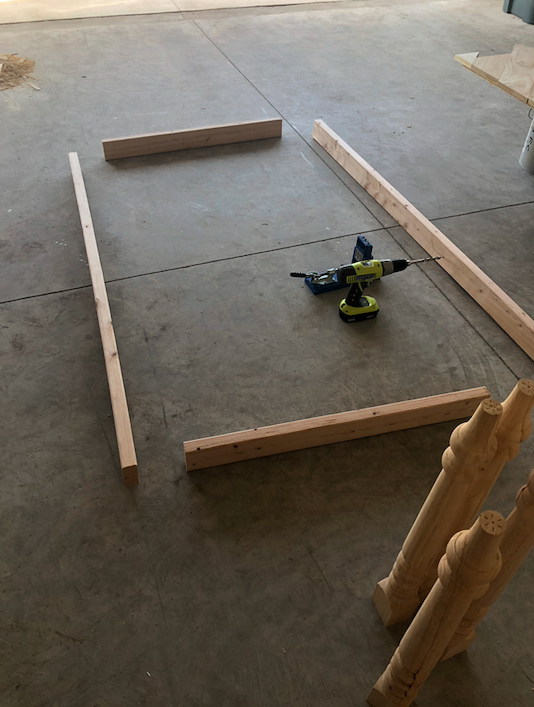
STEP 1: CUT MATERIALS
The cut list above is based off a table size 74″ (L) X 42″ (W) X 30″ (H). I went to Home Depot and had them cut the big stuff for me so that I could fit it into my SUV. I found the unique table legs at a local architectural resale shop that were each about 28 3/4″ long. I didn’t provide dimensions for each of the 1″ x 6″ pieces for the herringbone top. Once you get the plywood top cut to size, you can start adding the 1″ x 6″ pieces and cut as you go.

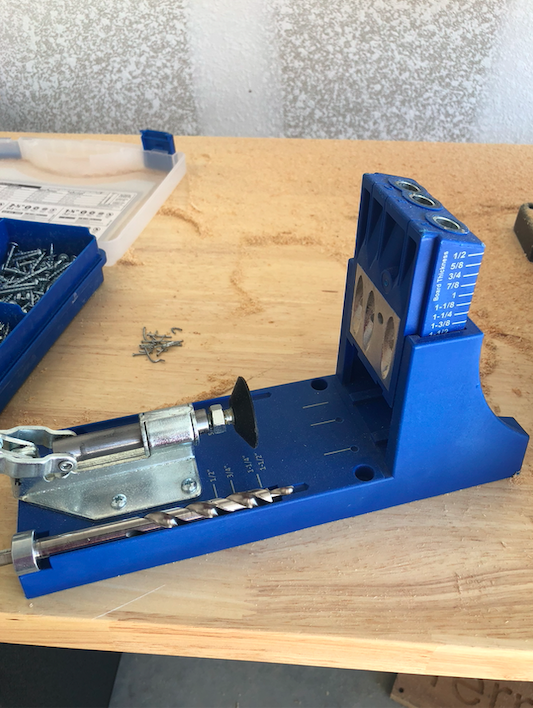
STEP 2: DRILL POCKET HOLES
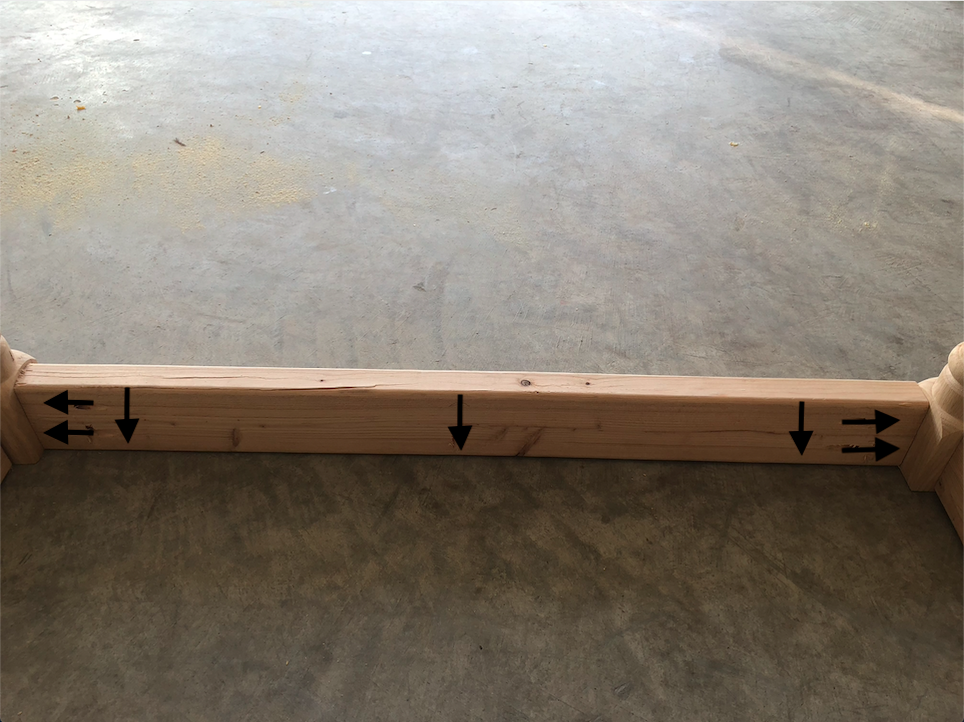
Set your kreg jig and drill bit to 1 1/2″. Line up your wood in the kreg jig and drill a hole in slots A and B. For each of the 4 supports, you should have 2 holes in each end and 2-3 holes along the top (see picture below).
For a video on kreg jig instructions click HERE.


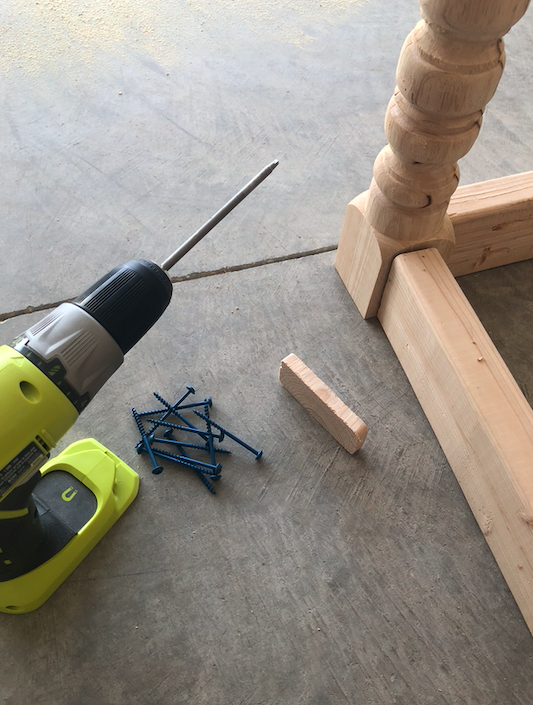
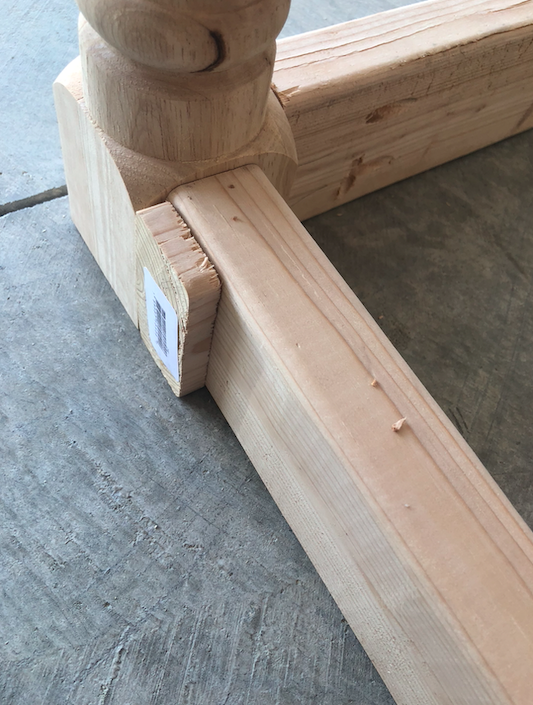
STEP 3: ASSEMBLE TABLE LEGS AND SUPPORTS
Use wood glue and your 2 1/2″ screws to secure the supports to the table legs. I used a 1/4″ spacer (scrap piece of wood) so that there will be a 1/4″ gap, instead of the 2″ x 4″ being flush with the table leg. Make sure that your pocket holes along the top of the supports are facing up so that you can drill screws up into the table top.


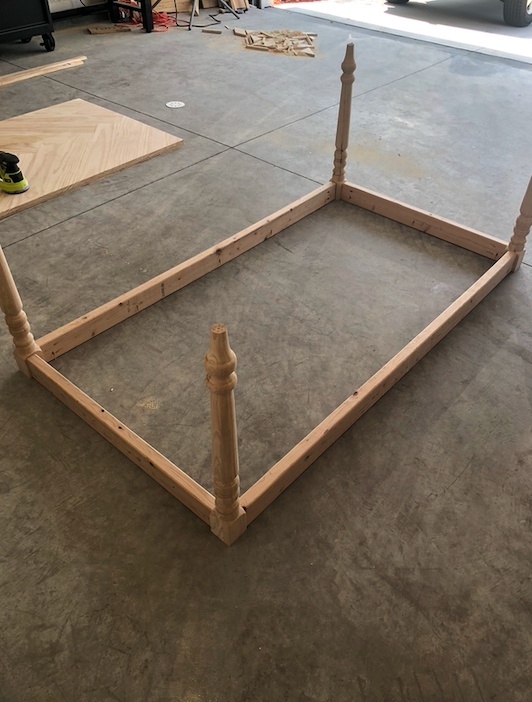

STEP 4: INSTALL MIDDLE SUPPORT
Measure and cut your middle support. Drill two pocket holes in each end and screw them into your side supports using 2″ screws.

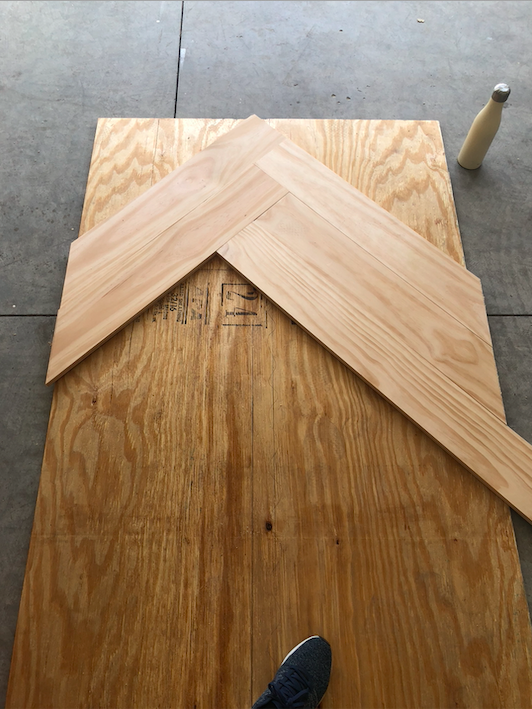
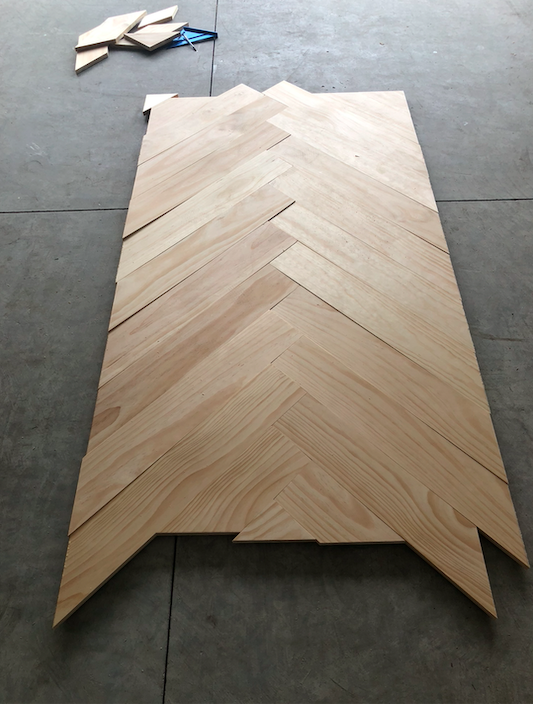
STEP 5: ASSEMBLE TABLE TOP
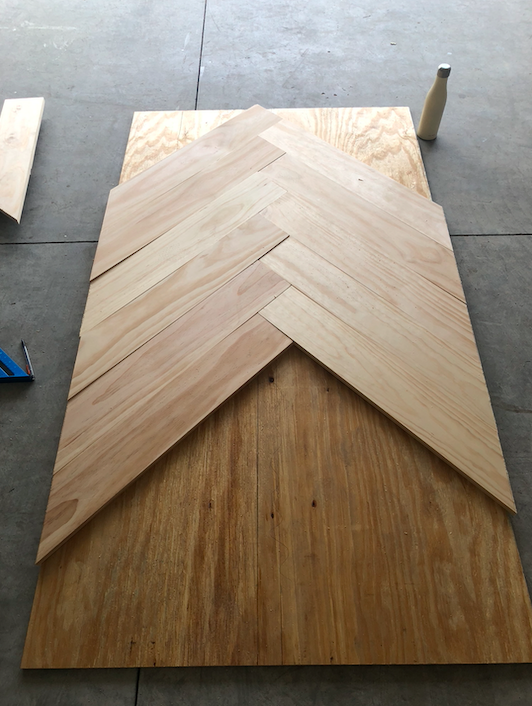
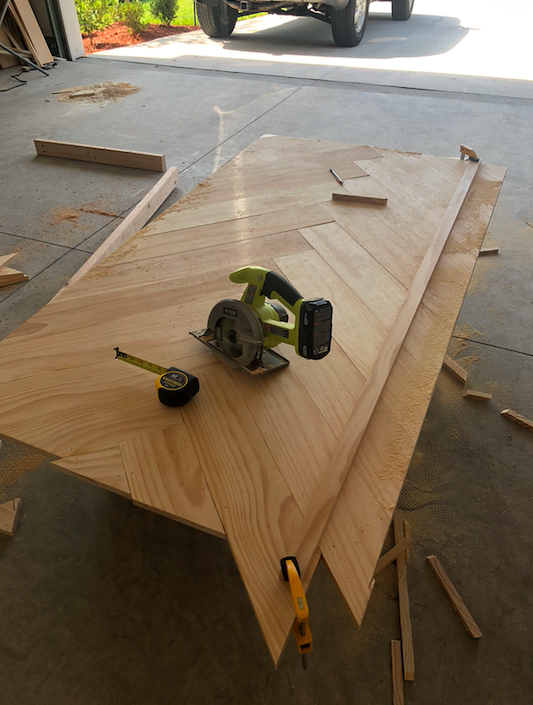
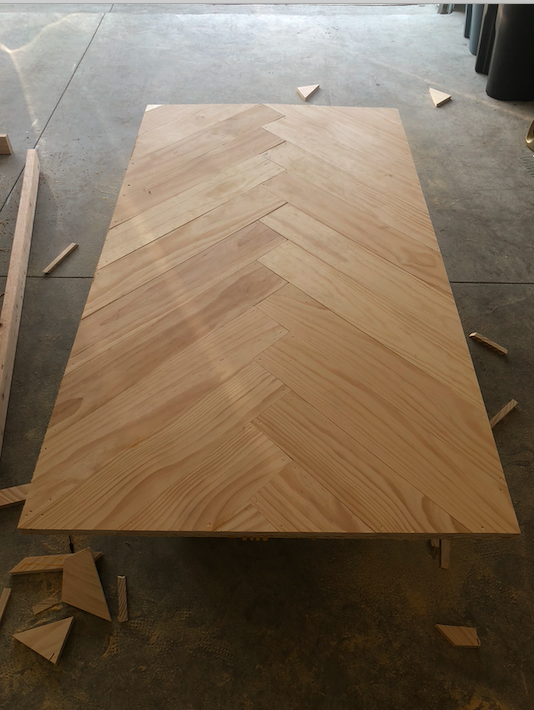
Draw a line down the middle of your plywood as a guide. We moved our line to the left about 2.5″ so that the zig zag would be centered down the table. Start by cutting a 45 degree angle in one of your 1″ x 6″s. Line up the top corner of your 1″ x 6″ and keep making 45 degree cuts until you fill your entire plywood board. Don’t worry if the 1″ x 6″s hang off the edges of your plywood. We will cut the excess off in the next step.
Once you dry fit all of the 1″ x 6″ herringbone pieces. Use wood glue and 1 1/4″ nails to secure them in place. After everything is secure, we placed a bunch of weight on the top for one night to let the wood glue set.


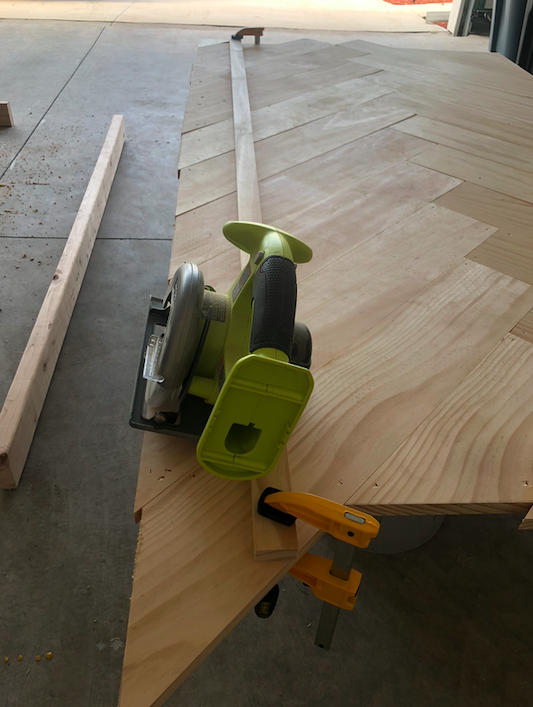
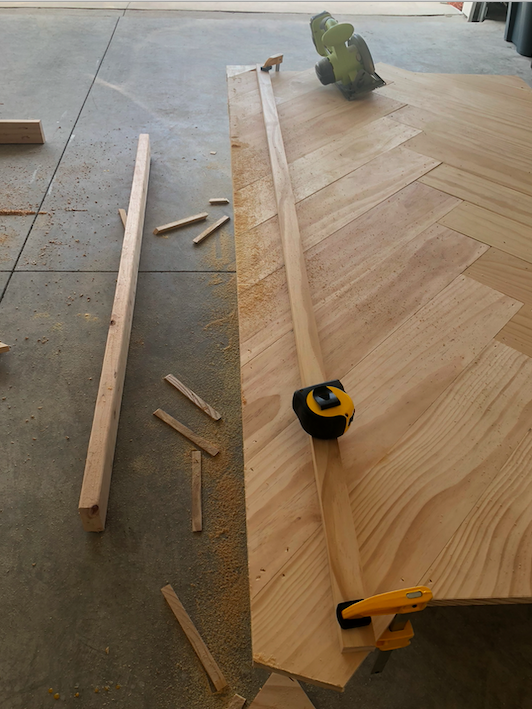
STEP 6: CUT OFF EXCESS
Use a scrap piece of wood as a guide and clamp it down so that you can make a straight cut down the edge of your herringbone table. Cut off all the excess 1″ x 6″ pieces.


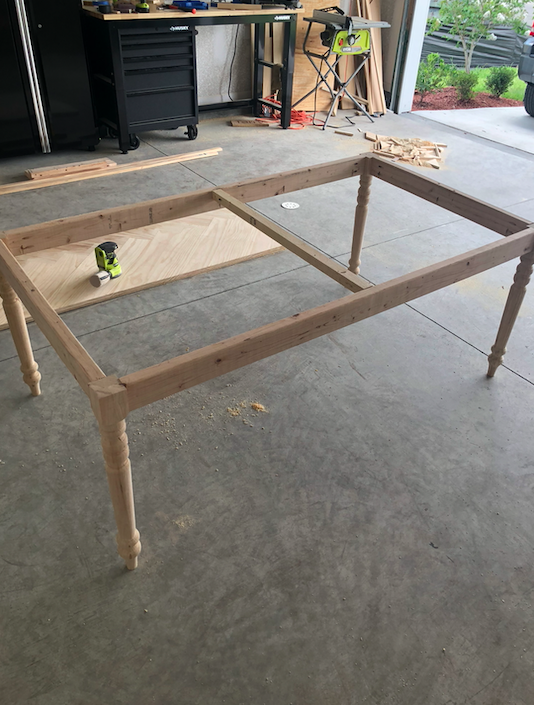
STEP 7: ATTACH TABLE TOP
Flip the table top over on a flat and clean surface. Flip over the table base and center it on the table top. Screw the 2″ screws through the pocket holes and into the table top.
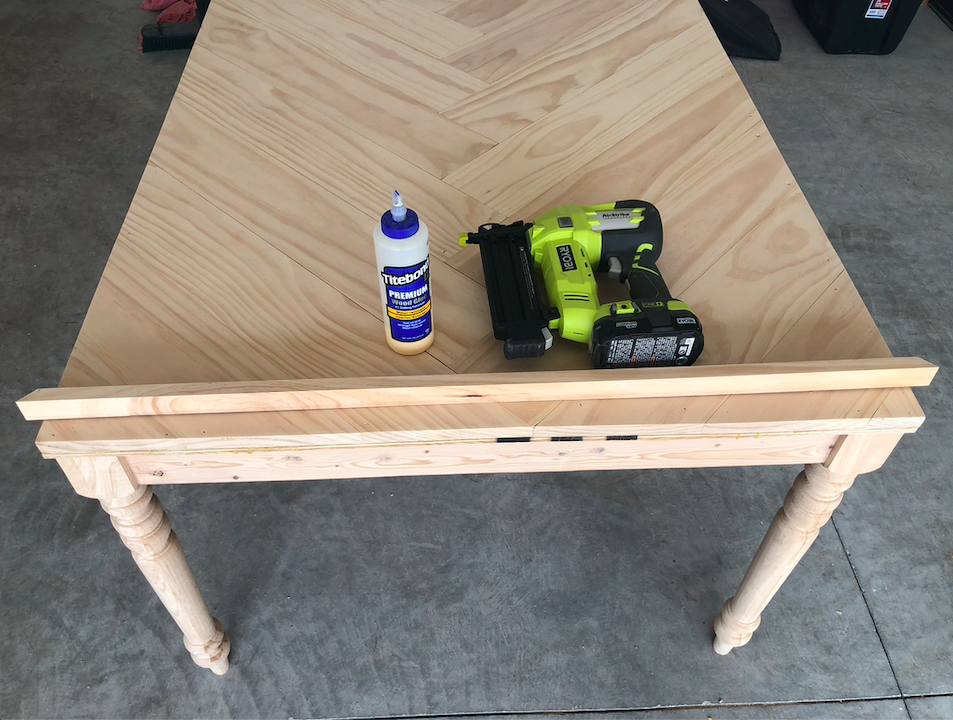
STEP 8: NAIL ON EDGING
Cut the edging to size using a 45 degree angle on your miter saw. Use wood glue and a nailer to nail the edging into your table top. Don’t worry if there are gaps in your edging and the table top, or in the corners. You can fill in these gaps with wood filler.
***We ended up putting our trim through the table saw to shave a bit off so that it was the same depth as the table top.

STEP 9: FILL HOLES / CRACKS
Use wood filler and a putty knife to fill in all the cracks, and gaps in your table top. Also fill in any little nail holes that are visible. This wood filler goes on pink and dries clear.


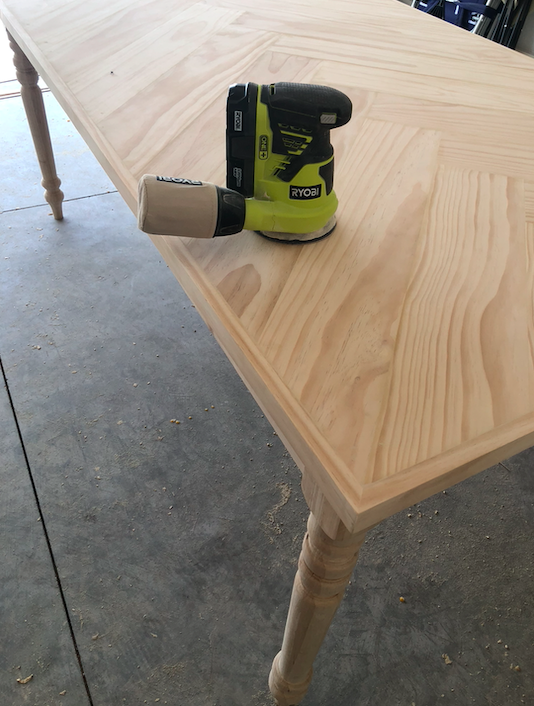
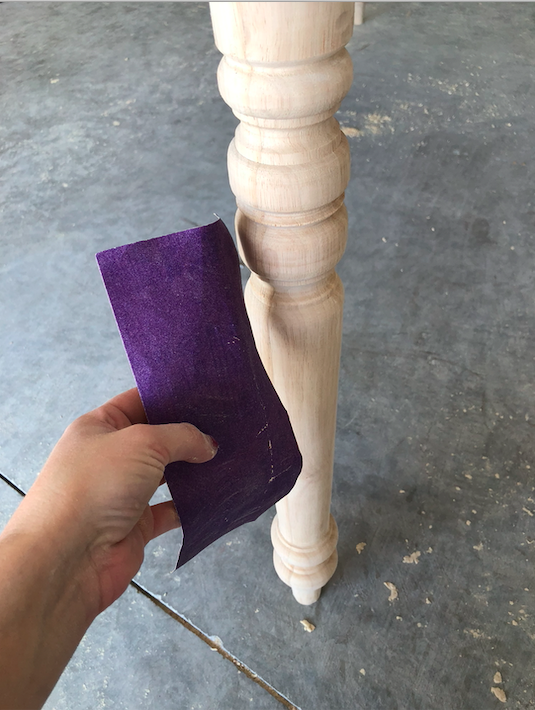
STEP 10: SAND
Sand the entire surface of the table using an electric sander. Use a piece of sand paper to sand the table legs. Start with rough grit then work to fine grit. Be sure to get corners so they aren’t as sharp.


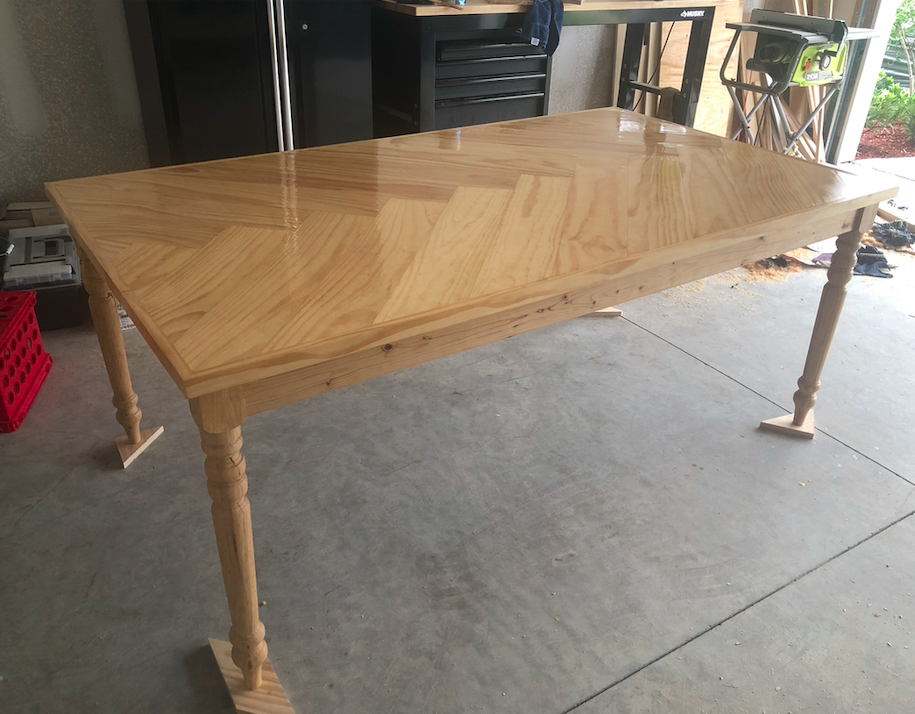
STEP 11: STAIN OR PAINT!
First use a pre stain wood conditioner, stain, then a polyurethane. Follow directions on each can. I used Natural stain for this herringbone table and I love how light and natural it looks!