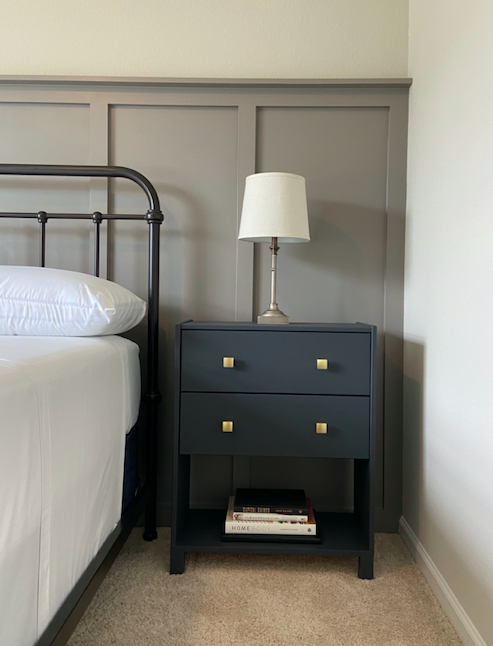
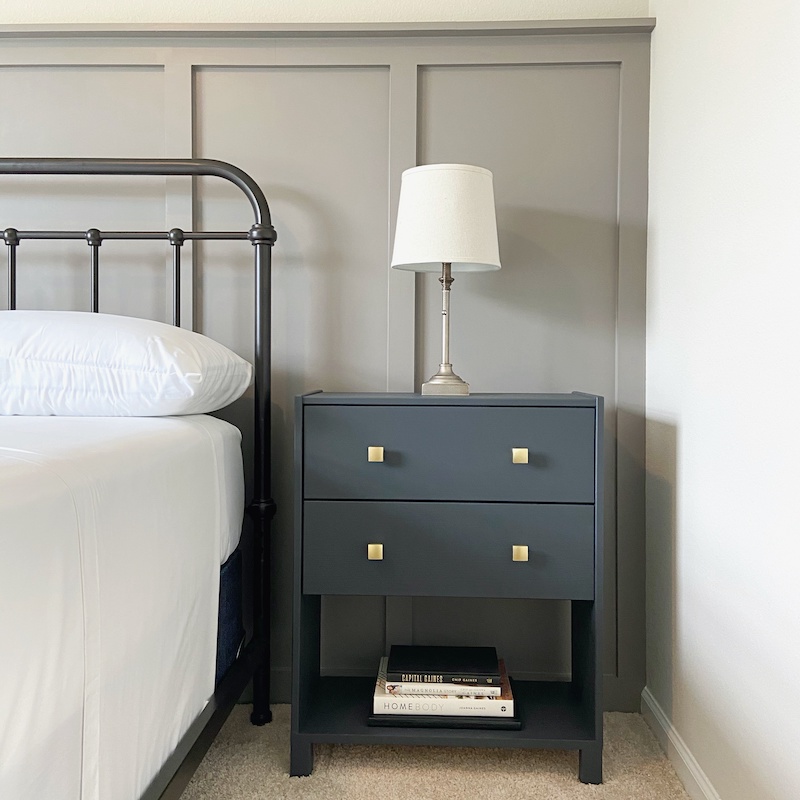
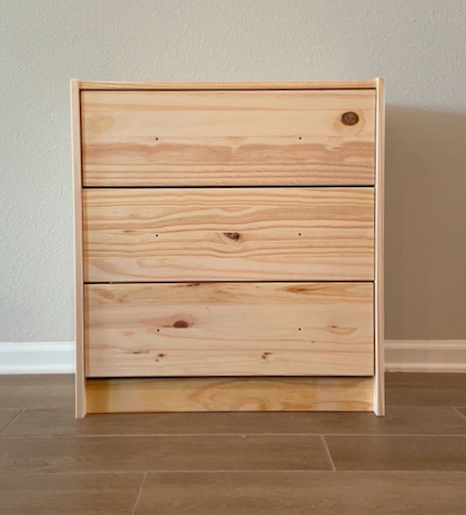
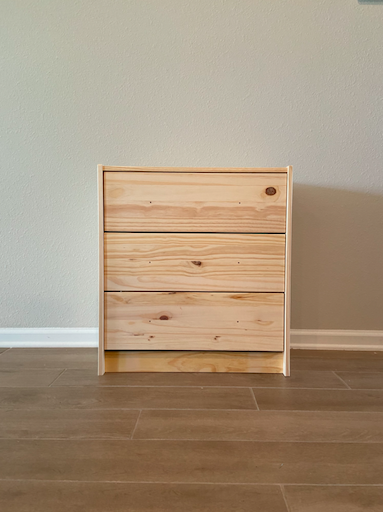
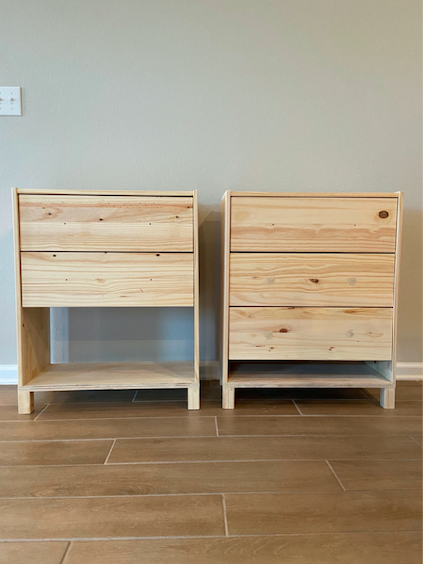
I’m working on giving our guest bedroom a makeover under $500 and needed a pair of nightstands that wouldn’t break the bank! For the past 3 weeks I searched facebook marketplace and thrift shops for a pair of cheap nightstands I could refurbish. I didn’t have any luck… so I turned to Ikea and got these $40 RAST dressers. They are a little plain and boring so I customized them to look more high end to fit my space. Check out the YouTube tutorial and the steps below for this fun Ikea hack!

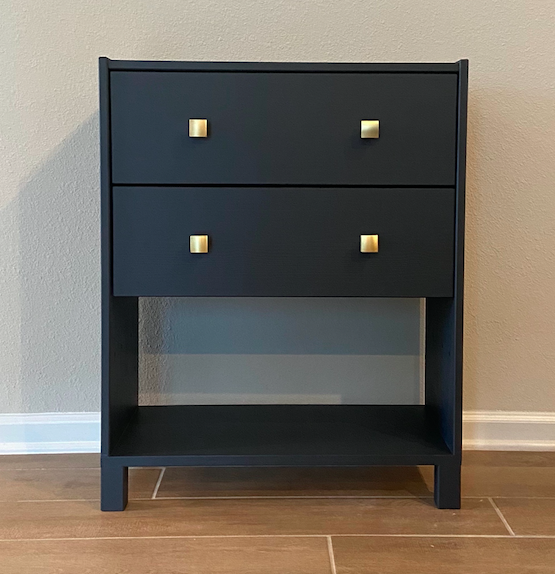
Overall final dimensions: 11 5/8″ (W) x 30 1/4″ (H) x 24 3/8″ (D)


TOOLS
| Miter Saw or Circle Saw |
| Tape Measure |
| Cordless Drill |
| Wood Filler |
| Wood glue |
| Screw driver |
| Wood screws: #8 1 1/2″ Flat head Phillips |
| Drill bits (5/16, 7/64) |
| Sanding Paper |
| Safety glasses |
| Primer / Paint (Behr Satin Black) |
| Painting supplies |
| Drawer hardware |
LUMBER LIST
| (#) | DIMENSION |
| (1) | 3/4″ Plywood (Project panel) |
| (1) | 2″ x 2″ x 8‘ |
CUT LIST
| (#) | WOOD | LENGTH |
| (1) | 3/4″ Plywood | @ 24 3/8″ x 11 5/8″ (plywood base) |
| (4) | 2″ x 2″ | @ 3″ (4 table legs) |
This post contains affiliate links. If you decide to purchase from one of the links, I will receive a small commission at no additional cost to you. Thank you for your support!
Cost: Ikea RAST dressers: $40 (2), Paint: $16, Drawer knobs: $4 each, 2″ x 2″ Lumber: $1.98, Project Panel: $14
STEP 1: Assemble RAST dresser
Assemble your RAST Ikea furniture according to the directions. For this Ikea hack I didn’t use the bottom support piece that it comes with. I also didn’t end up using the third drawer.

STEP 2: Cut plywood base
Using a circle saw, cut your 3/4″ plywood the same size as the bottom of your dresser. The bottom of these dressers are about 24 3/8″ x 11 5/8″. I had scrap plywood that I used but you can buy some smaller plywood project panels instead of a full 4′ x 8′ sheet.


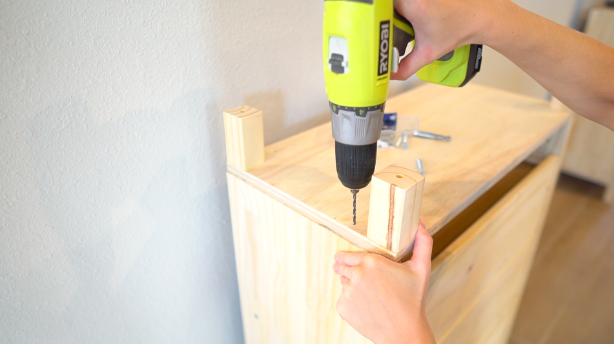
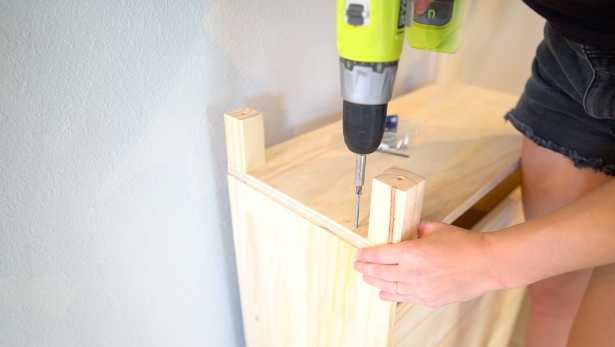
STEP 3: Cut table legs
I had these table legs left over from a different Ikea project and I cut them down to 3″. You can buy a 2″ x 2″ and then cut it down to size with your miter saw or circle saw.
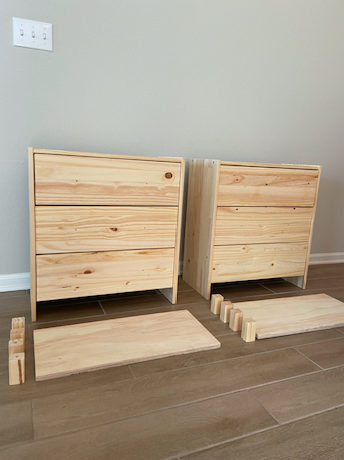
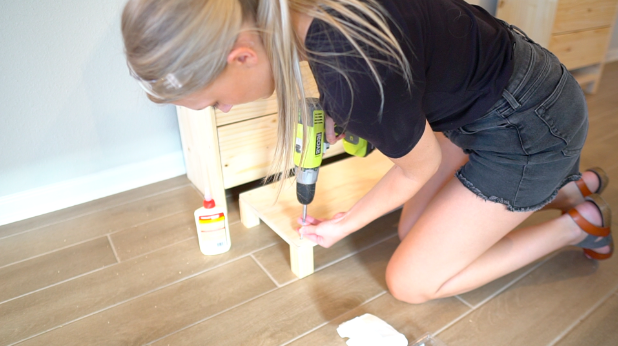
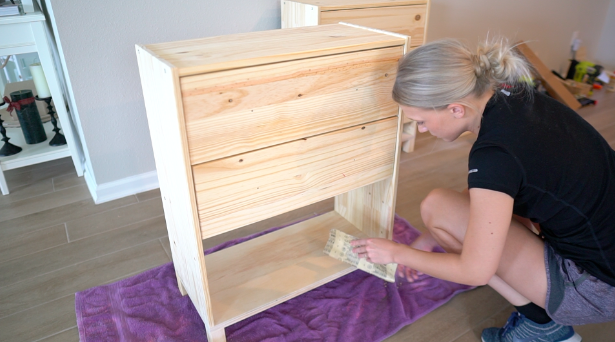
STEP 4: Attach table legs to base
In each corner of my plywood I drilled a very shallow hole using my 5/16″ drill bit. This way, when I screw my legs into place the screws will sit under the wood. Then I can use wood filler to fill the holes so that the board appears flawless!

After you drill the 4 holes, use wood glue and wood screws to secure your legs to the 3/4″ plywood. Make sure that your legs are flush in the corner of your plywood board.

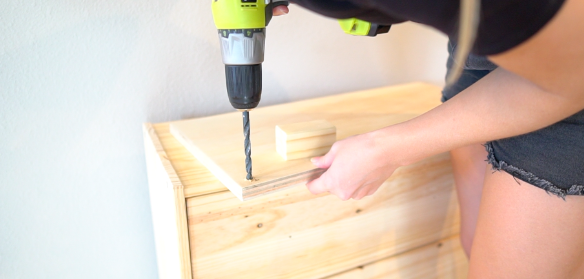
STEP 5: Attach base to dresser
Flip the dresser over and put a line of wood glue on the bottom of your dresser. Flip your base over and apply pressure to the base so the glue adheres.

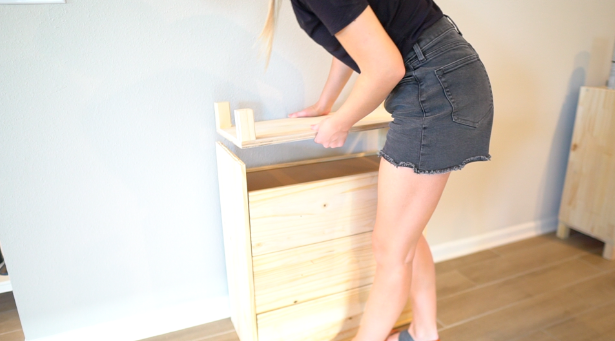
To ensure your wood doesn’t split, use a ~7/64 drill bit to drill a hole through your base and dresser. Then, take your wood screws to secure the base to the dresser. Make sure that you’re drilling straight down so your screws don’t pop out the side of your dresser.


I originally planned to use all 3 drawers but I put a poll on my Instagram stories and had my followers vote on whether they like two drawers better… and they did! I think the 2 drawers makes it look more like a nightstand.

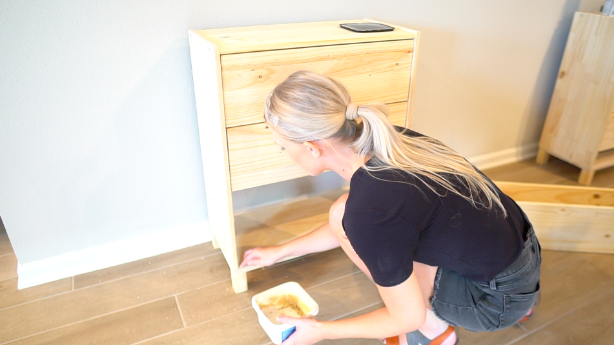
STEP 6: Wood filler
Take your wood filler and fill any holes or seams in your base.

STEP 7: Sand
Use sand paper to sand off the excess wood filler. I also took 320 grit sandpaper and went over the entire nightstand so that the wood was nice and smooth.

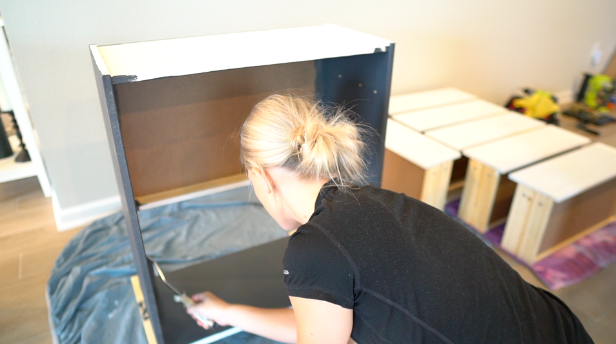
STEP 8: Prime & Paint
I primed the wood first then after letting that dry I took my 320 grit sandpaper and sanded the entire nightstand again. Sanding after priming and before painting really makes a difference and allows your paint to go on nice and smooth leaving a professional finish. Last, I painted my nightstands using Behr’s Satin Black color.


STEP 9: Install drawer hardware
Install your drawer hardware of choice and voilà!!!