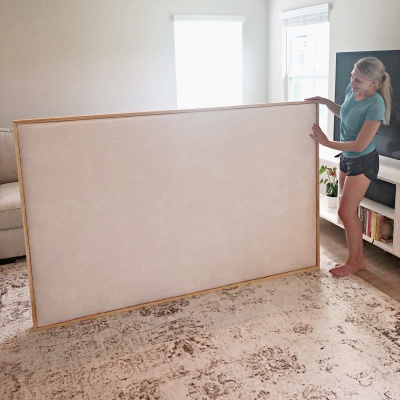
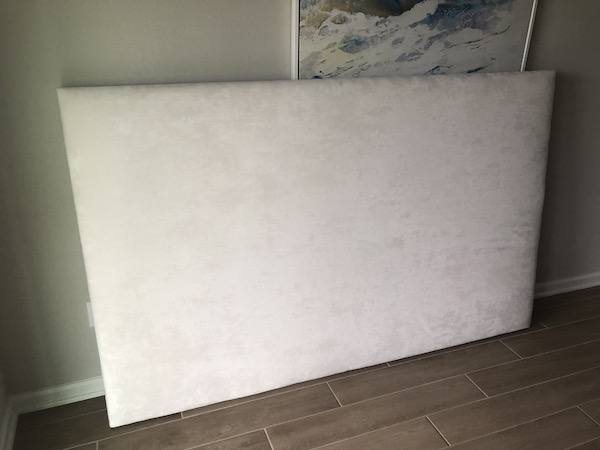
I was online shopping for an upholstered headboard that would make a major statement in our master bedroom. I found one that caught my eye and it matched out coastal theme, but it was over $1,500!! After finding some similar fabric, I decided to try and replicate the headboard for under $150!


This post contains affiliate links. If you decide to purchase from one of the links, I will receive a small commission at no additional cost to you. Thank you for your support!
TOOLS / MATERIALS
| Miter Saw or Circle Saw |
| Tape Measure |
| Kreg Jig w/ drill bit |
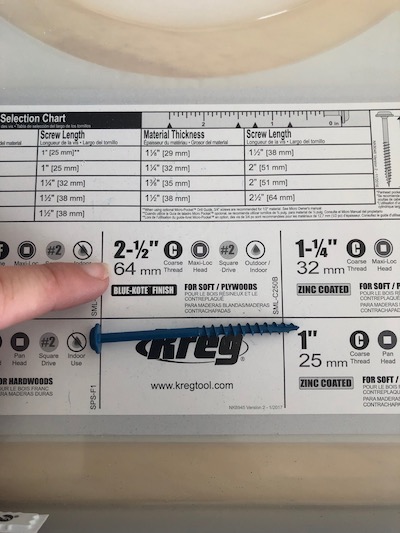
| 2 1/2″ Pocket screws (coarse) |
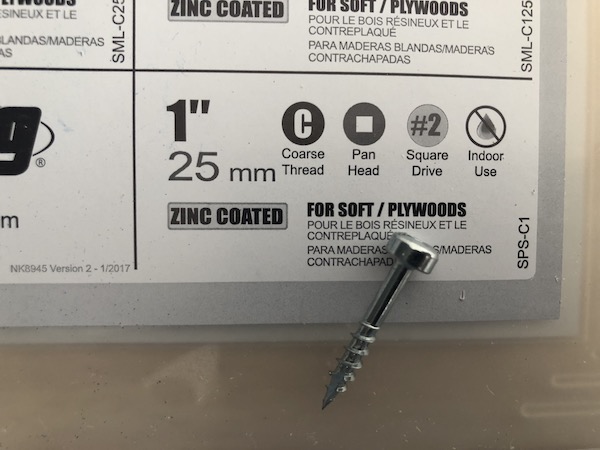
| 1″ Pocket screws (coarse) |
| Cordless Drill |
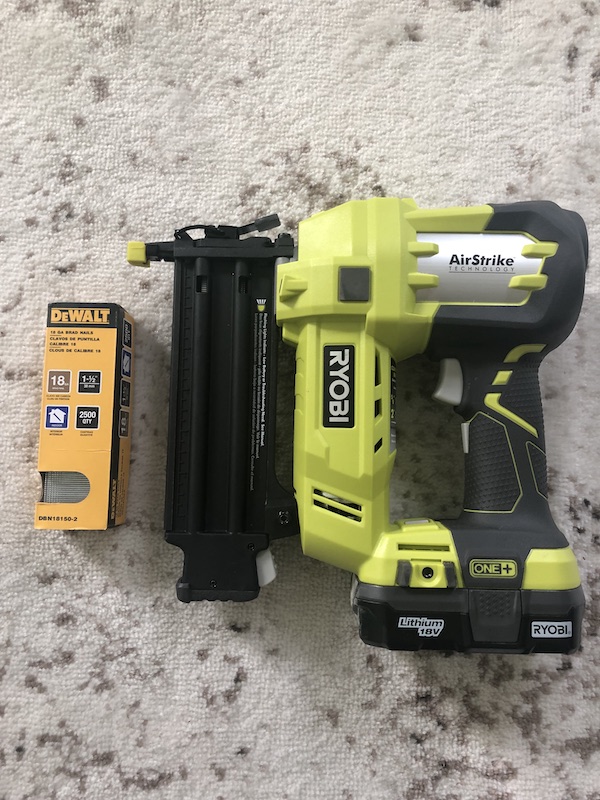
| Nailer with 1 1/2″ Brad Nails |
| Hand Sander |
| Sanding Paper |
| Wood Glue |
| Scissors |
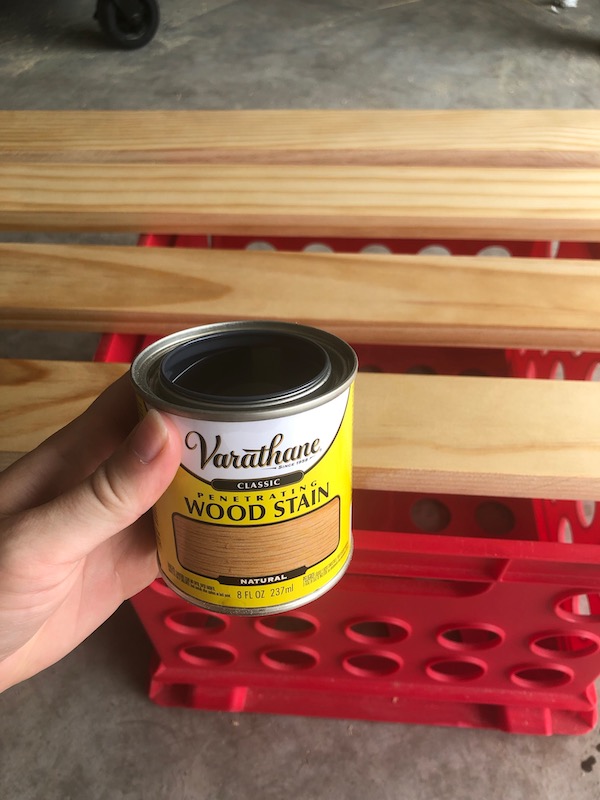
| Stain (Varathane Natural) |
| Oil-based Polyurethane |
| Staining & Poly Brush |
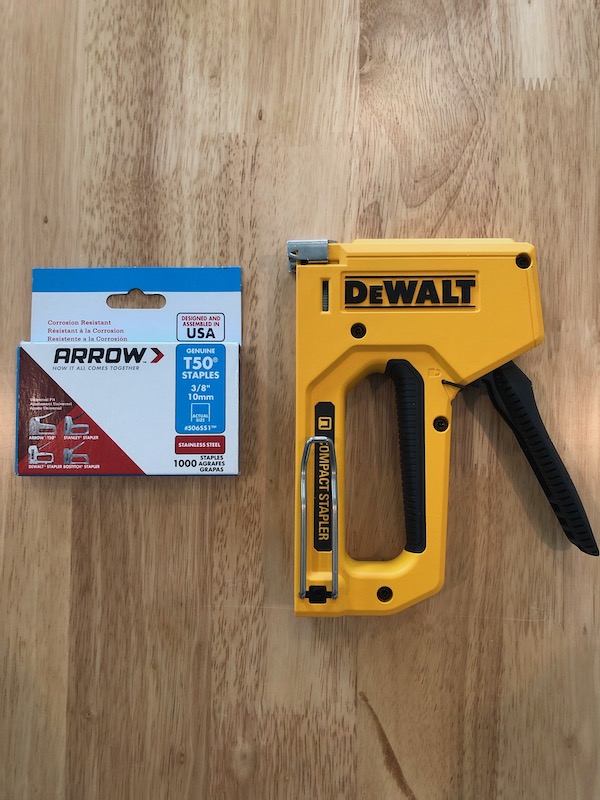
| Hand Stapler |
| 3/8″ Staples (heavy duty) |
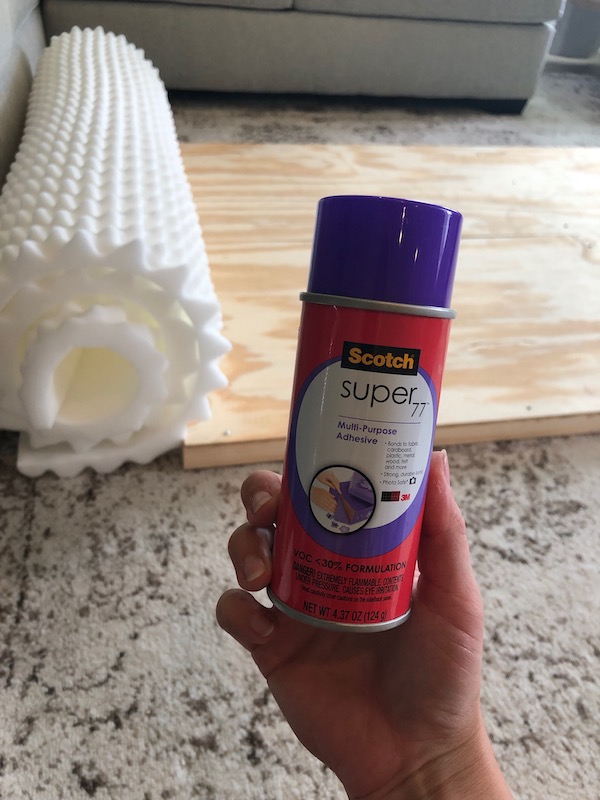
| Spray adhesive |
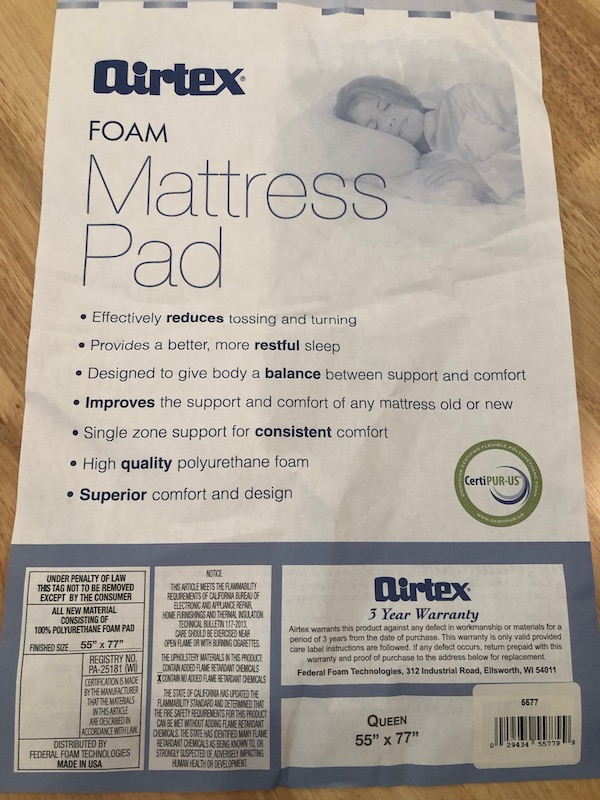
| 1″ Airtex Mattress Pad (Queen 55″x77″) |
| Twin size batting (72″x90″) |
| Fabric |
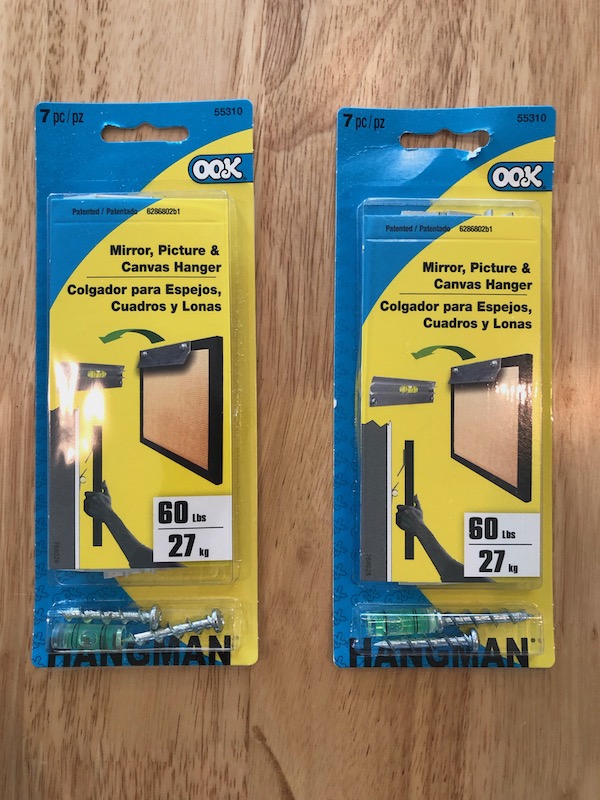
| (3) 60lb Picture Hangers |
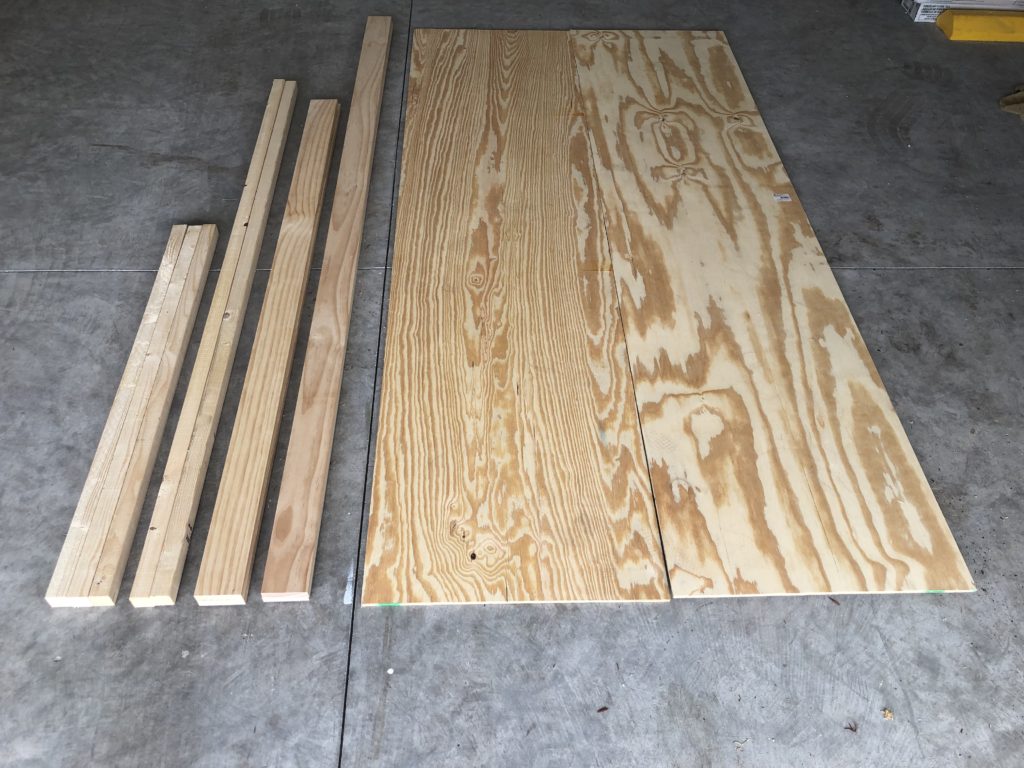
LUMBER LIST
| (#) | DIMENSION |
| (2) | 1″ x 3″ x 8′ Select Pine (2 Long Trim Pieces) |
| (2) | 1″ x 3″ x 6′ Select Pine (3 Short Trim Pieces) |
| (1) | 11/32″ x 4″ x 8′ BCX Plywood |
| (4) | 2″ x 2″ x 8′ Pine Strip (Frame Pieces) |
CUT LIST
| (#) | WOOD | LENGTH |
| (2) | 2″ x 2″ | @ 77″ (Long Frame Pieces) |
| (3) | 2″ x 2″ | @ 45″ (Short Frame Pieces) |
| (2) | 1″ x 3″ | @ 49 3/4 (trim at 45 degree long end to long end) |
| (2) | 1″ x 3″ | @ 78 3/4 (trim at 45 degree long end to long end) |
| (1) | 11/32″ x 4′ x 8′ | @ 48″ x 77″ |
Cost Est: $140 (I did my shopping at Joann for the fabric, batting and foam when they were having a 40% off sale!!)
Time Est: 1 day project

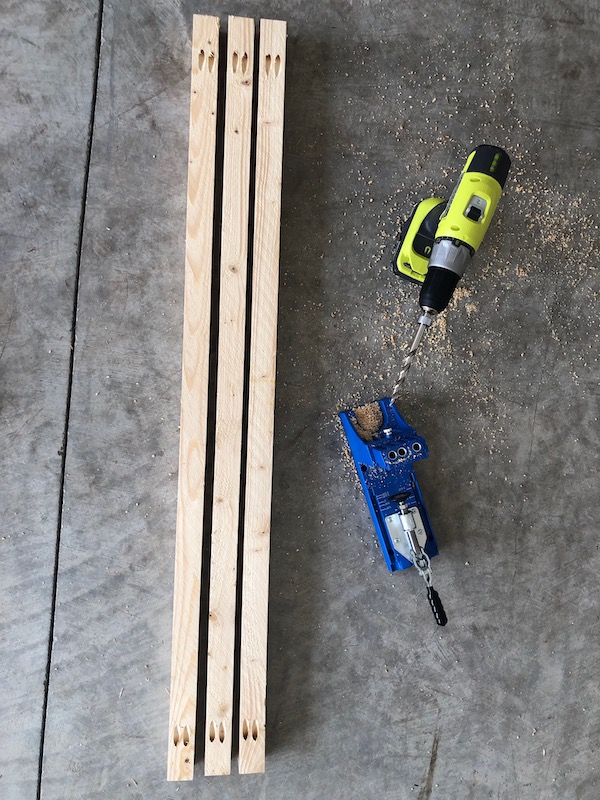
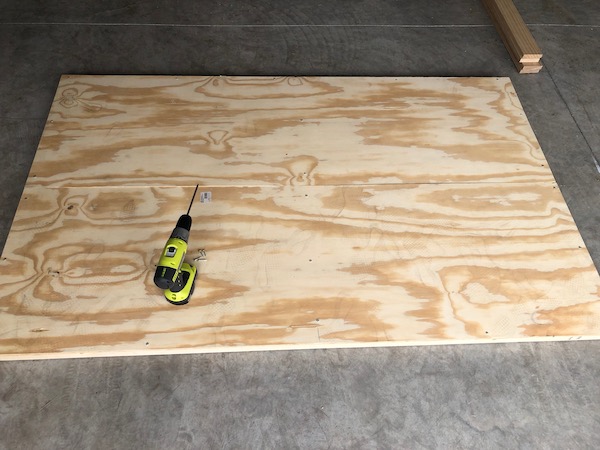
STEP 1: Cut Materials
See cut list above. I went to Home Depot and they will cut all of the boards and plywood for you if you have the dimensions ready!!
***The dimensions above are for a king bed!!

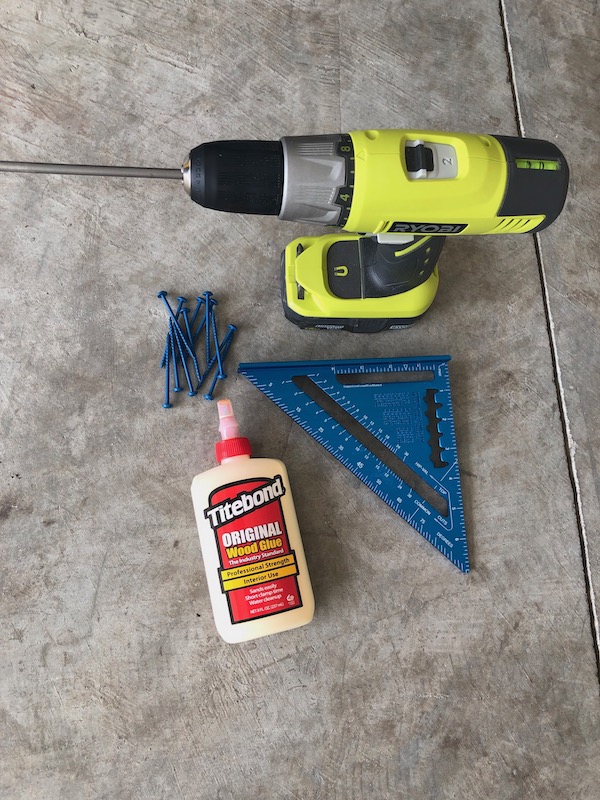
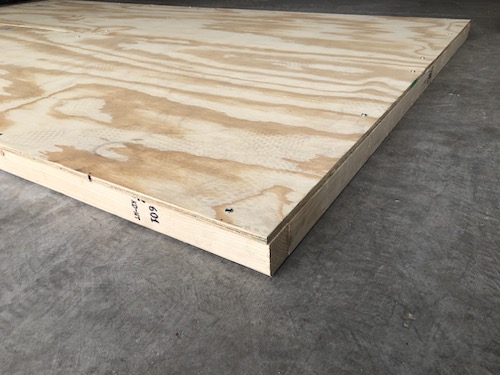
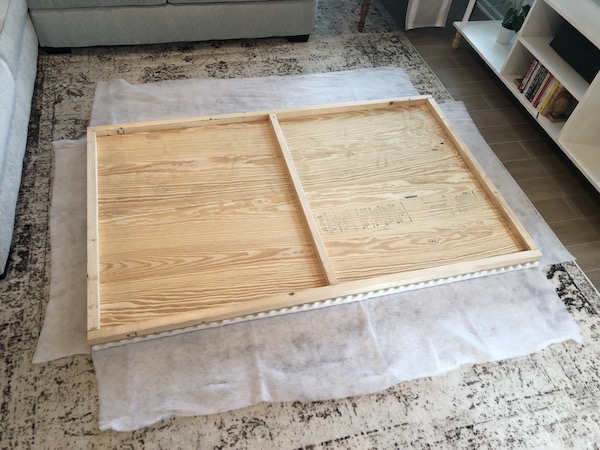
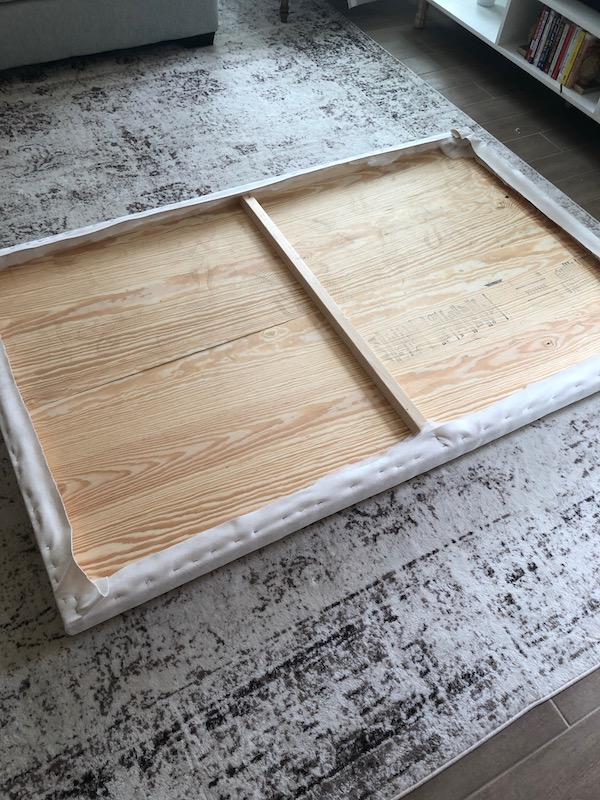
STEP 2: Assemble Frame
Drill pocket holes in each of the 45″ short frame pieces. You should drill 2 pocket holes in each end of the 2×2 board. If using a kreg jig, set it to 1 1/2″ depth.
After you drill the pocket holes, lay out the 3 short frame pieces in the middle and the 77″ frame pieces on top and bottom. Screw these pieces together using wood glue and 2 1/2″ screws.


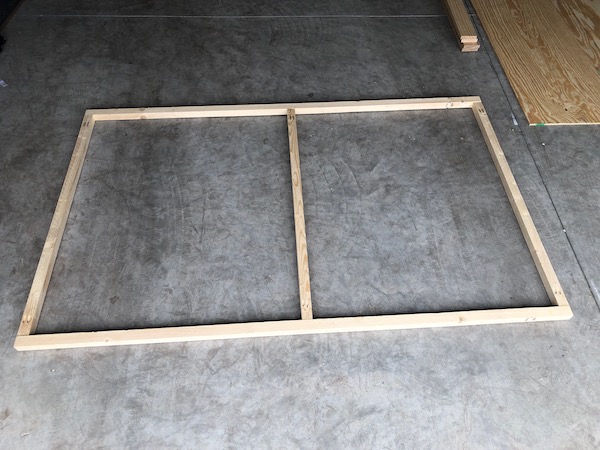
STEP 3: Attach Plywood
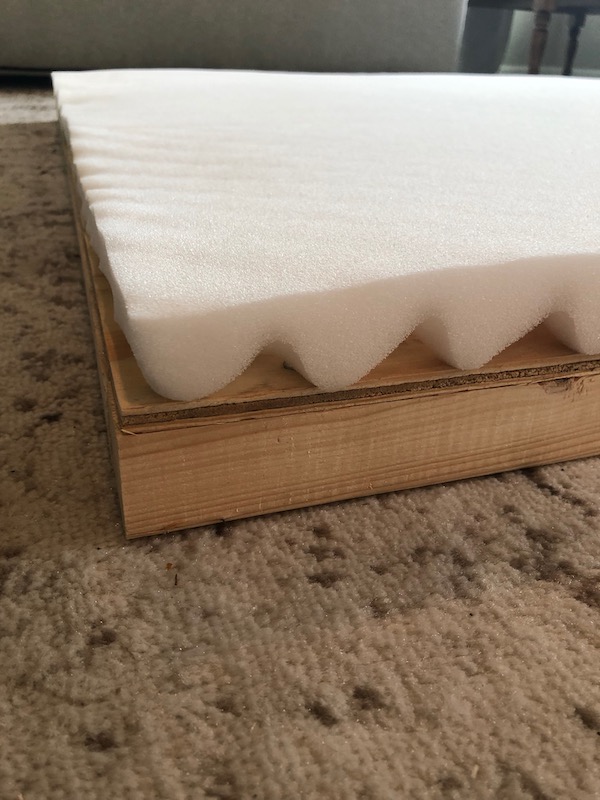
Attach the 48″ x 77″ plywood to your frame using 1″ screws.


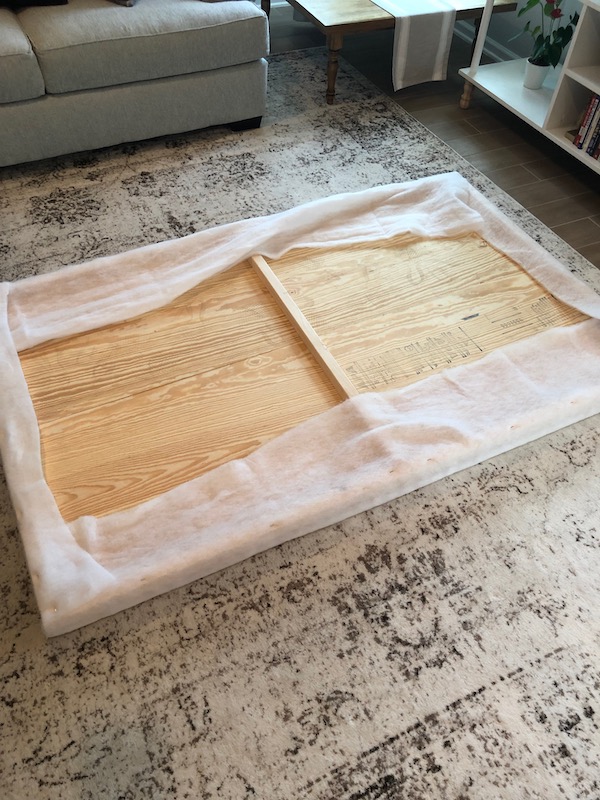
STEP 4: Secure 1″ Foam
I moved into my living room for the following steps so I had a nice and clean work area. I decided to use a mattress pad instead of upholstery foam because it is a lot cheaper and works just as well!
Cut the foam using scissors so that it fits on the 48″ x 77″ plywood. Use spray adhesive to secure the foam to the wood.
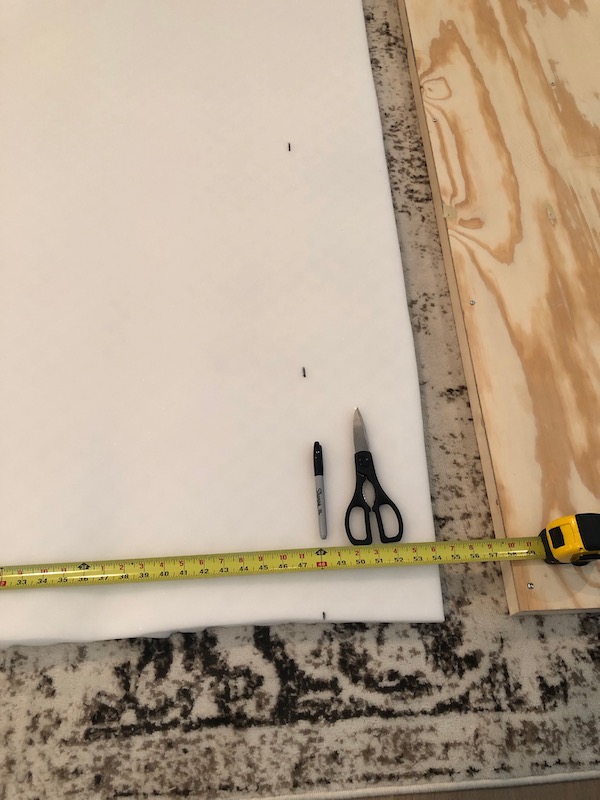
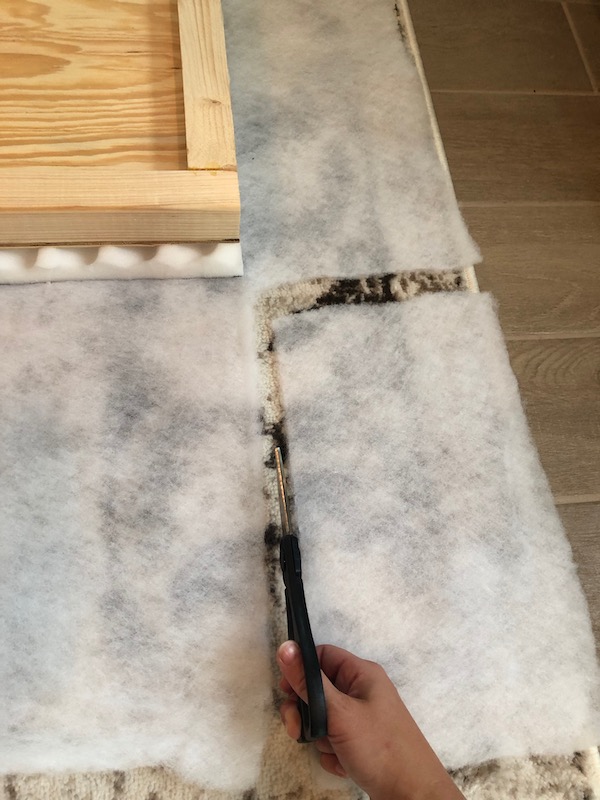
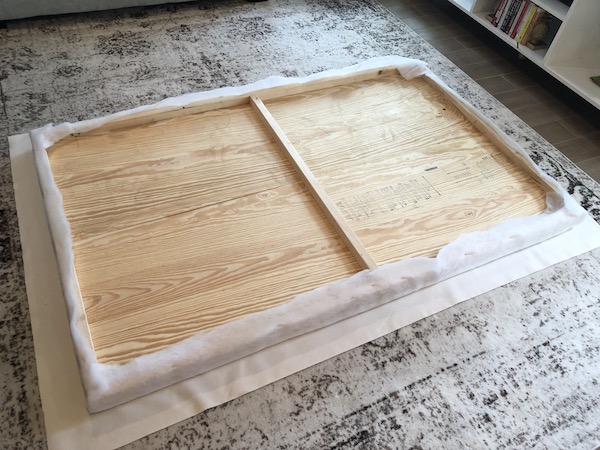
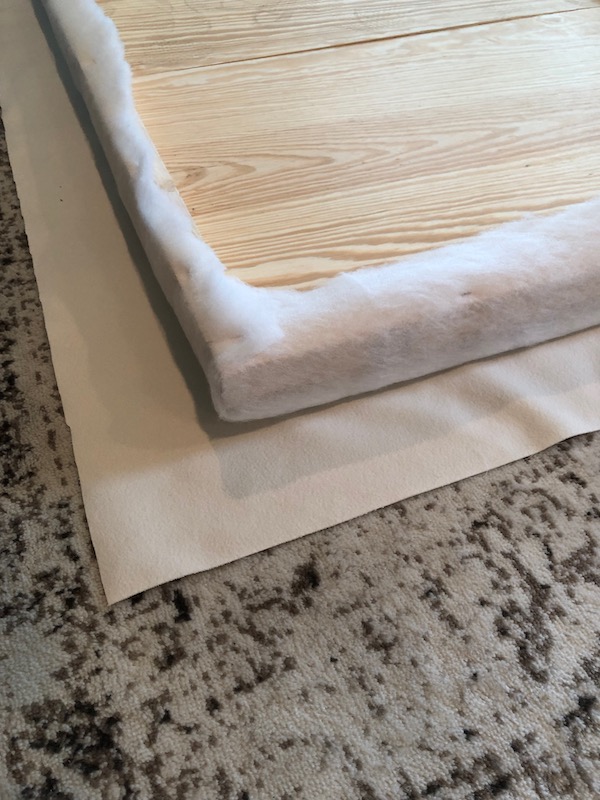
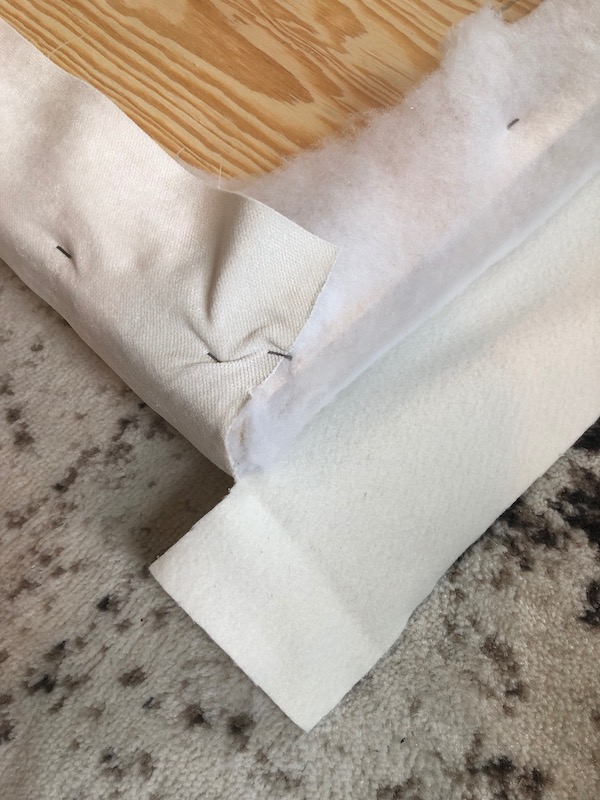
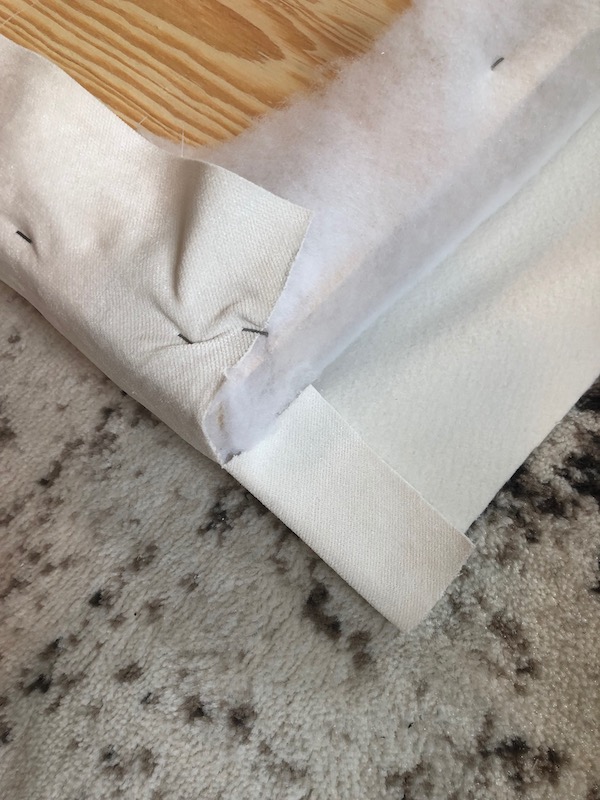
STEP 5: Staple Batting
Lay out the batting so it’s nice and flat on the ground. Flip the headboard over so the 1″ foam is facing down. Cut each of the corners like the pictures shown below. Fold the batting over and staple to the 2 x 2 frame making sure that it’s nice and tight. Cut off the excess batting.


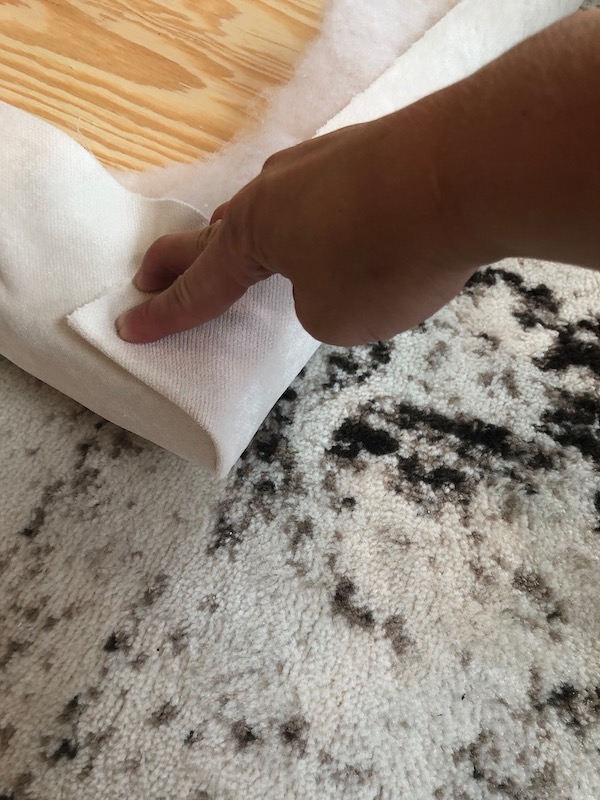
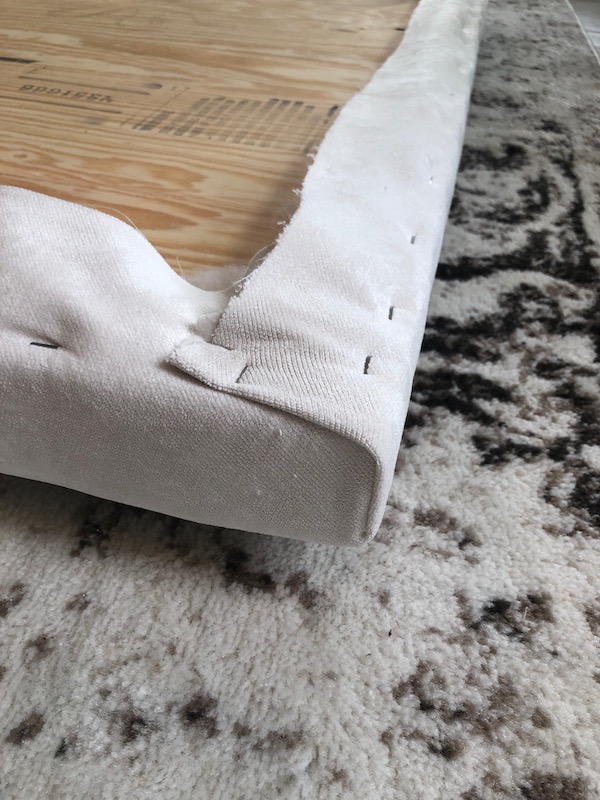
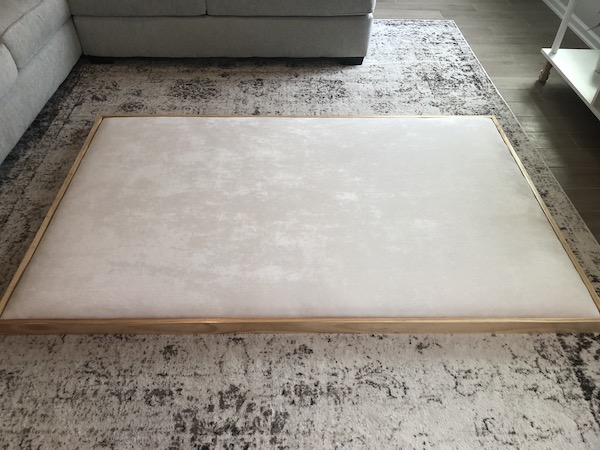
STEP 6: Staple Fabric
Just like the batting, lay out the fabric so it’s nice and flat on the ground. Make sure there are no wrinkles!!
Cut the corners like the pictures below. Start stapling the fabric onto the headboard on one side then move onto the opposite side.
***Be sure to pull the fabric as tight as you can and staple every few inches.


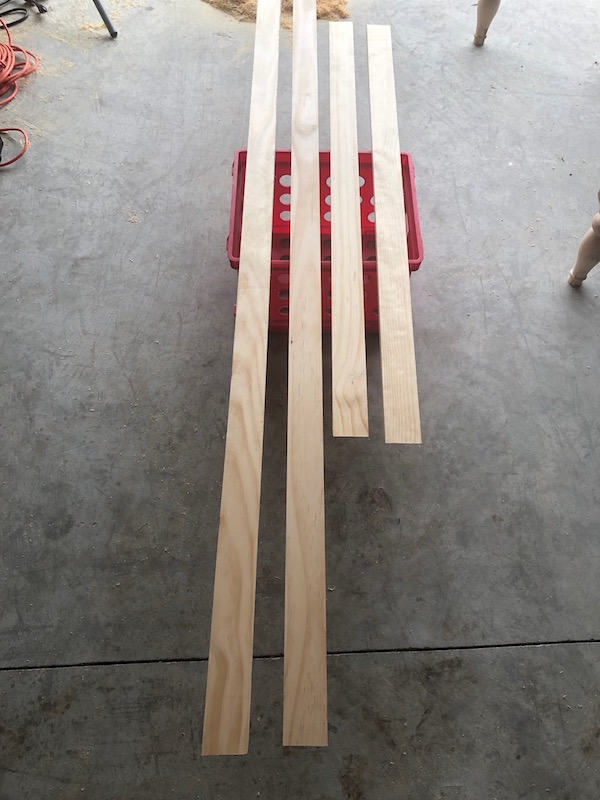
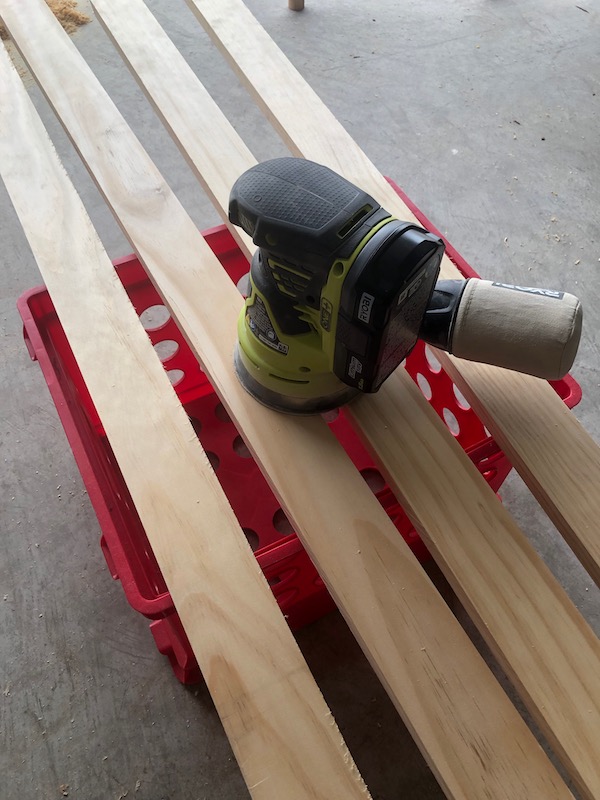
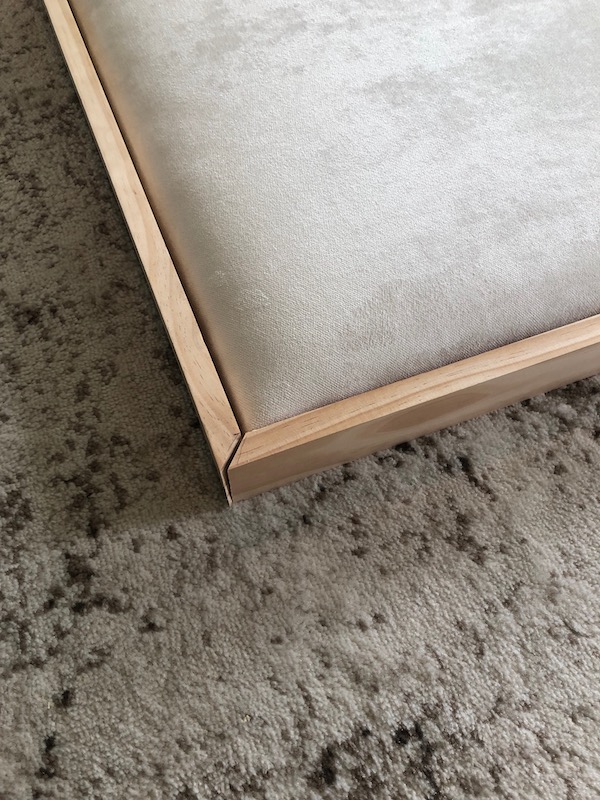
STEP 7: Cut & Stain Trim
Measure your headboard with the fabric on it to determine the length of your trim. I decided to do 45 degree corners, but you could do straight corners to make it easier. After dry fitting the trim to make sure it will fit together perfectly, sand trim and prep for stain.
I used a natural stain for the trim as well as a satin polyurethane.
***I cut the 1″ x 3″ trim down to 1″ x 2.5″ with a table saw.

STEP 8: Attach Trim
Using a nailer and 1 1/2″ brad nails. Attach the trim pieces once they are completely dry. If needed, fill the nail holes with wood filler.


STEP 9: Hang Headboard!
We picked up a few heavy duty picture frame hangers to attach to the headboard/wall. Measure on your wall where you want the headboard to be and hang it up!