

When I bought my first rental property, there was ugly and smelly carpet throughout the whole house. In order to get this home in prime renting condition, I decided to tear out the carpets and refinish the hardwood floors. If you’re looking for a cheap way to restore your hardwood floors, keep reading!! If you’re looking for an easy and quick fix, this is not the project for you. This project took a lot of time and determination, but it was incredibly worth it and my wallet was happy! Check out these 15 steps on how to refinish your hardwood floors.


TOOLS
| PREP/SANDING TOOLS |
| Utility Knife |
| Hammer |
| Needle Nose Pliers |
| Nail Punch |
| Broom/Dust Pan |
| Vacuum |
| Pry Bar |
| Putty Knife |
| Wood Filler |
| Sand Paper 36, 50, 80 Grit |
| Painters Tape |
| Garbage Bags |
| Orbital Floor Sander (Rent) |
| Detail Hand Sander |
| PAINT TOOLS |
| Mineral Spirits |
| Pre-Stain Conditioner |
| Tack Cloth |
| Cloth / Rags |
| Minwax Stain (Early American) |
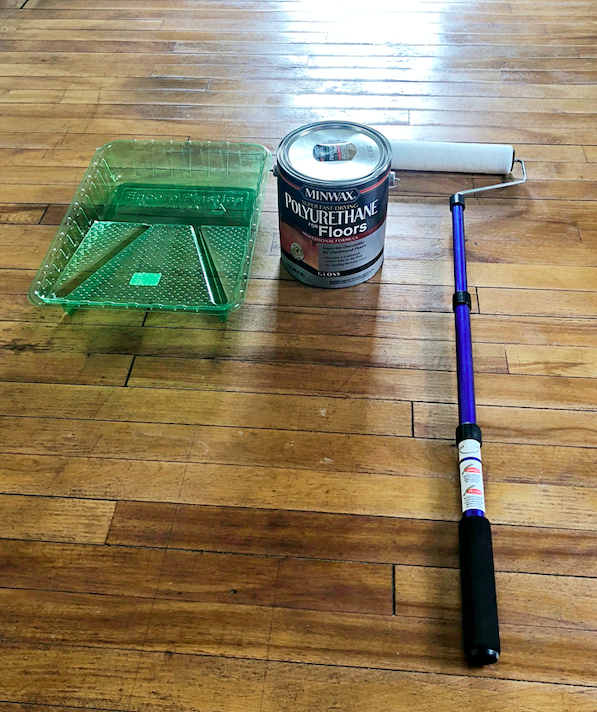
| Minwax Polyurethane (Gloss) |
| Stain Applicator |
| 4″ Brush |
| Lambs-skin Applicator |
| Paint Trays |
| Extended Arm Roller |
This post contains affiliate links. If you decide to purchase from one of the links, I will receive a small commission at no additional cost to you. Thank you for your support!
BEFORE YOU BEGIN
SAFETY: make sure that you are wearing the proper protective equipment when necessary: Goggles, hearing protection gloves, kneepads, and dust mask or a respirator.
ASBESTOS!!: Older homes may contain asbestos. Do not sand until you know if your home is asbestos free. If you aren’t sure, contact an asbestos-removal company.
DETERMINE FLOOR TYPE: Some hardwood floors are very thin and will not allow you to sand them down. Do a little research to verify your floor type and whether or not you can even move onto the next step. Check out this article to see if tour hardwood floors can be sanded: Can my Floors be Sanded?
STEP 1: TEAR UP CARPETING
If you have old carpeting that you need to remove, now’s the time to do it! With a utility knife, cut the carpet in under 6′ lengths so that the pieces are easy to handle. This way, you can roll it up and fit it in your car/truck to haul out. Be careful of any tacks, staples or nails sticking up during this step.


STEP 2: REMOVE STAPLES, NAILS, ETC.
If you can, pull these up with a hammer, pliers, wrecking bar or whatever else will do the job. If you can’t pull out the staples and nails, take a nail punch and pound them into the floor about 1/8″. You will fill these holes with wood filler in a later step. Anything sticking out of your flooring can damage the sander.
STEP 3: REMOVE MOLDING / TRIM
Using your pry bar and wide blade putty knife, remove the molding/trim. Removing this allows you to reach every inch of your flooring without worrying about scuffing your trim. Be careful during this step if you plan to re-use the trim.
**If you are saving your trim/molding, number the trim and the corresponding wall so that you can easily remember where it goes.
STEP 4: PREP FOR SANDING
Cover any vents, furniture, light fixtures, electrical outlets, etc. in the vicinity so that they don’t get dusty. Cover these items using plastic or garbage bags and painters tape. Before moving on to the next step, sweep the area up and ensure nothing is left protruding from your floors.
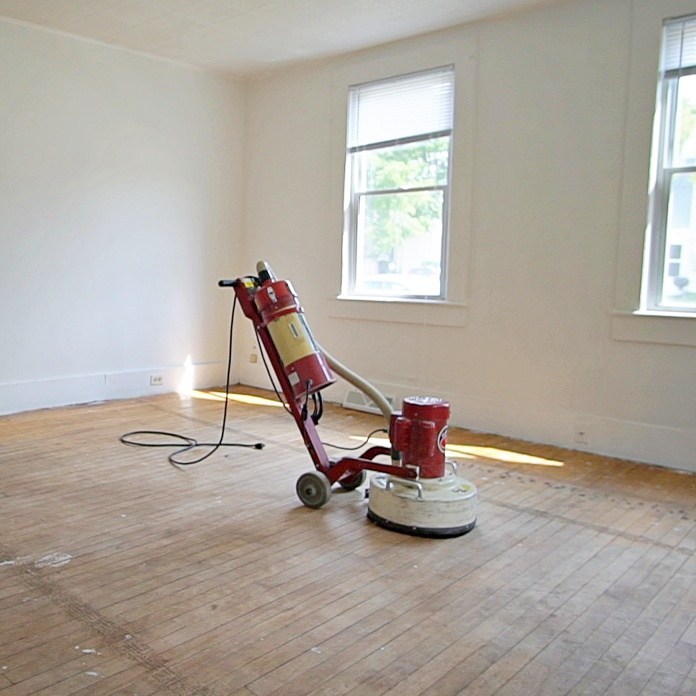
STEP 5: SAND WITH 36 GRIT (ORBITAL SANDER)
You may want to try renting a large orbital sander depending on the room size. Since I was doing three rooms and a hallway in my house, I decided to rent an orbital floor sander to cover the most space as possible. The sander looked pretty intimidating, but I found that renting this type of sander is inexpensive and surprisingly easy to use! You can also try a belt sander, drum sander, etc. If you don’t know how to use a sander, ask the rent a center or look up a tutorial!

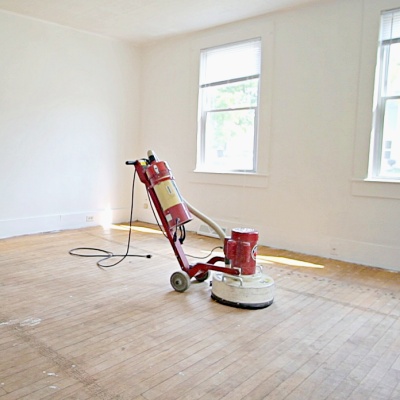
**SANDING TIPS
- Start with 36 grit
- Move to 50 grit
- Finish with 80 grit
- Work in small sections going along the grain of the wood
- Check your sand paper regularly to make sure it’s not clogged or too worn down
- Replace sand paper when necessary
- Avoid moving too slow and staying in one spot. Let the sander do the work and keep moving at a steady speed.
- Draw light pencil marks around the room if you need help keeping track of where you have sanded
- Vacuum floor in between sand papers
STEP 6: SAND WITH 36 GRIT (DETAIL SANDER)
For the majority of the floor you can use your large sander. But in order to get to the corners and edges, a hand sander will be beneficial (either a random orbital sander, orbital finishing sander or detail sander). You can also use a sanding block or sand paper to get the hard to reach areas.
STEP 7: VACUUM
After you go through the 36 grit sand paper with the large floor sander and your detail sander, vacuum the room thoroughly and move onto the next step.
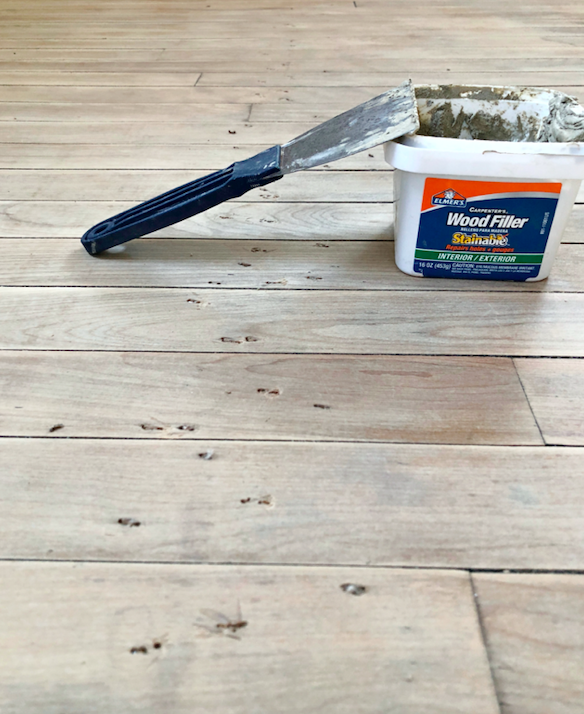
STEP 8: FILL HOLES & GOUGES
With your putty knife, fill any holes or gouges with matching wood filler. I had a strip of carpet staples in my hardwood floors. After pulling the staples, I used wood filler to fill in all the blemishes.

STEP 9: REPEAT STEPS 6-8
Repeat sanding steps 6-8 except use the 50 grit, then the 80 grit sandpaper.


STEP 10: CLEANUP
Remove the garbage bags and painters tape that you used to cover items in the room. With your vacuum, clean up any dust from the floors, walls, windows, etc. Take a wet rag and go over these areas to catch any loose dust.
Lastly, clean your floors using a tack cloth or a clean rag soaked in mineral spirits to ensure your floors are completely clean and dust free.
STEP 11: PRE-STAIN CONDITIONER
Pre stain conditioner will help even out the color of your floors so they can be restored to their former glory. Take a cloth or brush and apply a liberal amount to the entire hardwood floor surface. Apply the conditioner going along the grain.


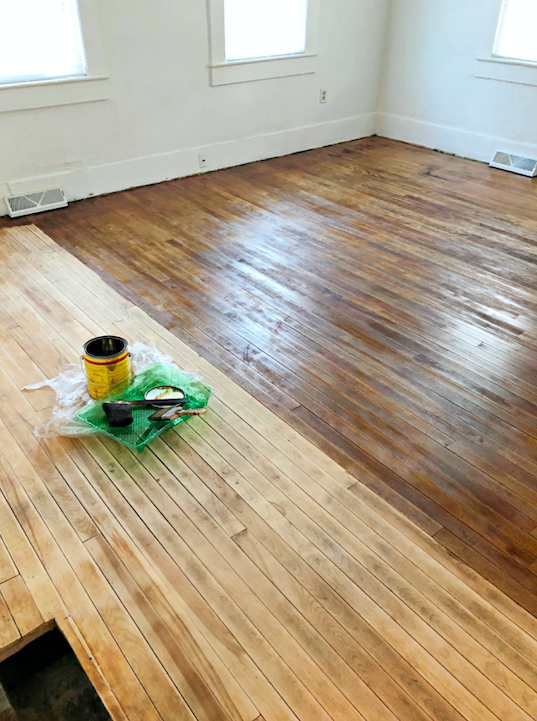
STEP 12: APPLY STAIN
Use your 4″ brush to cut in areas around the perimeter of the room. Use a rag or sponge to apply the stain to the rest of the floor, making sure to overlap the areas that you cut in. Wipe in the direction of the grain. Wipe off the excess stain as needed.
**Start staining in the furthest corner of the room. Don’t trap yourself in a corner!
**See label of stain for more specific instructions and dry times.

STEP 13: APPLY POLYURETHANE
Choose which poly you want based off of dry time and the sheen. For my floors I used super fast drying in a gloss sheen.
Just like with your stain, use your 4″ brush to cut in areas around the perimeter of the room. Use your lambs-wool applicator to apply the poly to the rest of the floor, making sure to overlap the areas that you cut in.
**Start the poly in the furthest corner of the room. Don’t trap yourself in a corner!
**See label for more specific instructions and dry times. Some products require sanding in between coats.

STEP 14: Re INSTALL MOLDING/TRIM
Install the molding/trim that you removed in the beginning of the project. Or install new trim for a fresh, clean look… and enjoy your new beautiful floors!!!!


