

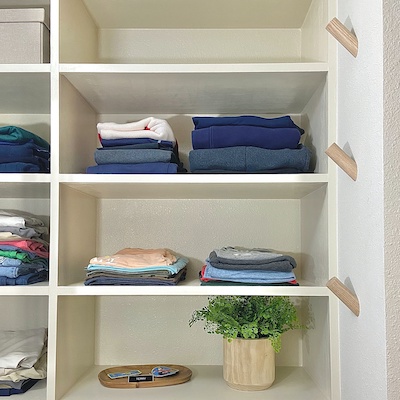
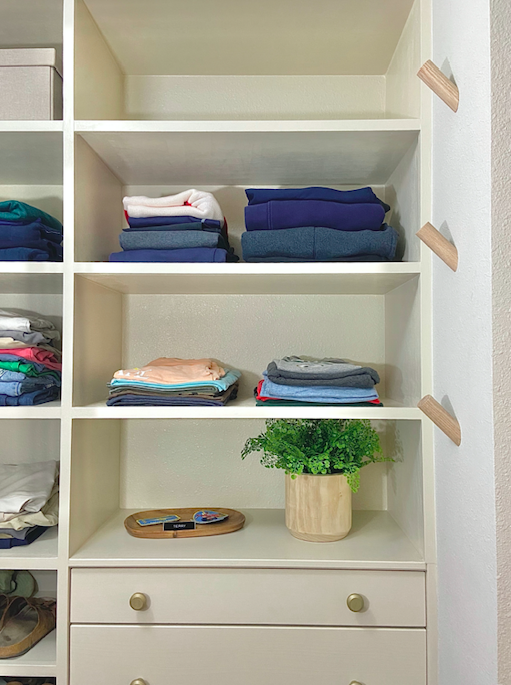
I recently remodeled my entire master closet (check it out HERE). One thing our closet is lacking is a place to hang hats! My husband has sooo many hats so I thought this wooden hook project would be the perfect solution! You can use square lumber or circle lumber for this project. I decided to use the left over wooden dowel from our clothes rod. Home Depot sells all sorts of sizes of circle wooden dowels, or you can buy 2″ x 2″ lumber for this wooden hook project!
You can also customize the color of the hooks to match your space! Our closet already has some wood accents so I wanted to keep the natural wood look. But feel free to stain or paint them any color your heart desires!


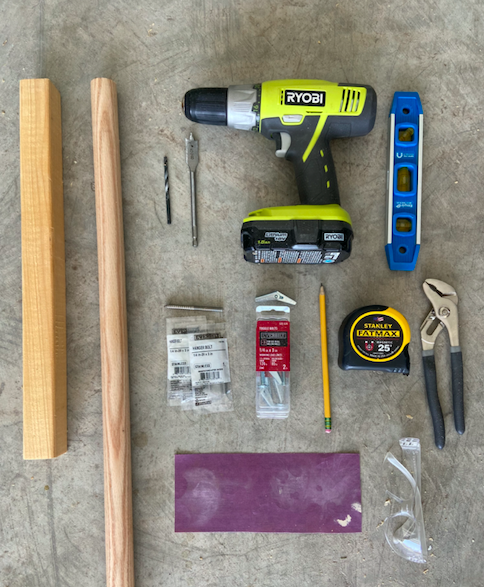
TOOLS / MATERIALS
| 1 1/4″ Wooden Dowel (round) or 2″ x 2″ (square) |
| Miter Saw |
| Safety Glasses |
| Tape Measure |
| Pencil |
| Cordless Drill |
| Drill Bit: 5/8″ & 3/16″ |
| Pliers |
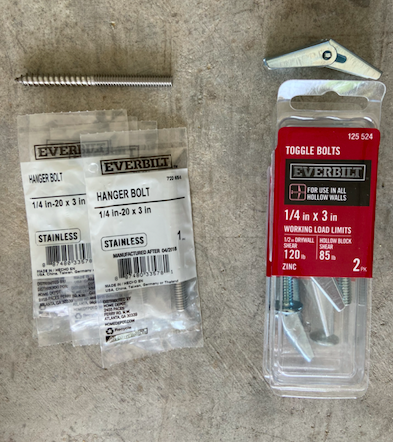
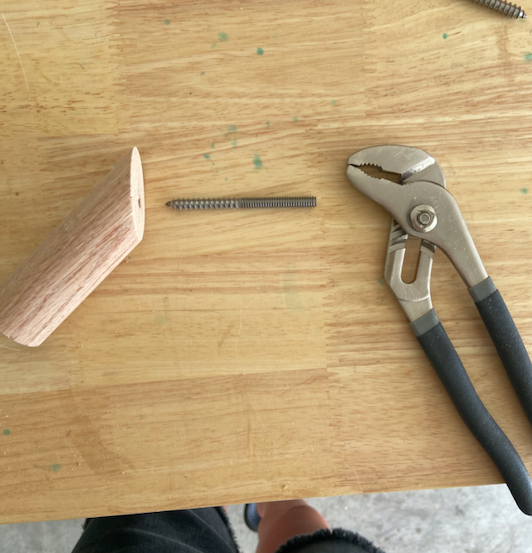
| Hanger Bolt 1/4″ x 3″ |
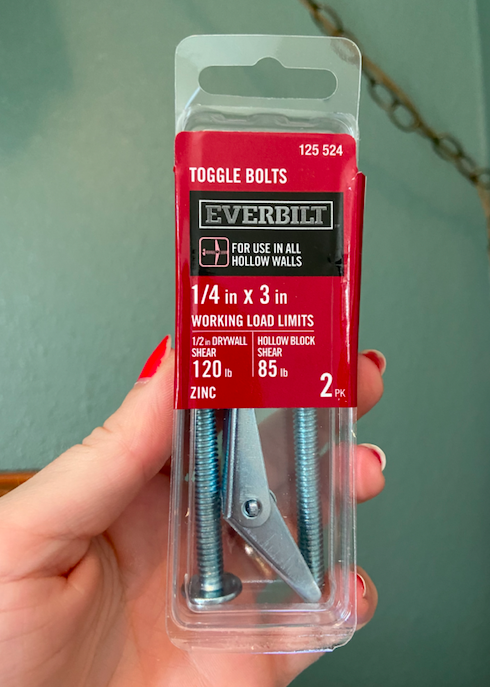
| Drywall Toggle Bolts 1/4″ x 3″ |
| Sand Paper |
| Paint / Stain of Choice |
| Small Level |

This post contains affiliate links. If you decide to purchase from one of the links, I will receive a small commission at no additional cost to you. Thank you for your support!

I bought 3 different types of screws/bolts/drywall anchors before finding the perfect solution. After a few trail and errors I found this combination to be the most sturdy!!! [1/4″ x 3″ Hanger bolt & 1/4″ x 3″ Toggle Bolt]

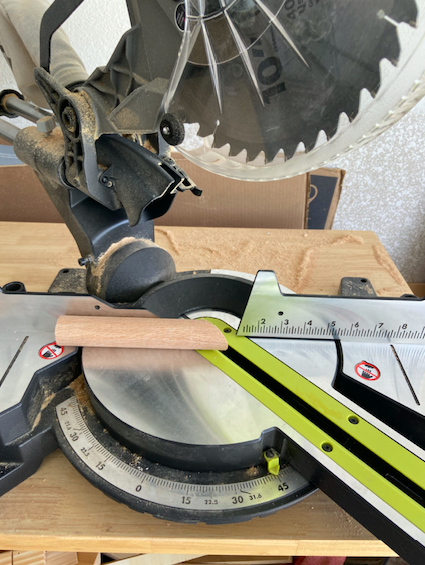
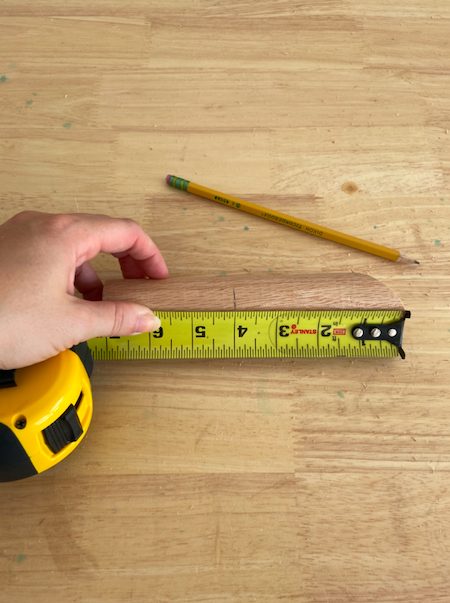
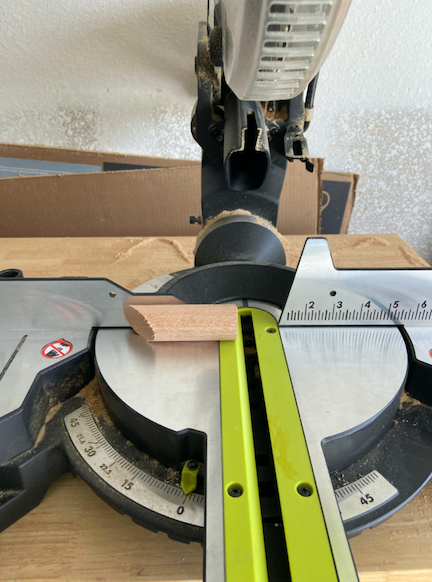
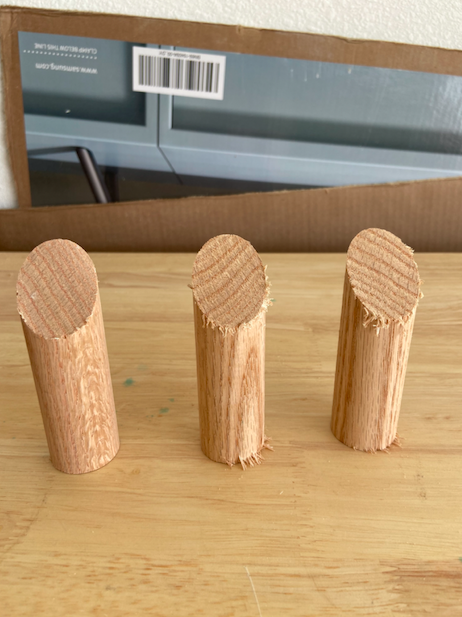
STEP 1: Measure / cut wood
I started by making a 45 degree cut. Then I measure 4″ from the long end of the 45 degree angle. Make a pencil mark at the 4″ mark and then make a straight cut!


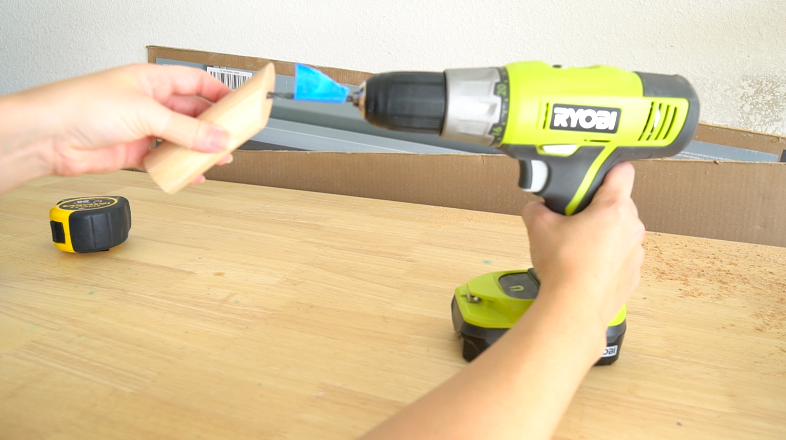
STEP 2: Drill holes in wood
First mark the center of your wood hook with a pencil (see picture). Then, take a 3/16″ drill bit and drill a hole into your wooden hook. You want to make sure that you’re drilling straight into the angled part of the wood (see picture). This will allow the hook to sit straight on the wall.


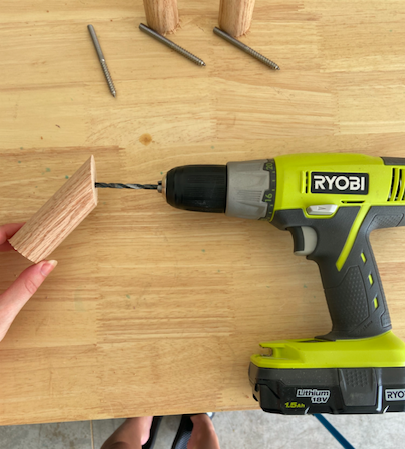
Here’s a little hack: Measure how deep your screw needs to be in the wood then measure that same depth on the drill bit. Place a piece of tape at the pre-determined depth so that when you’re drilling, you don’t go past the piece of tape!

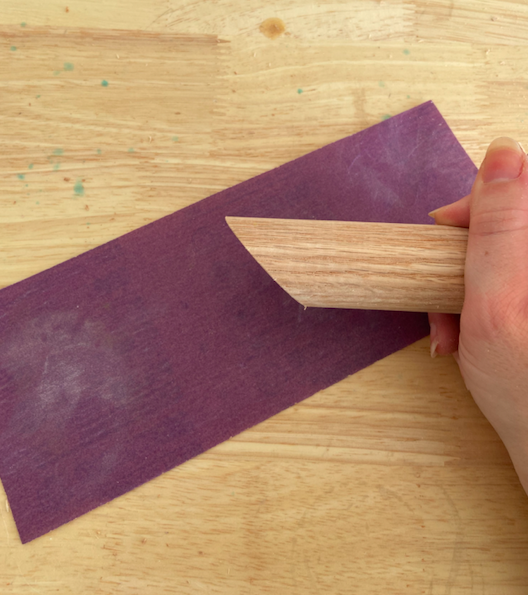
STEP 3: Sand
Use some sand paper to make your wood hooks nice and smooth.

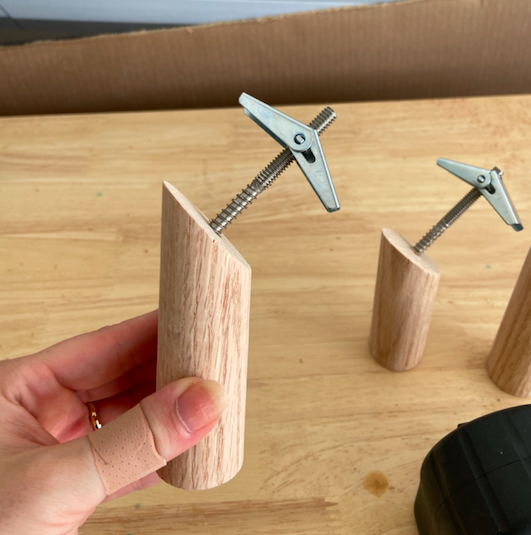
STEP 4: Install Hanger bolt & toggle bolt
I bought 3 different types of screws/bolts/drywall anchors before finding the perfect solution and I found this combination to be the most sturdy!!!
Twist in the pointy end of your hanger bolt to your wood hook using a pliers. Make sure to twist in this screw as much as you can without it going through the other end.
***If you don’t twist the bolt in far enough you won’t be able to get your hook tight to the drywall.

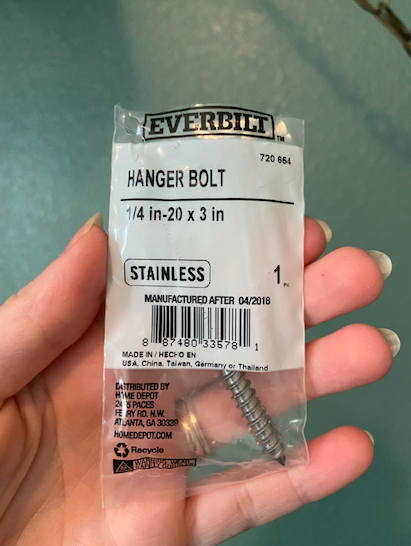

Get the toggle bolt started by twisting it onto the end of your screw.


STEP 5: Stain or paint wood
Take this time to stain or paint your wooden hooks! I decided to leave mine natural to match the wood accents in my closet.
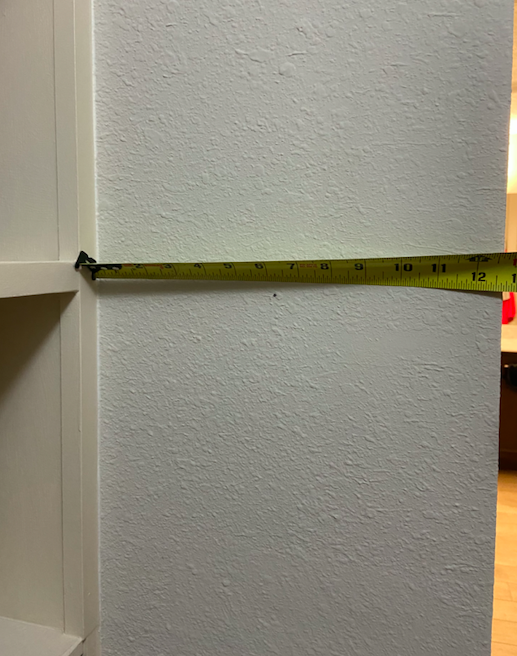
STEP 6: Measure where you want hook to go
Measure on your wall where you want the wooden hooks to go.

STEP 7: Install Hook
For the toggle bolt to fit in the drywall, you’ll need to drill a 5/8″ hole into the wall.
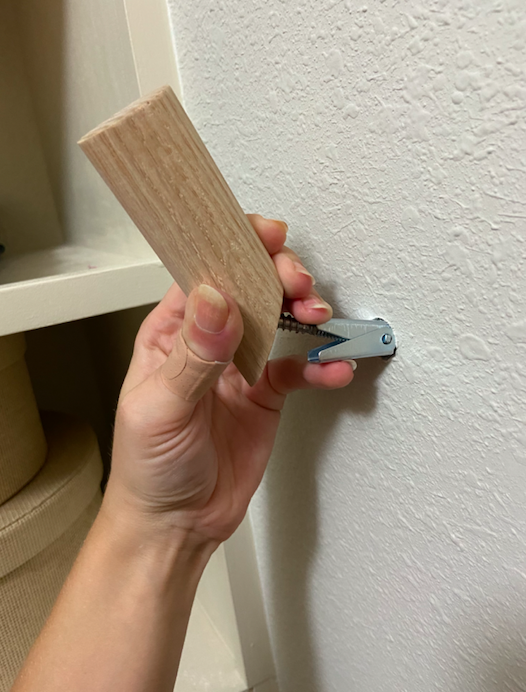
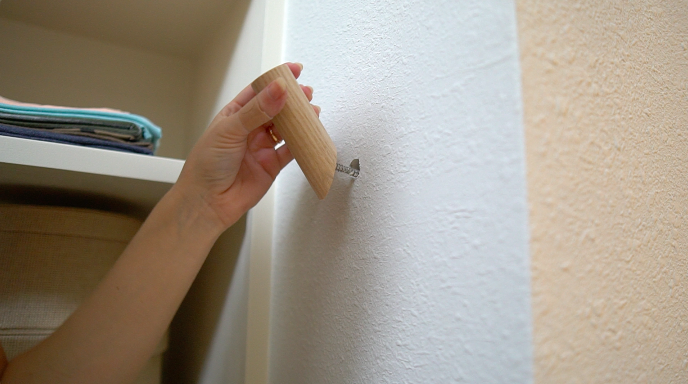
Squeeze the toggle bolt together and push it into the hole in the wall. Pull on your wood hook and start twisting so that your toggle bolt grabs onto the back of the drywall. Keep twisting until the wood hook is tight!! (You won’t use the actual bolt that comes with this package, just the butterfly clip thing?)
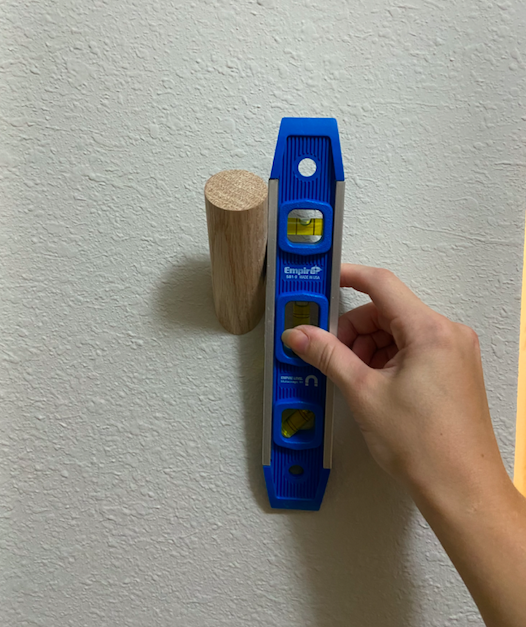
Last, use a level to make sure your hooks are nice and straight! (Orrrr just eyeball it)


Hang up whatever you need to hang up and ENJOY!!

